Tiny Whoops are extremely fashionable amongst FPV pilots for his or her compact dimension and agility, making them good for indoor flying and tight areas. Nonetheless, getting the very best efficiency out of your Tiny Whoop requires fine-tuning varied settings in Betaflight, Bluejay, FPV, and your radio. On this tutorial, I’ll information you thru the optimum configurations that can assist you get essentially the most out of your Tiny Whoop.

Don’t overlook to take a look at these nice equipment for Tiny Whoops: https://oscarliang.com/best-tiny-whoop/
FPV System Setup
In case you are flying indoors, there’s normally little must run larger than 25mW energy in your VTX. This maximizes your flight time and reduces VTX overheating.
It’s widespread to have a 5GHz WiFi router in the home, so selecting a VTX channel that’s removed from the WiFi frequency band would possibly improve your video high quality, e.g., Raceband channel 8. For extra recommendations on selecting FPV channels: https://oscarliang.com/fpv-channels/

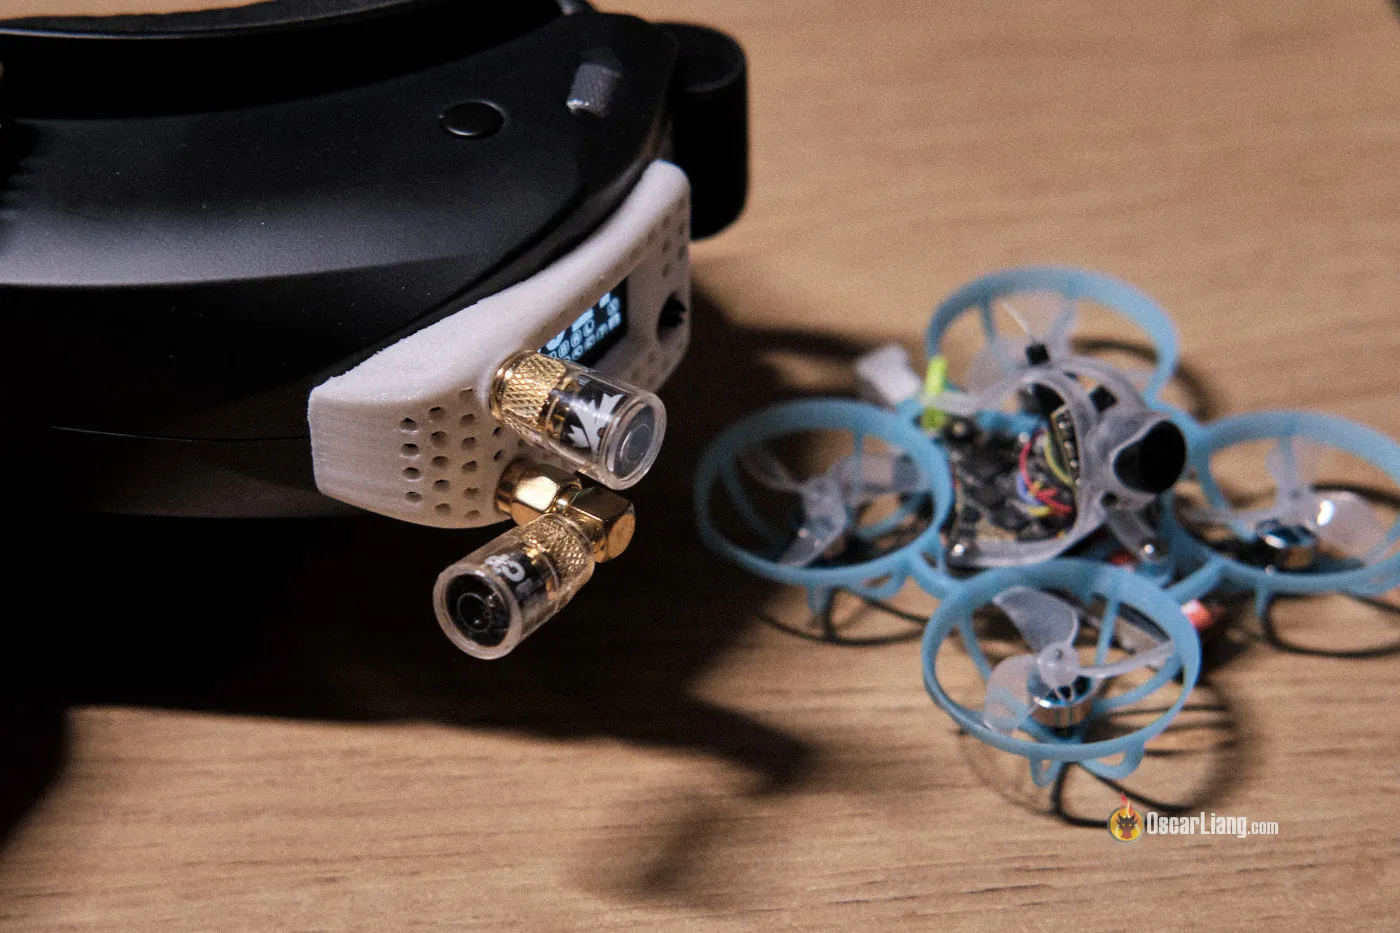
For comfort, I normally use two stubby antennas on my FPV Goggles, pointing at 90-degree to one another. They’re lighter and extra compact. The polarization route (RHCP or LHCP) normally doesn’t matter as most Tiny Whoops use a light-weight dipole antenna, which is linearly polarized. In the event you don’t know what to decide on, RHCP is a extra fashionable alternative for analog FPV. See my antenna suggestions: https://oscarliang.com/best-fpv-antenna/#Antennas-for-VRX-and-FPV-Goggles
Radio Hyperlink Setup
Assuming you’re flying indoors and utilizing an ExpressLRS radio hyperlink, think about selecting the bottom energy degree, e.g., 25mW or 10mW if obtainable. This may significantly enhance your radio battery life.

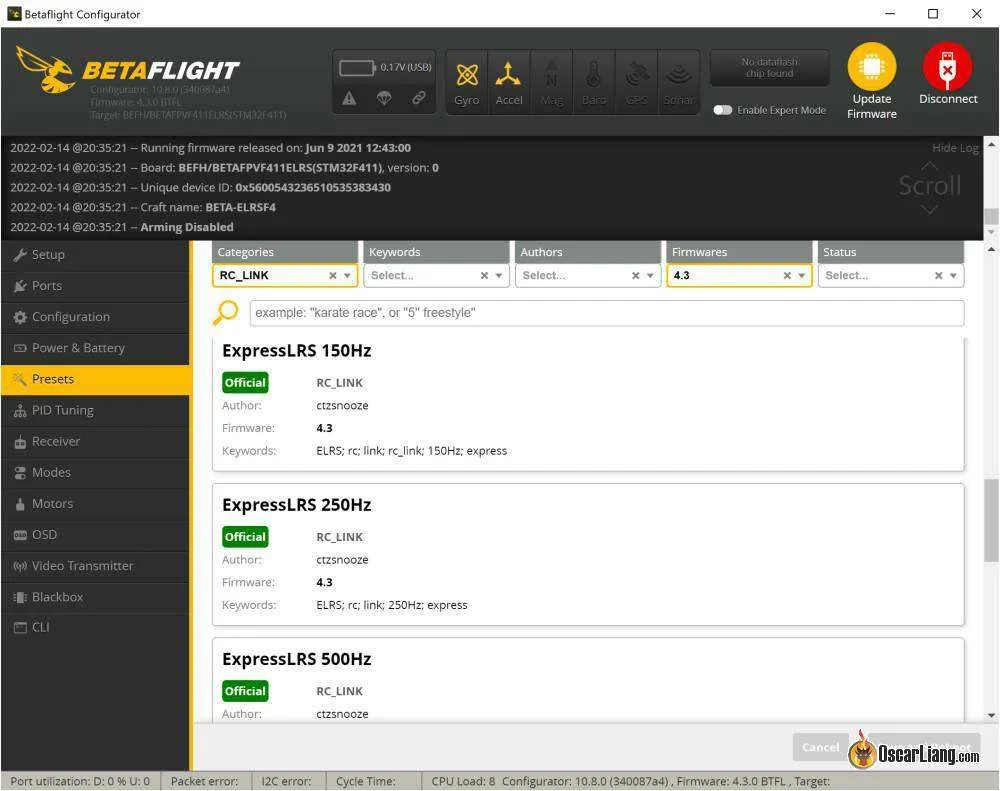
In the case of packet charges, think about using 500Hz and even F1000Hz for minimal latency. For most individuals, it could be tough to even inform the distinction between 150Hz and 500Hz, so I wouldn’t fear an excessive amount of about packet charges. Personally, I simply use 250Hz to maintain it constant, as I take advantage of 250Hz on all my different quads.
Don’t overlook to use the ExpressLRS preset based on your particular packet price to keep away from undesirable vibrations.
Flashing Bluejay Firmware
It’s extremely advisable to flash Bluejay to your ESC for 2 causes:
- It permits larger PWM frequency.
- It permits bi-directional DShot, which permits RPM filters in Betaflight.
Observe my tutorial on how you can flash Bluejay: https://oscarliang.com/bluejay-blheli-s/

Select a PWM frequency that fits your wants. 24KHz offers higher motor efficiency, resulting in extra responsive and exact management, whereas 96KHz maximizes flight time. 48KHz offers stability between responsiveness and effectivity. I examined totally different PWM frequencies on my BetaFPV Air65, and listed below are the flight occasions:
- 96KHz: 4:00
- 48KHz: 3:40
- 24KHz: 2:50
Props In vs Props Out
Props in and props out confer with the motor spin route and propeller mounting. I’ve a tutorial explaining it in additional element: https://oscarliang.com/reversed-motor-prop-rotation-quadcopter/
Props in is the default configuration in Betaflight, however props out is extra fashionable in Tiny Whoops. By default, you must begin with props out on a Tiny Whoop, because it appears to typically fly higher and has grow to be the usual. Nonetheless, should you expertise points with washout throughout corners and descents, the props in configuration would possibly repair it. Don’t take my phrases for it, strive totally different configurations to see what works greatest for you.

Betaflight Configuration
Angle Mode Settings
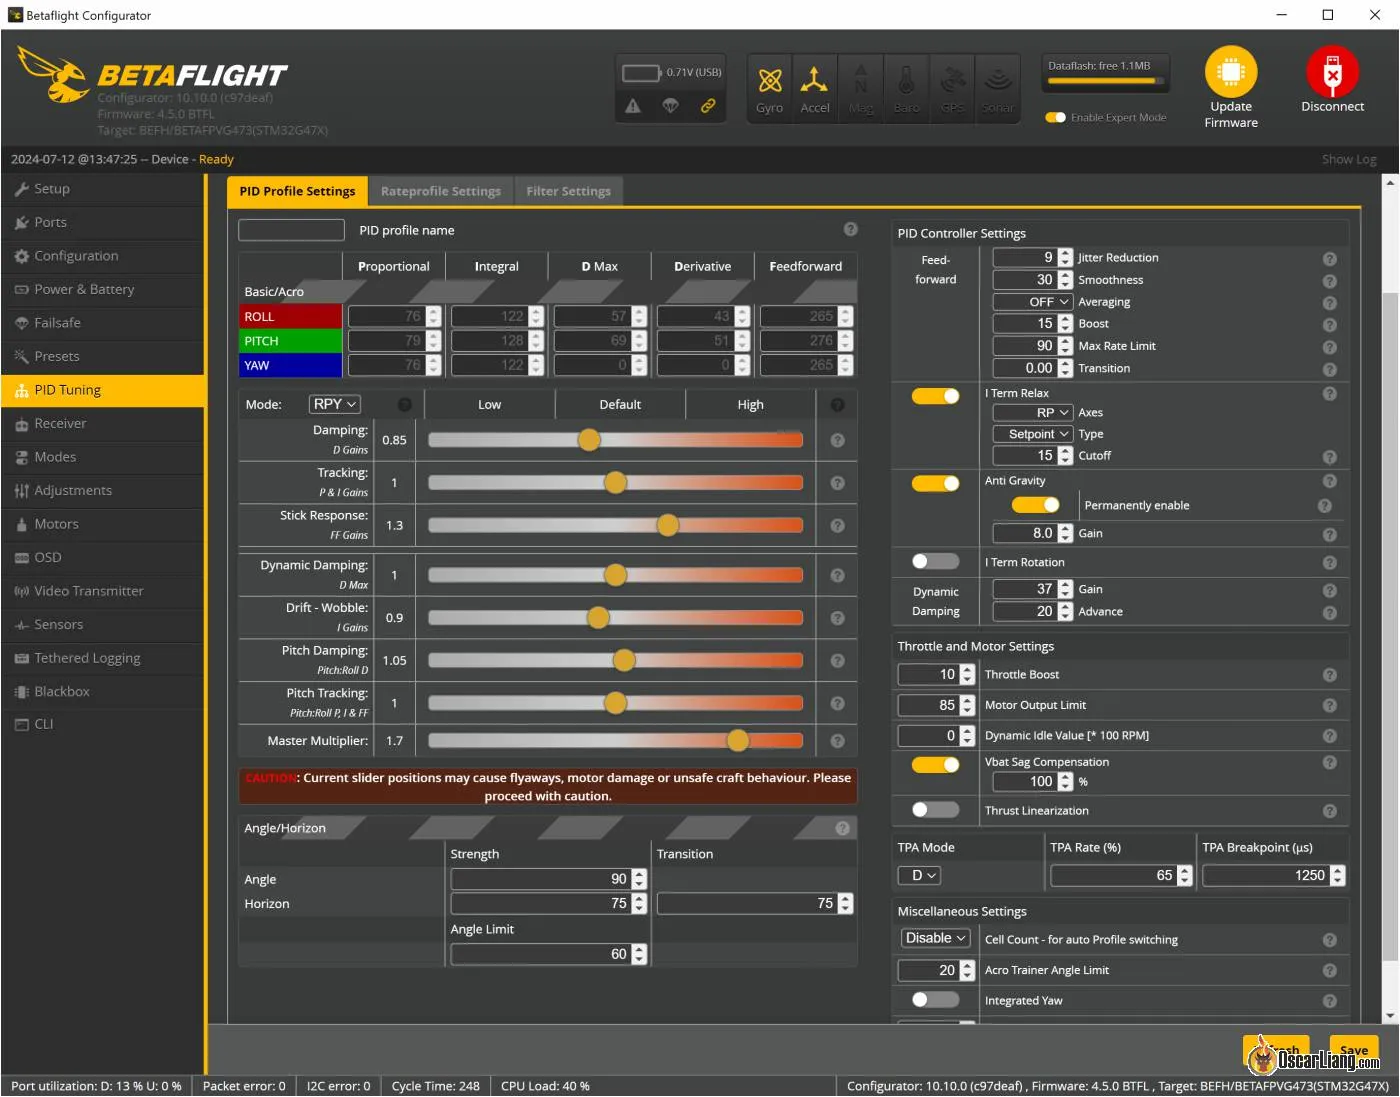
- Angle Energy: 90 (In the event you really feel that is too tight, cut back this quantity).
- Angle Restrict: 60 (This controls how a lot tilt you are able to do in Angle mode earlier than it limits it, sort of like charges and expo in a way. 80 is the very best I might go right here. If it feels too twitchy, cut back it to 65 and even decrease. I favor 60 to 65 when flying indoors).
Disabling Airmode
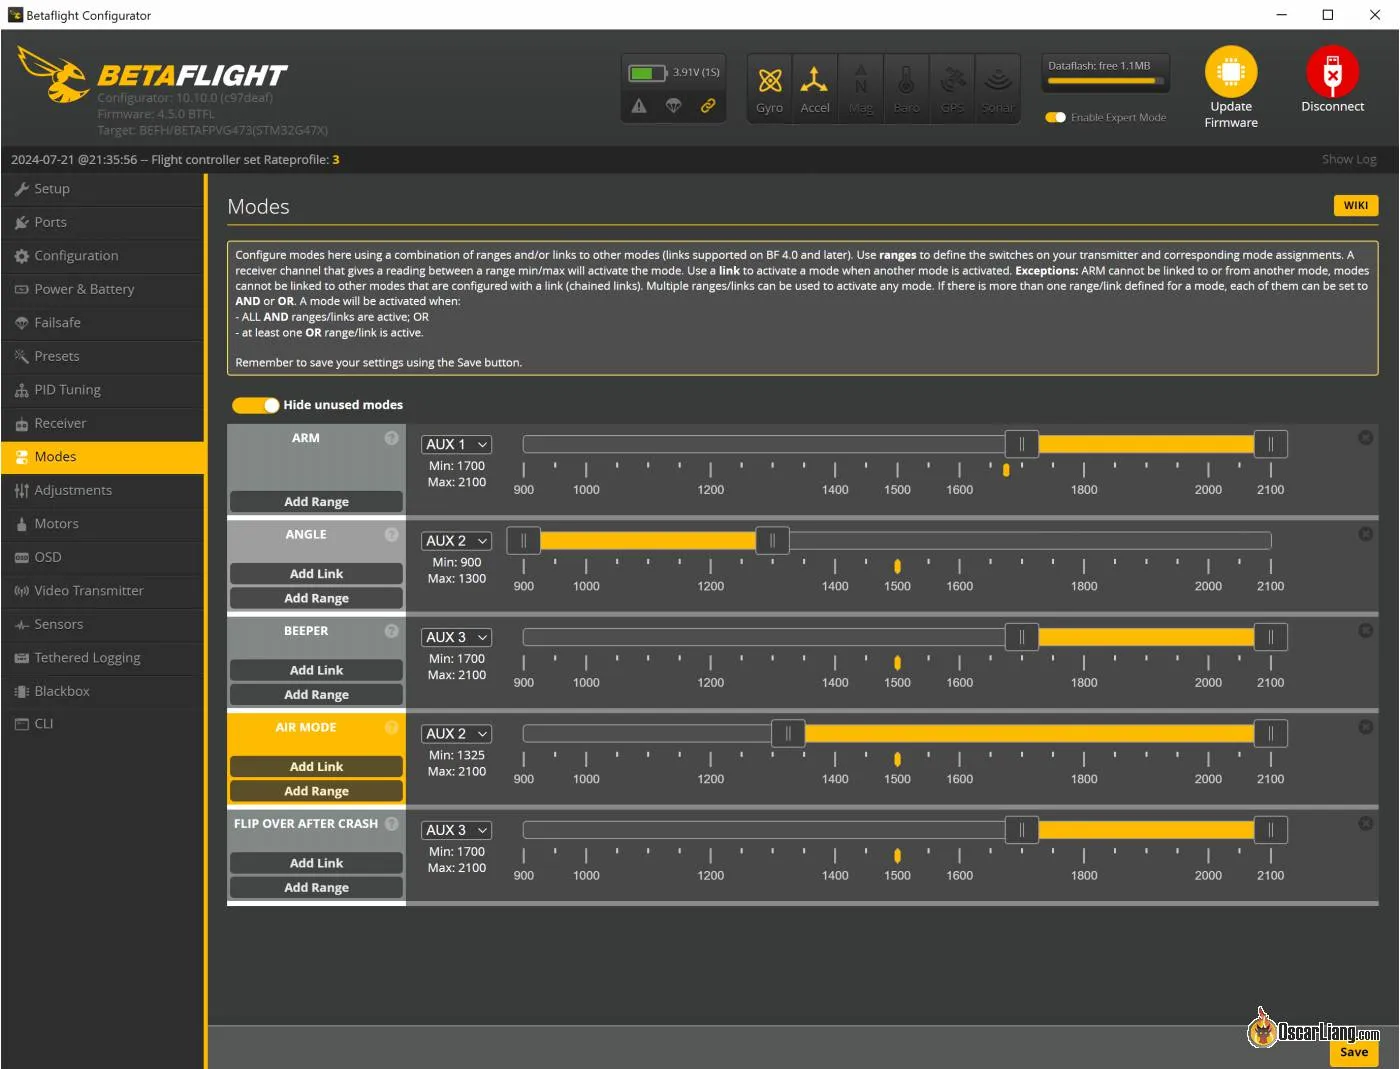
I normally disable Airmode within the Configuration tab when flying in Angle mode. This helps with crashing; the whoop doesn’t overreact and freak out, permitting simpler restoration.
In the event you additionally fly in Acro mode, you possibly can assign Airmode to the identical change as Angle mode in order that if you deactivate Angle mode, Airmode is activated routinely.
Throttle Scaling
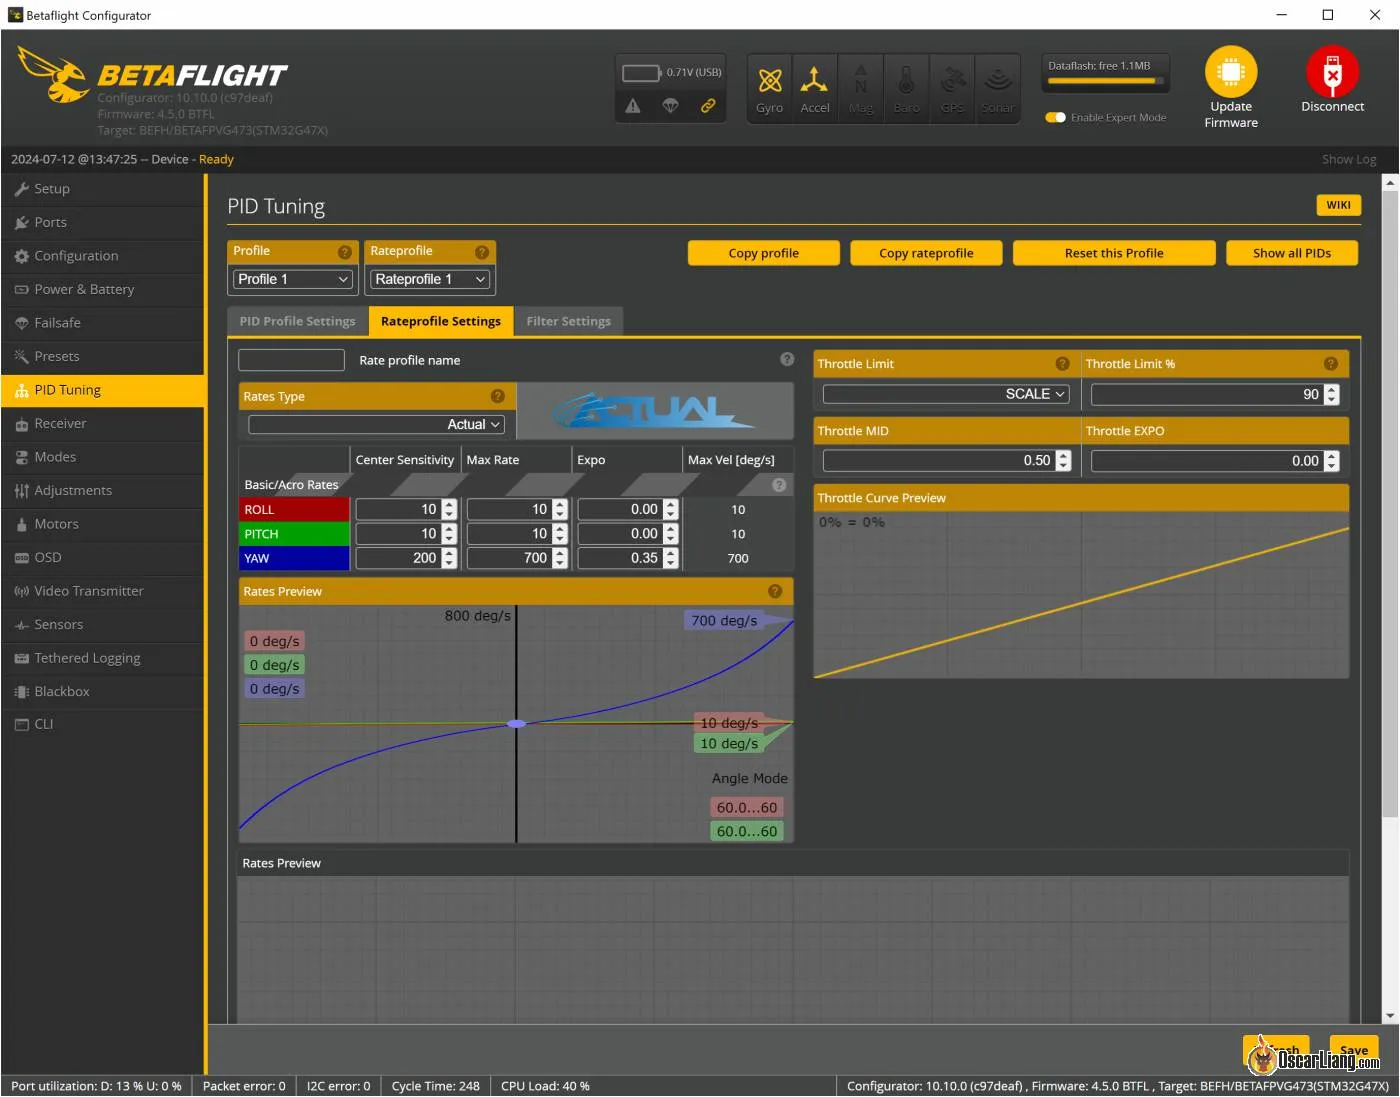
Within the Charges tab, I set the throttle restrict to Scale and 90%. It is because I virtually by no means use 100% throttle when flying indoors. Scaling it down will give me extra throttle decision. You may even set it to 80% or decrease for extra relaxed cruising.
To find out how a lot to scale down, strive placing throttle proportion in your OSD, report your self flying as quick as you possibly can, and watch the DVR to see the utmost throttle you usually use. In the event you use 100% throttle, then don’t set any throttle restrict in any respect. But when the utmost throttle you employ is decrease, cutting down your throttle will present extra decision.
You aren’t shedding flight efficiency by cutting down throttle, your motors are nonetheless able to operating at 100% at any time when it must stabilize the quad. It’s totally different from “Motor Output Restrict”, which places a cap on how briskly the motors can run and can make your whoop much less responsive.
Different Settings
- Throttle Enhance: 6-10 (Really helpful should you set a throttle scale of 90% or decrease; it makes your quad’s throttle extra responsive).
- VBAT Sag Compensation: 100% (Makes the quad really feel extra constant by way of the entire battery pack but in addition extra dangerous as you would possibly overlook when to land).
- Motor Idle: 8% to 10% (Within the Motors Tab).
- Battery Voltage Settings: Set the Minimal Cell Voltage to three.0V and the Warning Cell Voltage to three.2V within the Energy & Battery tab. This ensures you don’t over-discharge your batteries.
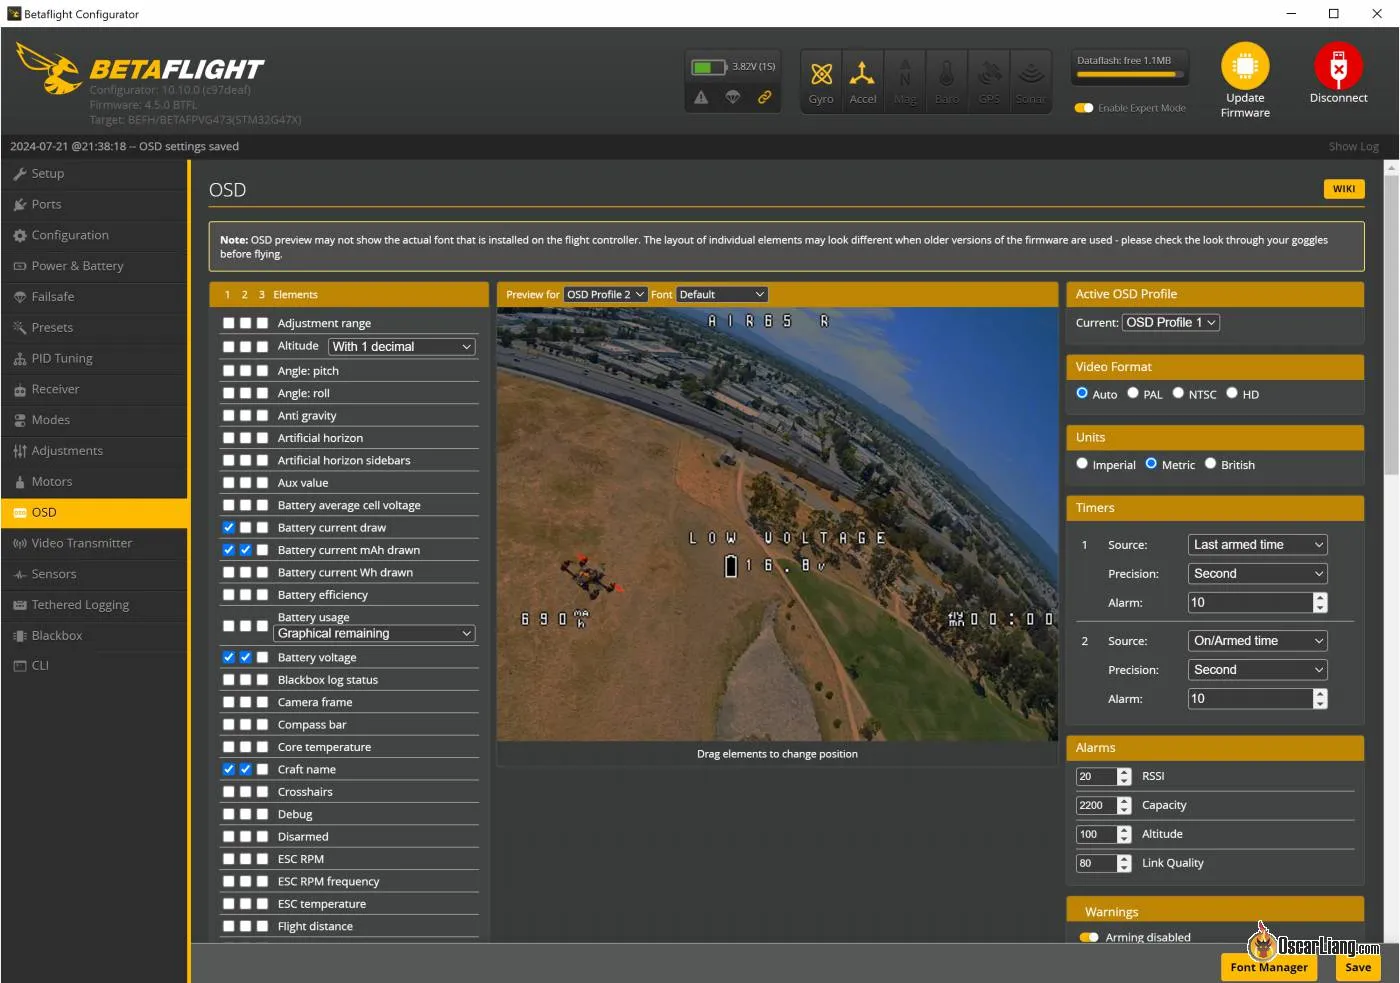
- OSD Setup: Run a minimal OSD setup with solely important components like battery voltage, flight time, and warnings to keep away from distractions.
Switching Fee Profiles
In the event you fly in each Acro and Angle modes, you would possibly need to use totally different charges. You may arrange totally different charges utilizing Charges Profiles, and one of the best ways to change price profiles can be utilizing the “Changes” tab. In case you are simply flying in Angle mode, you possibly can ignore this part.
For instance, should you use AUX2 (a two-position change) to change between Angle and Acro mode, when it’s within the low place 1000, it’s in Angle mode, when it’s within the excessive place 2000, it’s in Acro mode.
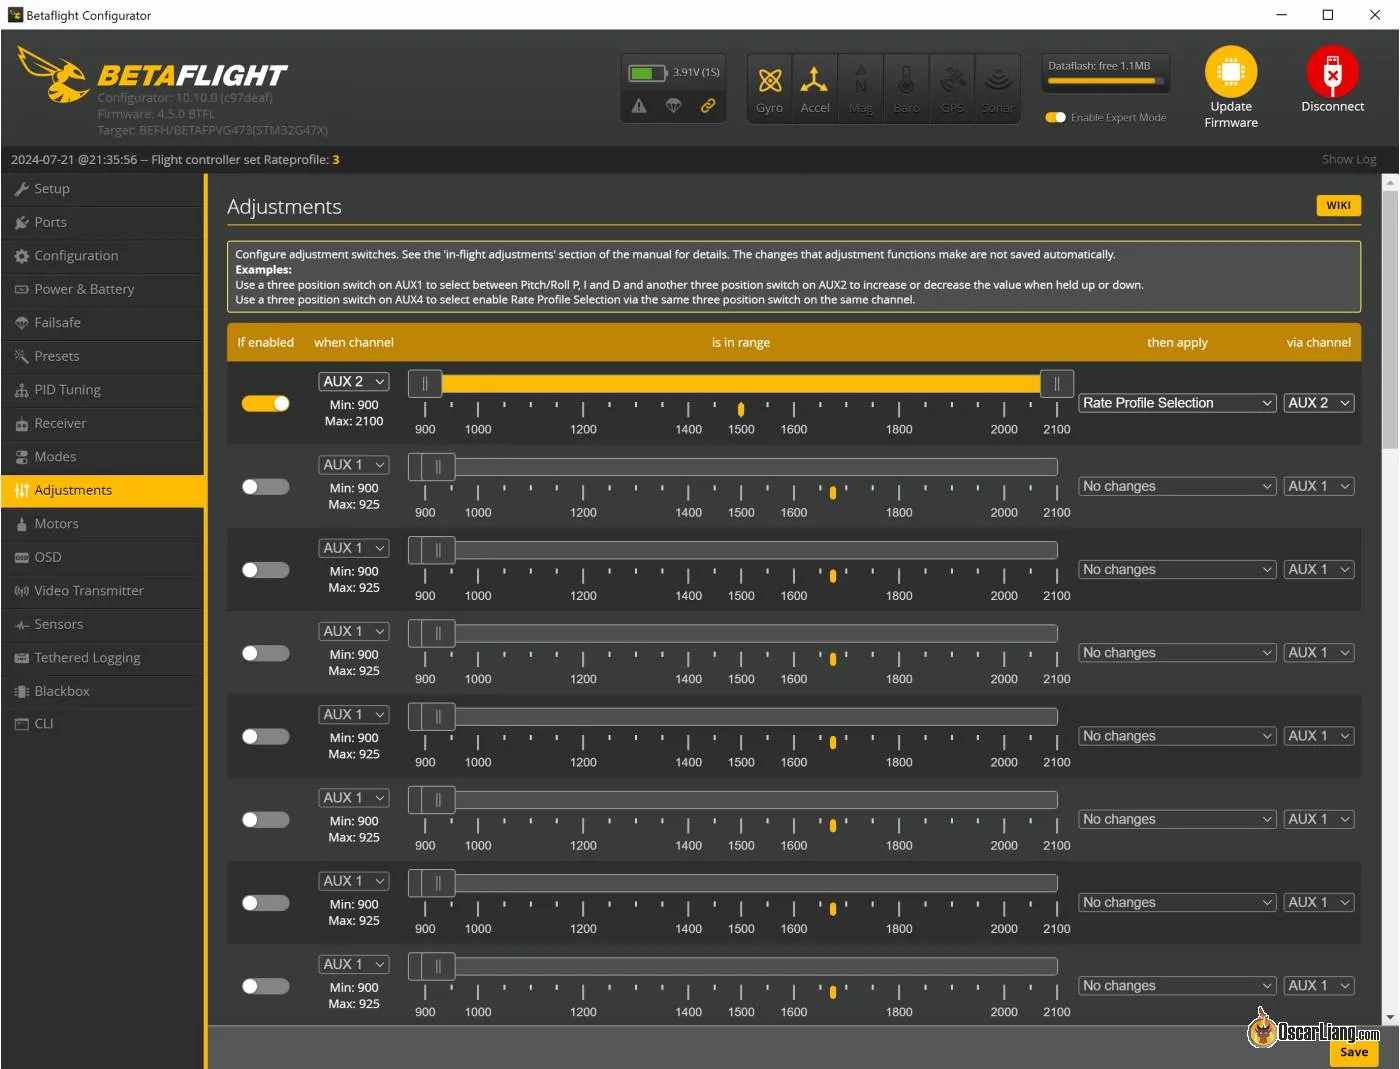
Within the Changes tab, allow the primary obtainable slot:
- Set “When Channel” to the change for switching between Angle and Acro mode (AUX 2 on this instance).
- Prolong “Is In Vary” to the entire vary.
- Set “Then Apply” to “Fee Profile Choice.”
- Set “Through Channel” to “AUX 2” once more.
On this instance, when in Angle mode, it’ll change to Fee Profile 1, and when in Acro mode, it’ll change to Fee Profile 3. Observe: It’s skipping Fee Profile 2 as a result of I’m utilizing a 2-position change. In the event you use a 3-position change, it’ll permit switching amongst Fee Profile 1, 2, and three.
Conclusion
Establishing your Tiny Whoop with these configurations and suggestions will considerably improve your flying expertise. Keep in mind, these are beginning factors, and also you would possibly must fine-tune settings primarily based in your particular {hardware} and flying fashion. Blissful flying!