Utilizing Handbook Mode with Auto ISO could be very helpful for fast-paced wildlife images. On this article, I’ll clarify the way to set Handbook Mode + Auto ISO, the way it works, and why it’s so efficient. Additionally, I’ll present some tips about optimizing publicity and maximizing your picture high quality on this mode.
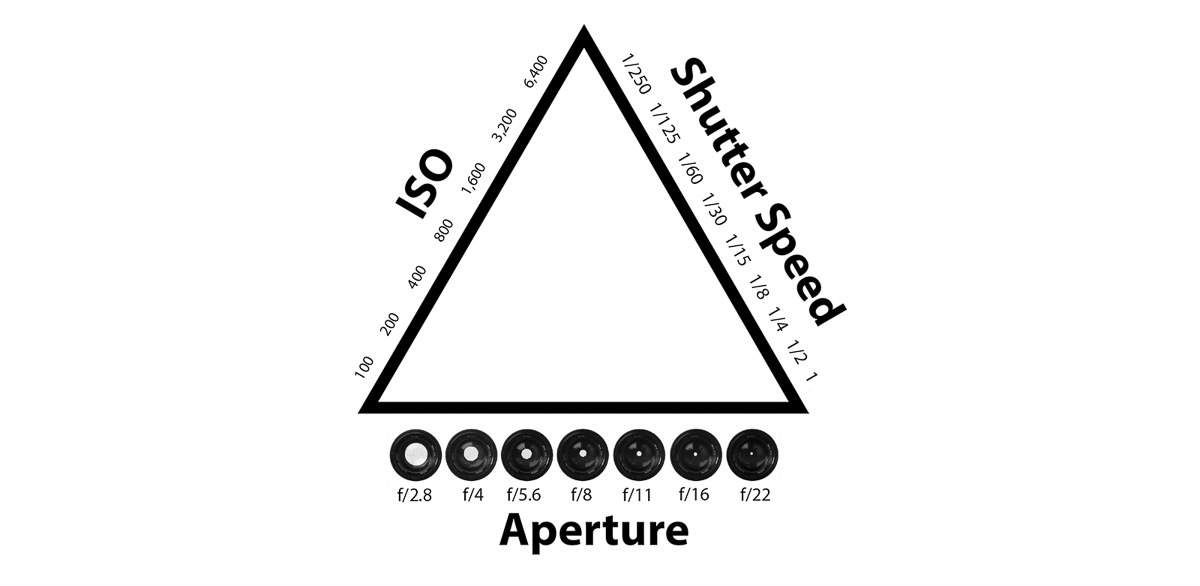
Handbook Mode is without doubt one of the normal taking pictures modes in images. Different examples embody Aperture Precedence, Shutter Precedence, Program, Auto, and varied scene modes relying in your digicam. All of those modes are based mostly round controlling the three predominant digicam settings: aperture, shutter velocity, and ISO. If you happen to aren’t conversant in that, I counsel studying the linked articles to present your self a refresher.
Typically, photographers consider Handbook Mode as the correct selection once you wish to lock within the three main digicam settings manually, leaving nothing as much as the digicam. However this isn’t essentially the case. Cameras right now provide the selection of setting ISO mechanically even in Handbook Mode.
With Handbook Mode + Auto ISO, you continue to choose your aperture and shutter velocity, however the digicam is left to decide on your ISO. Whereas this can be unintuitive at first, I’ve discovered that Handbook Mode mixed with Auto ISO is commonly the quickest solution to have management over an important settings in images. For fast-moving wildlife images, it’s particularly helpful.
When Auto ISO is enabled in Handbook Mode, your digicam will learn the ambient lighting circumstances and choose an ISO accordingly. Nevertheless, you may fine-tune the ISO that it chooses by altering your metering mode and your publicity compensation. For instance, if you happen to set center-weighted metering and an publicity compensation of -0.7, the digicam will choose the ISO based mostly upon a central area of the picture after which decrease it by 2/3 cease.
Personally, I all the time use Nikon’s Matrix metering mode, which analyzes the complete body and units publicity based mostly on tone distribution, coloration, and composition. (Canon’s Evaluative mode and Sony’s Multi mode work equally.) As for publicity compensation, it relies upon upon the scene. I all the time am ready to lift and decrease it as wanted. For instance, in snowy scenes with a darkish topic, I normally add +2/3 cease to verify my topic isn’t too dim. And with vibrant topics in opposition to a darkish background, I could decrease it to as a lot as -1.0 cease to protect in opposition to overexposure.
The good thing about Handbook Mode + Auto ISO is that you just retain full management over your aperture and shutter velocity. This allows you to very fastidiously choose the depth of subject and the way a lot you’ll freeze the movement of your topic. In the meantime, with the digicam shifting ISO in response to the sunshine, you don’t have to fret as a lot about overexposure or underexposure.
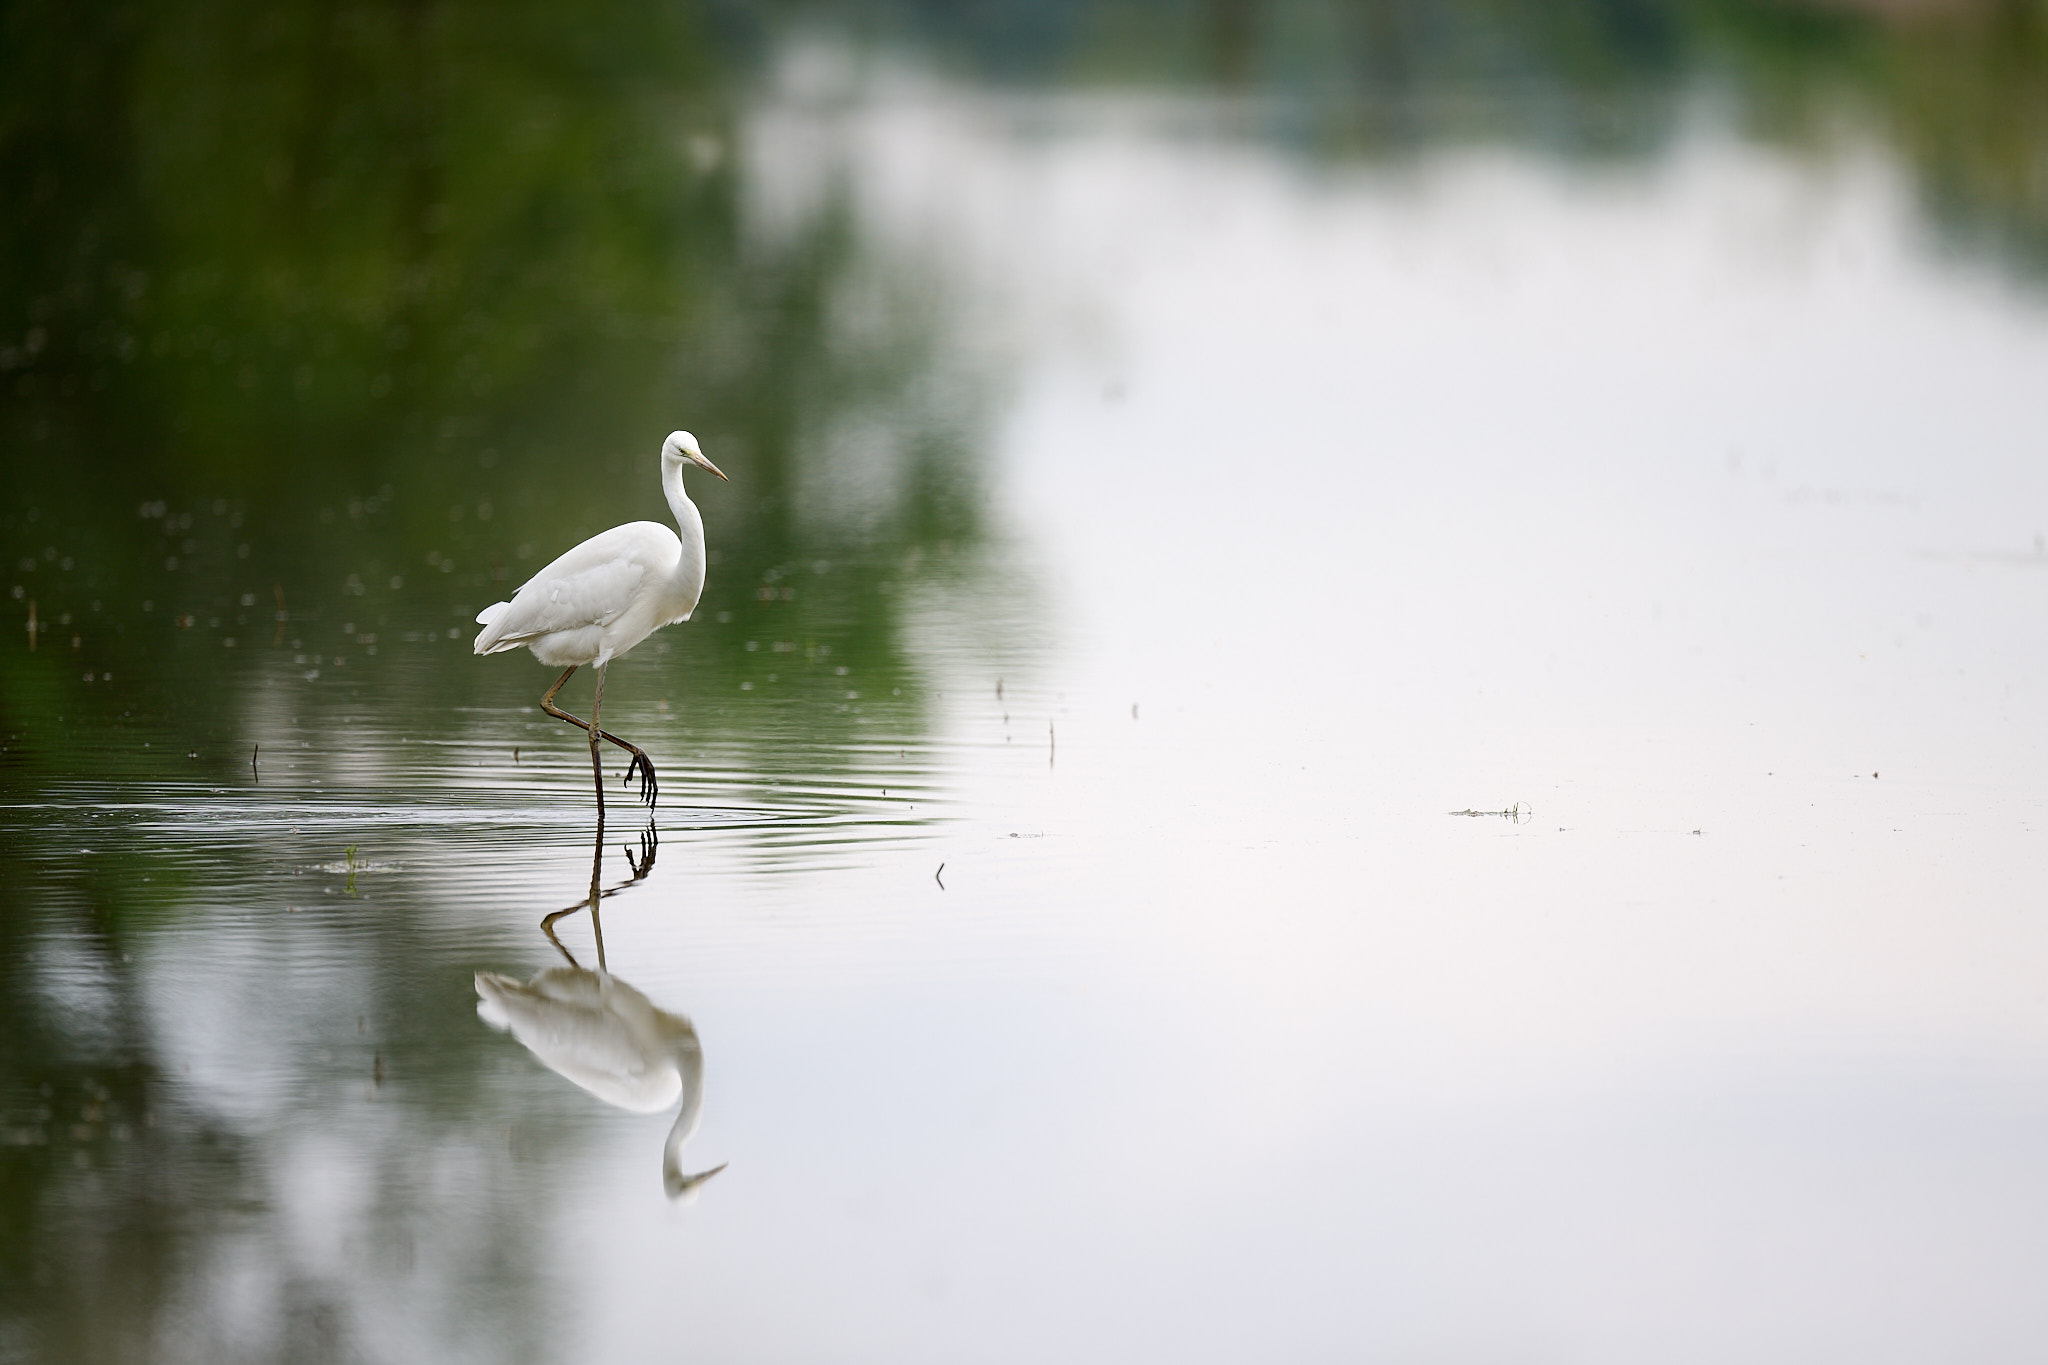
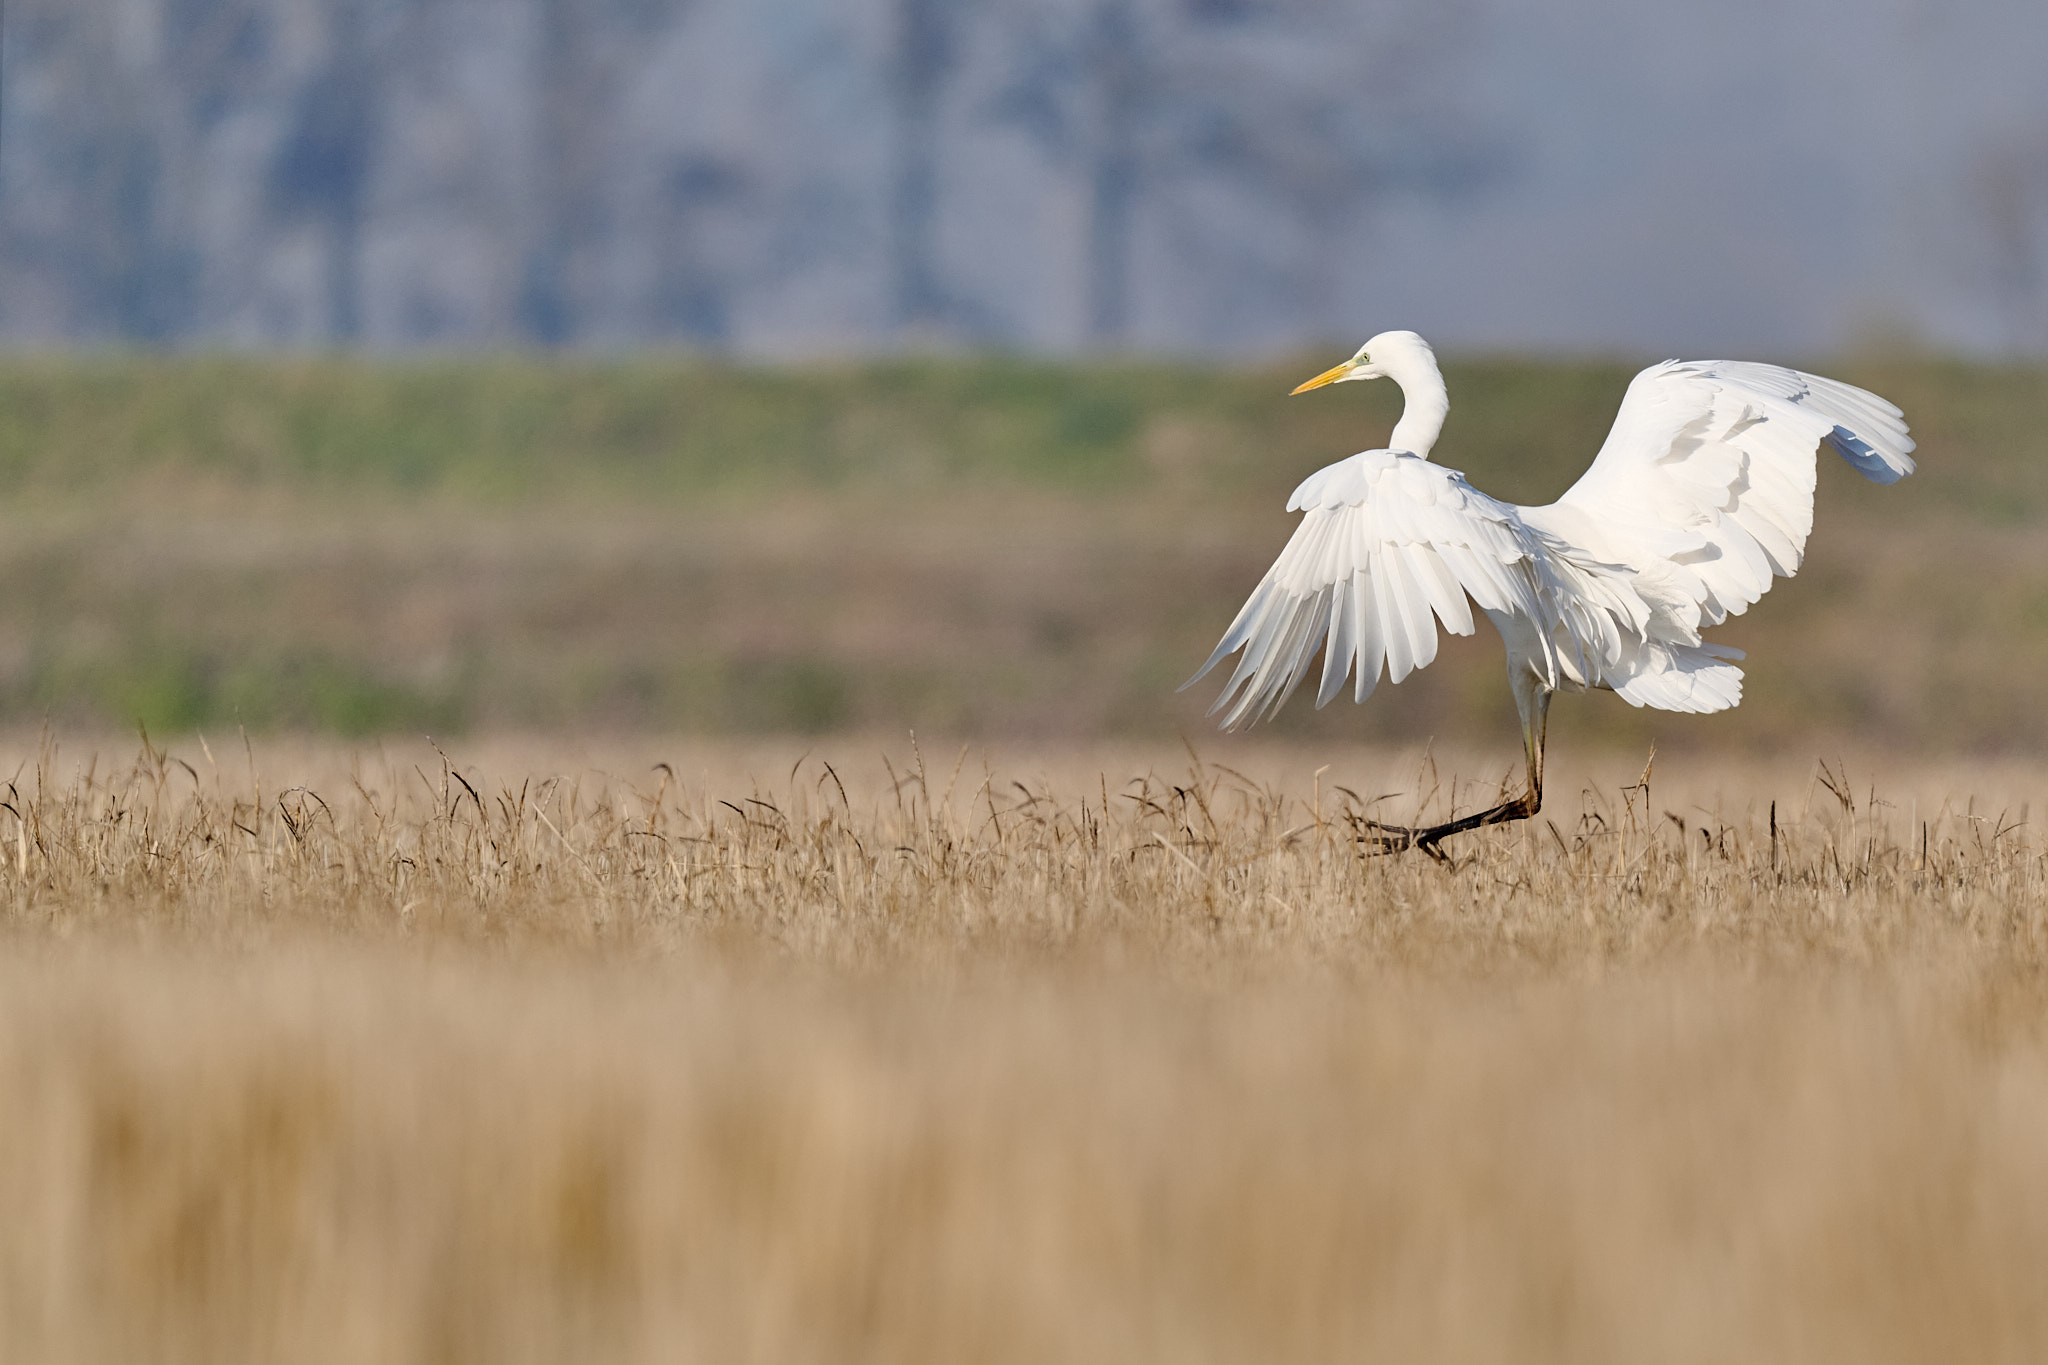
Let’s take into account some real-life examples. If you happen to’re taking photographs of a stationary topic in wildlife images, a great start line is a shutter velocity of 1/500 second. This captures sufficient mild with out risking a blurry topic, at the least if you happen to’re taking pictures from a tripod or monopod. Shoot at your widest aperture until you need extra depth of subject, and let the ISO float. In most lighting circumstances, the digicam will be capable to decide a low ISO like 100:
If you happen to see that the ISO has dipped all the best way to the bottom worth (both ISO 64 or ISO 100 on most cameras), chances are you’ll begin to threat overexposure as a result of the digicam can’t decrease ISO any extra. In that case, simply bump your shutter velocity a little bit quicker. For instance, set it to 1/2,000 second as an alternative of 1/500 second.
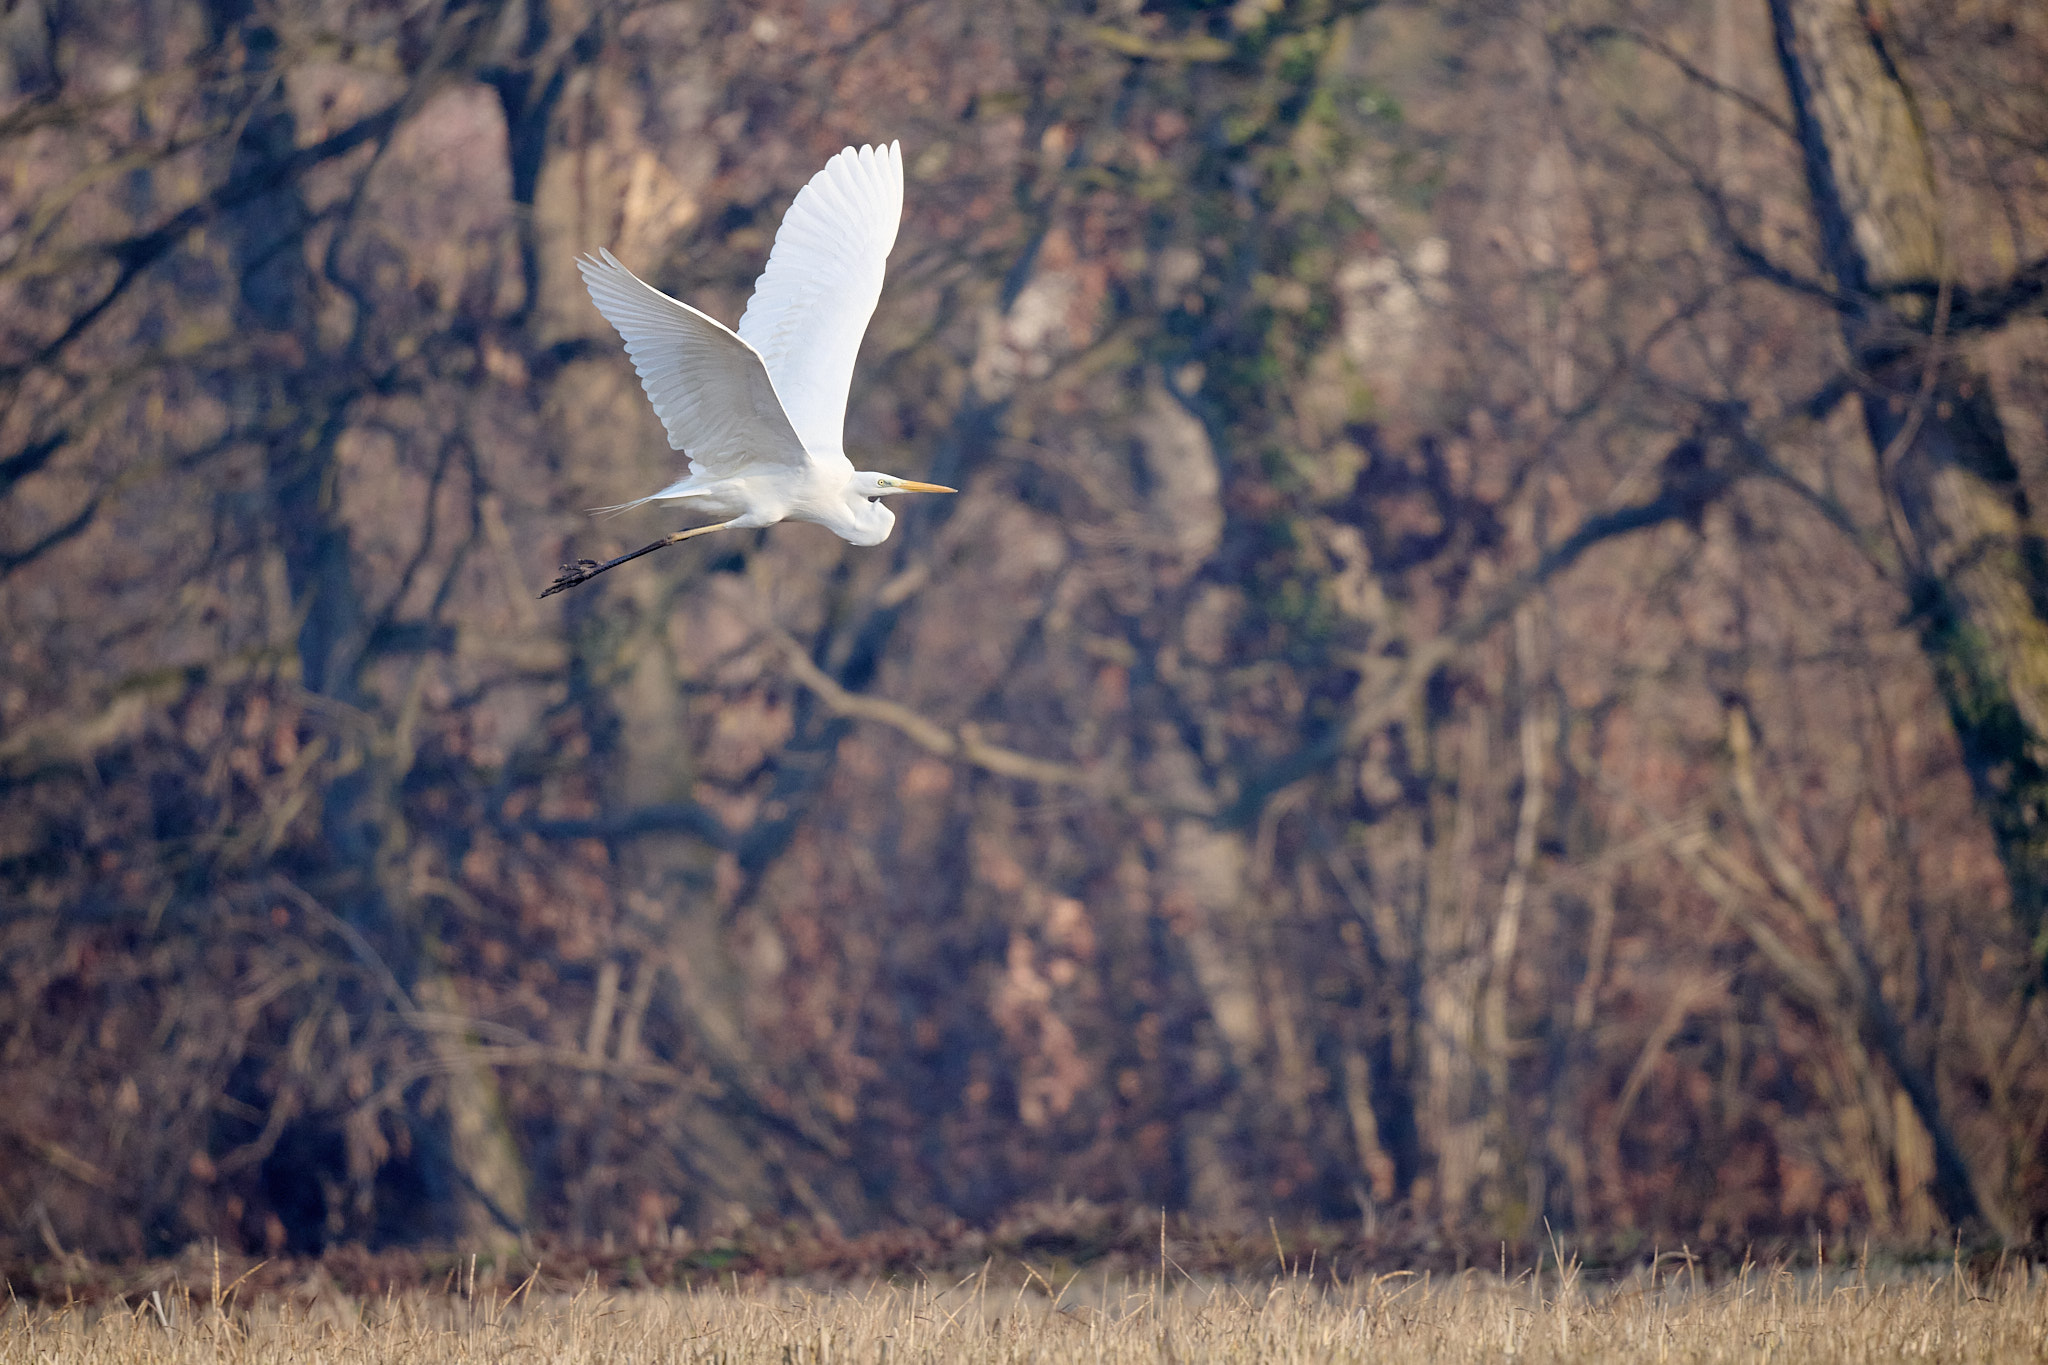
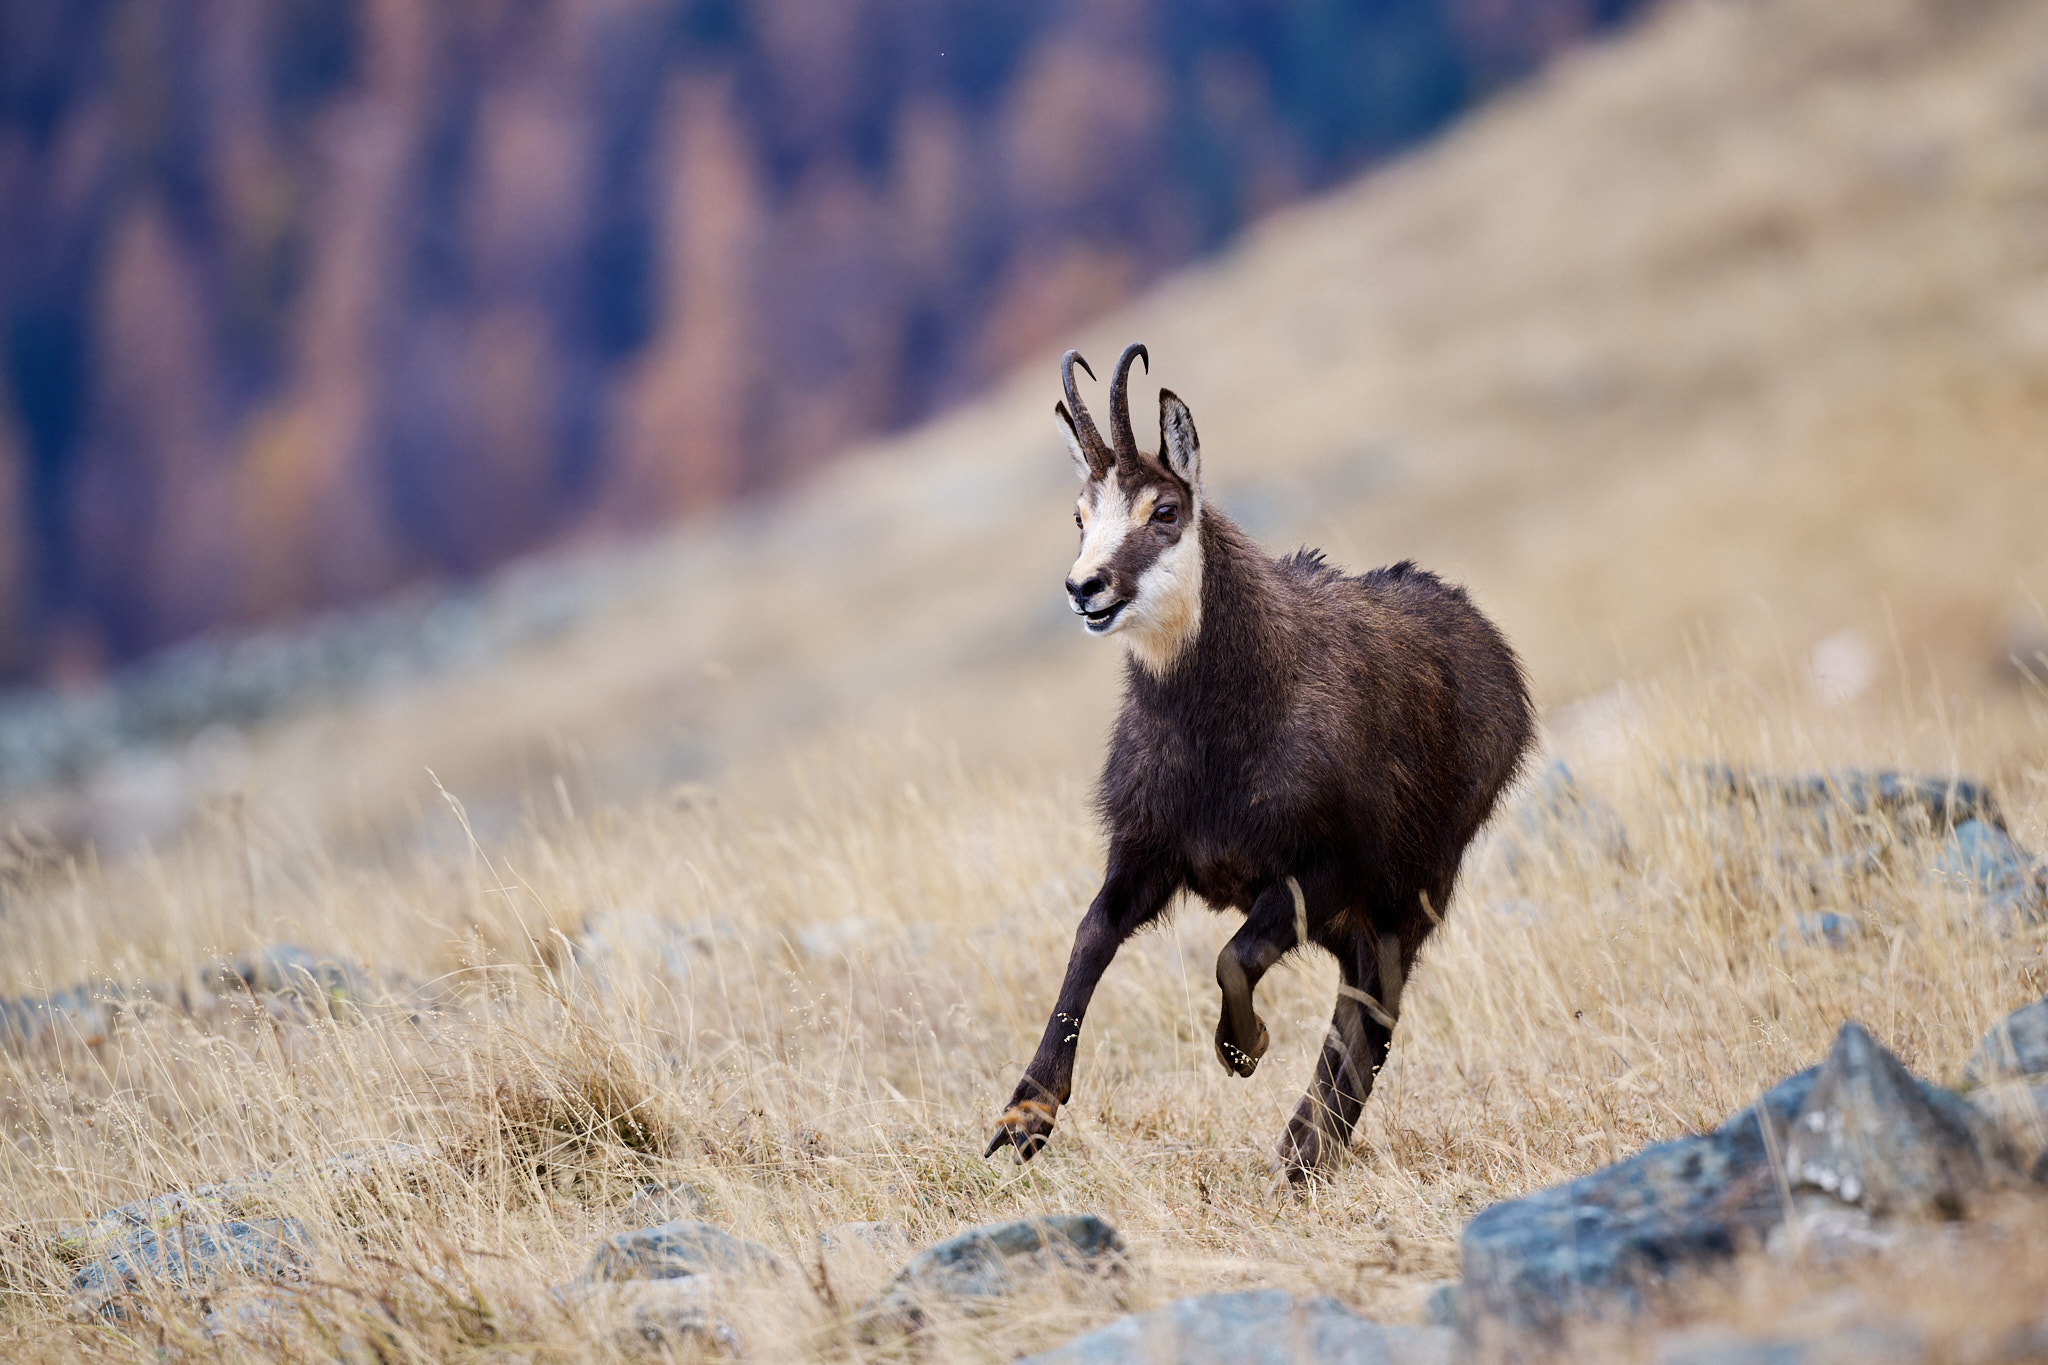
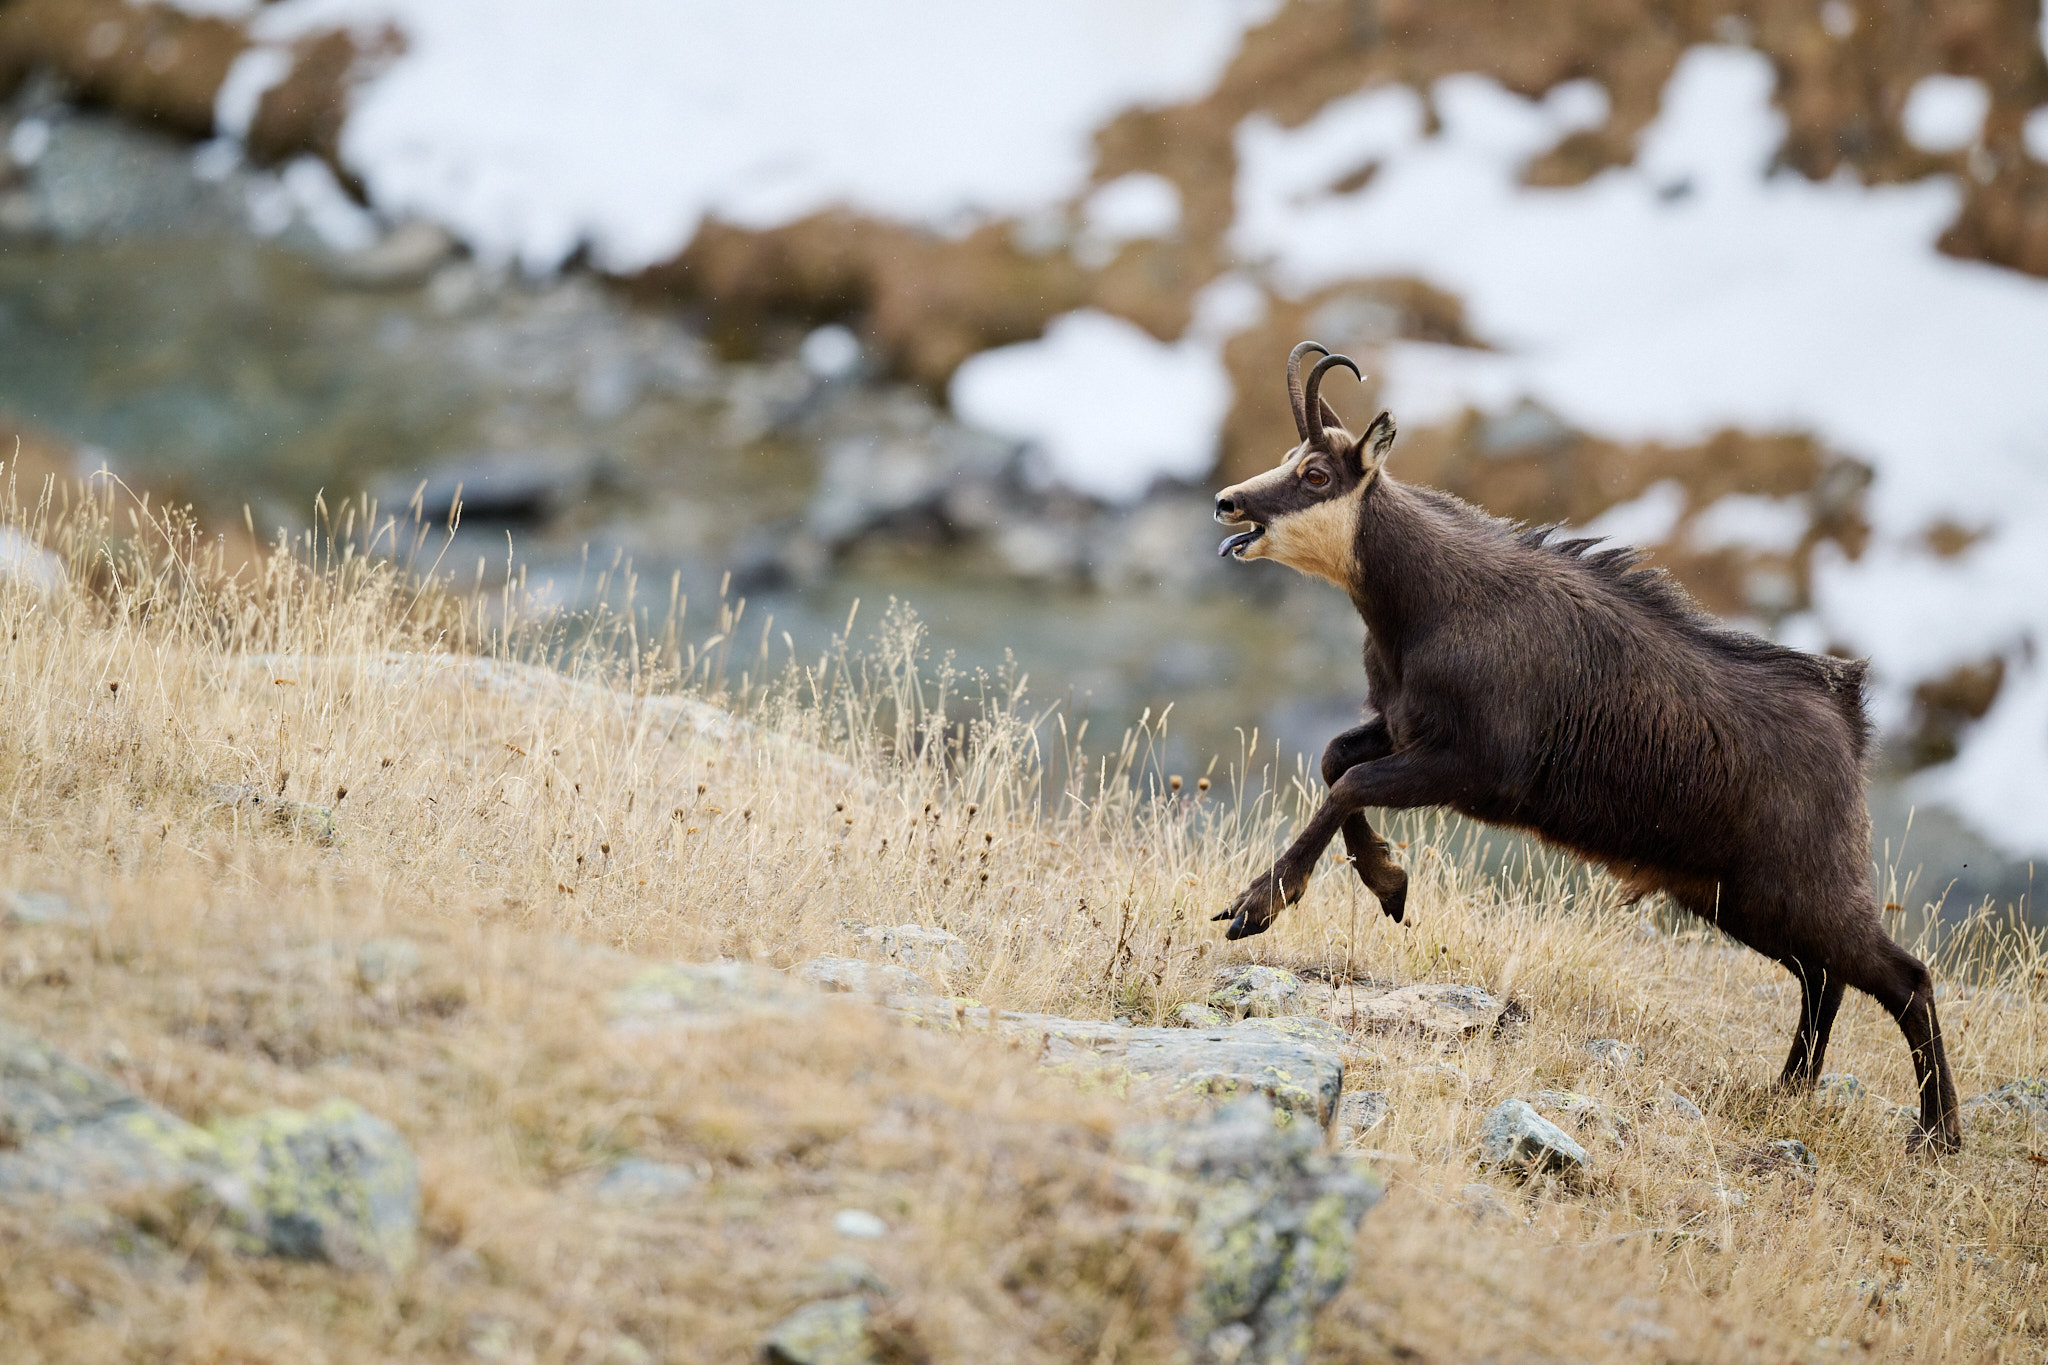
One other time that you just’ll want to make use of a quicker shutter velocity is when the topic begins shifting. I all the time attempt to concentrate to my topic’s conduct and take into consideration what shutter velocity I’ll want. If it’s a fowl that’s about to take off, I’ll shortly rotate the shutter velocity dial six clicks (that’s two stops) to set it to 1/2,000 second and ensure I freeze the second. With Auto ISO enabled, I belief the digicam to spice up my ISO accordingly.
That’s the essential introduction to Handbook Mode + Auto ISO, however it’s also possible to take steps to enhance your picture high quality even additional, at the least in case your topic is being cooperative.
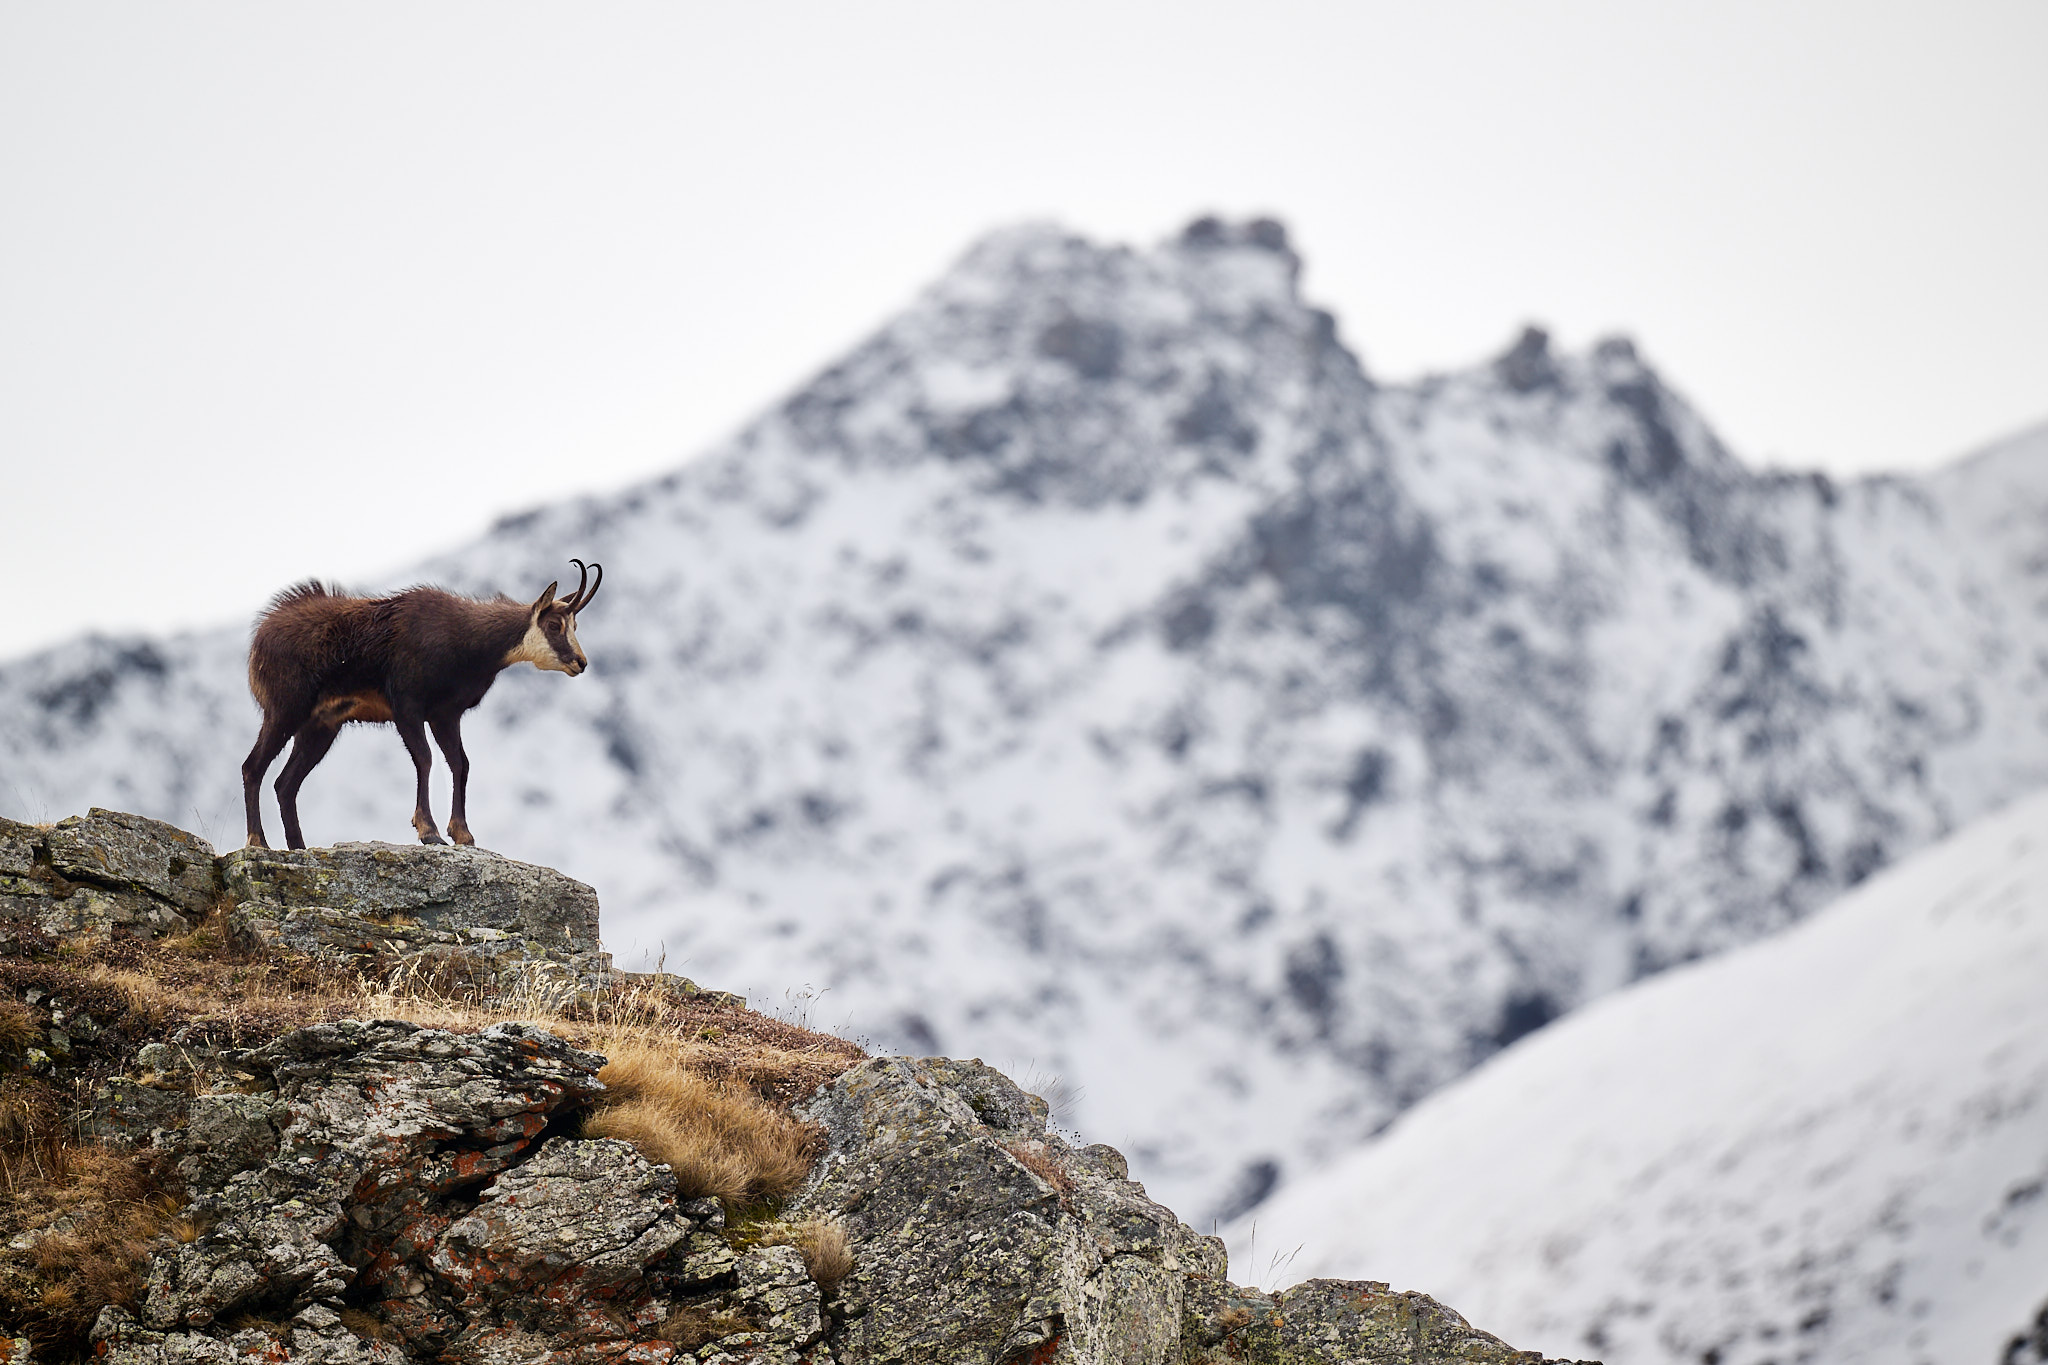
For instance, how do you truly know that 1/500 is the correct shutter velocity for a comparatively stationary topic? What if you will get away with completely sharp photographs at 1/250 second, in order that your digicam can set a decrease ISO?
This half is about trial and error, in addition to observe. With sufficient observe, you may normally inform simply your topic what shutter velocity you’ll want. However right here’s a professional tip. In Handbook Mode + Auto ISO, you may in a short time swap between completely different shutter speeds whereas sustaining the identical picture brightness. If you happen to’re questioning between (say) 1/500 second versus 1/250 second, take a picture of each! The truth is, take an entire sequence and possibly even begin a little bit quicker – 1/800, 1/640, 1/500, 1/400, 1/320, 1/250, 1/200, 1/160, 1/125, and 1/100. With observe, you must be capable to take the entire sequence in a matter of seconds.
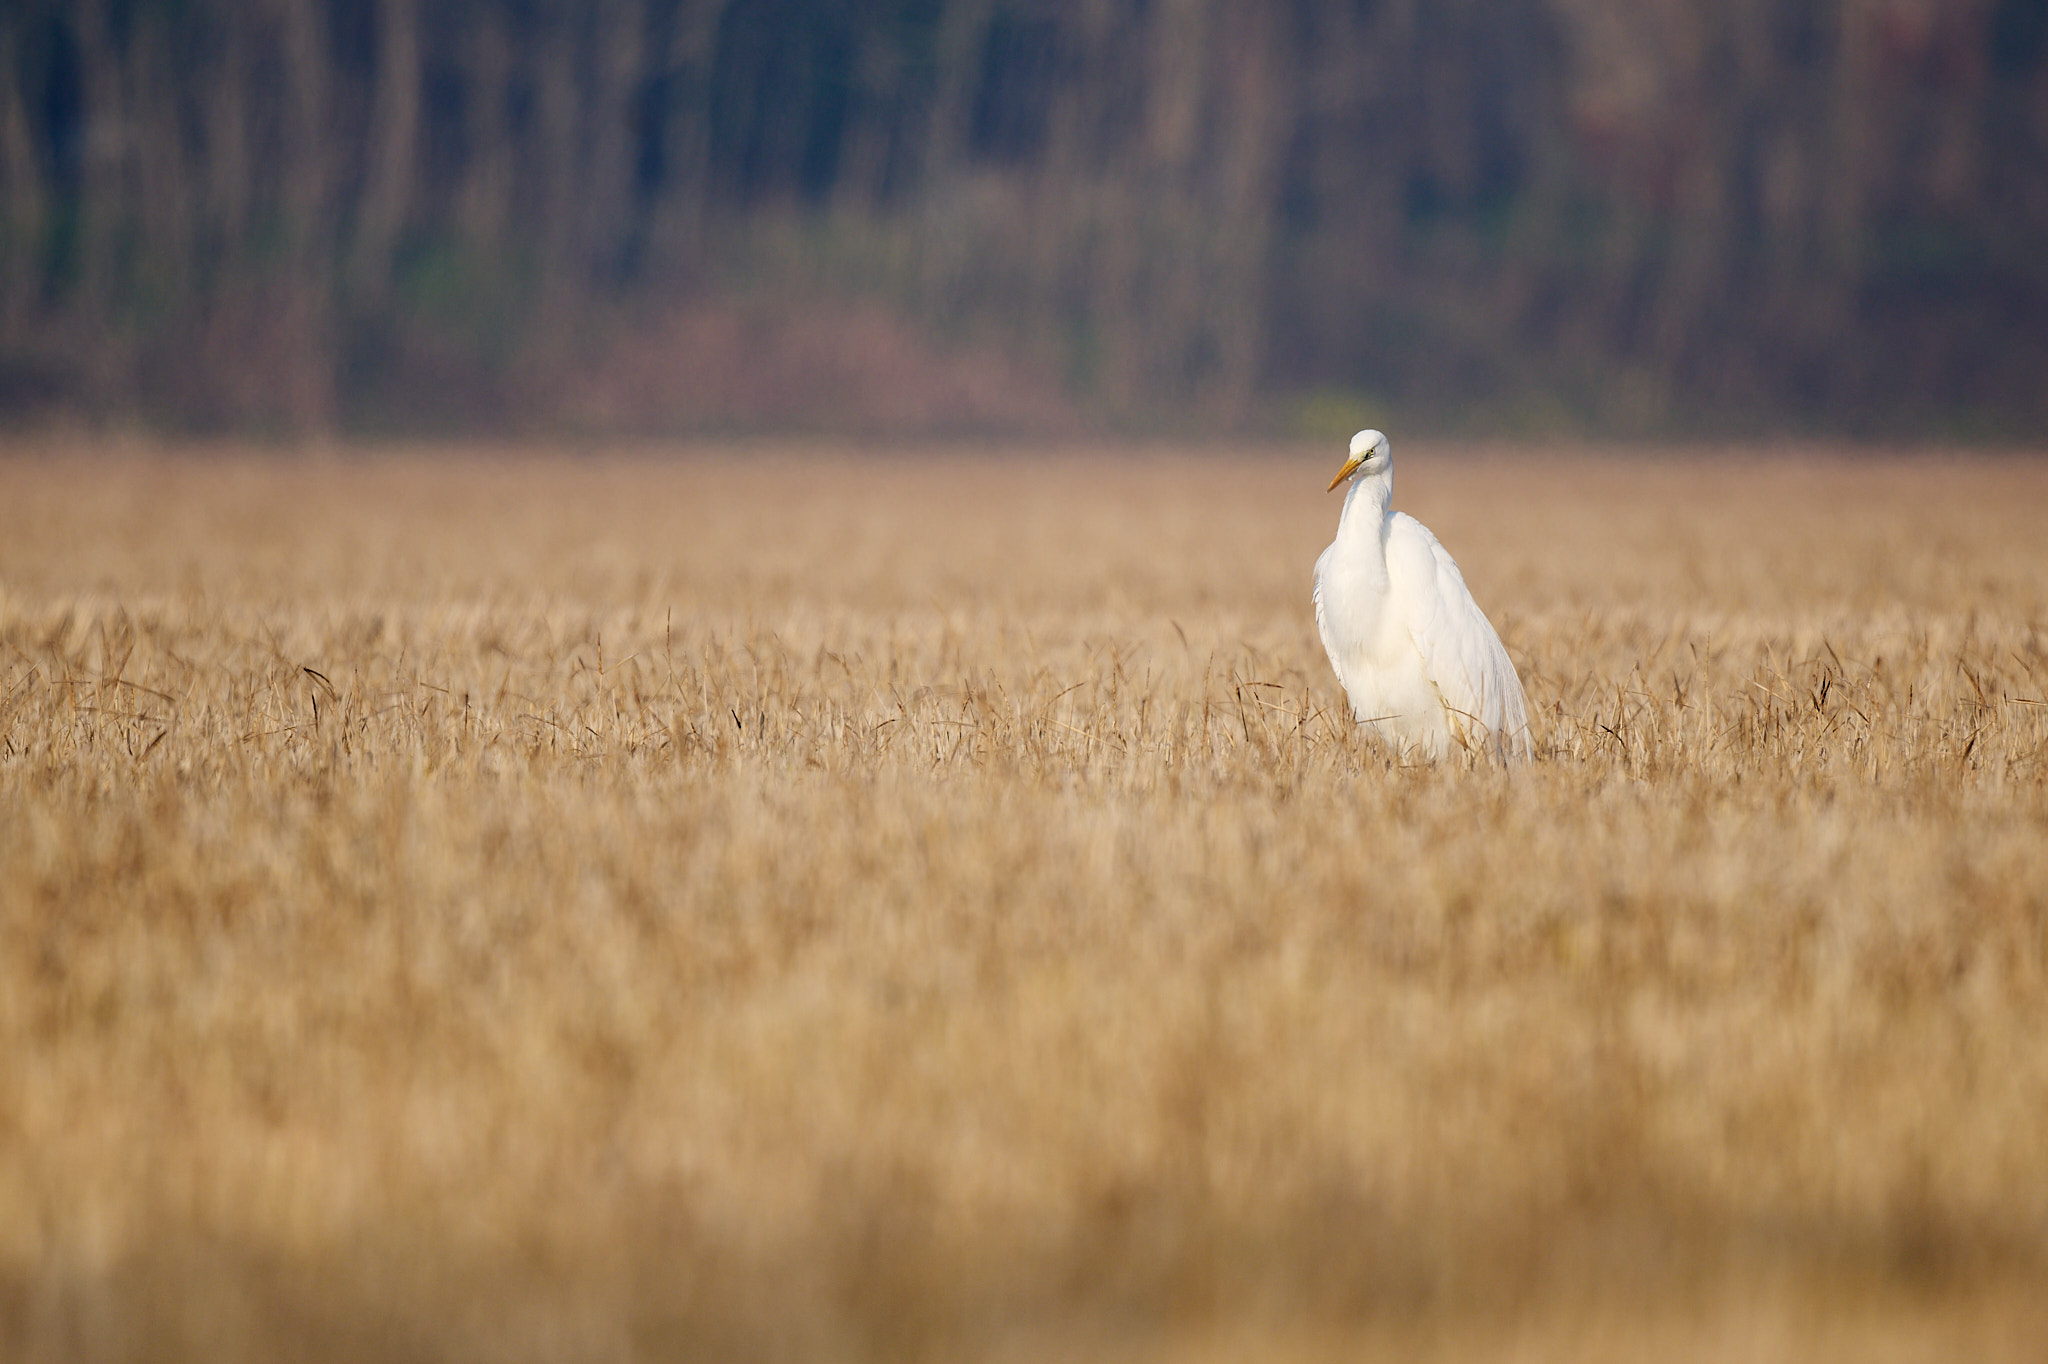
Then, begin reviewing from the latest picture and work your approach again by way of the sequence. Set your digicam to one-button magnification if obtainable, so to instantly zoom in and test sharpness. This offers you the very best concept of what shutter speeds are acceptable for the topic at hand. On this case, for instance, 1/250 second proved to be lots, for the reason that topic was not shifting very a lot:
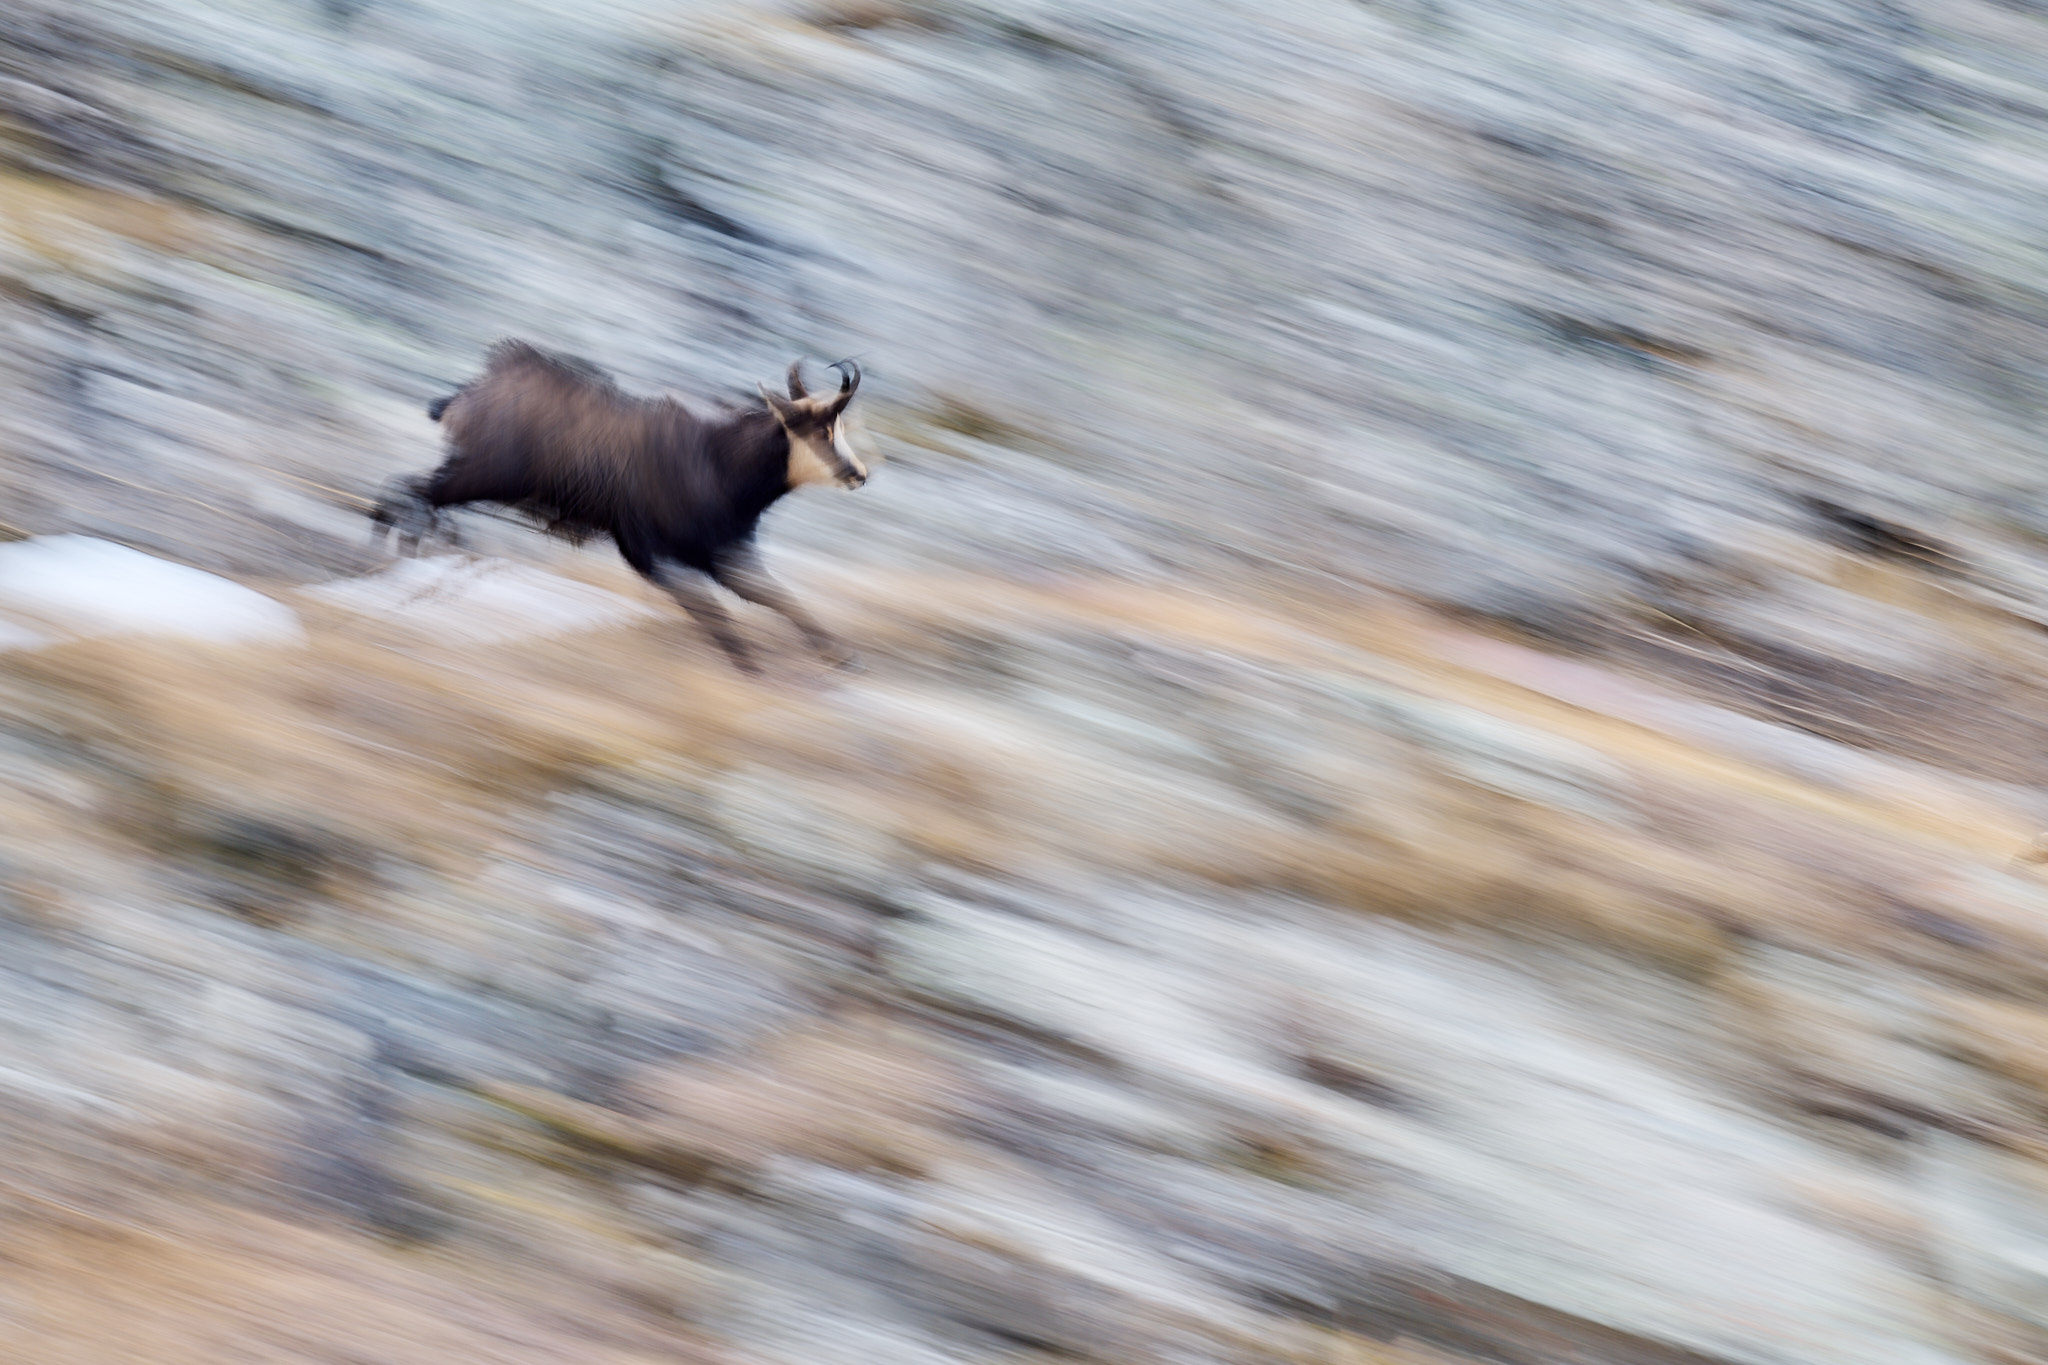
Handbook Mode + Auto ISO additionally provides you the total flexibility to mess around with movement blur nevertheless you need. I like taking pictures with a couple of 1/10 to 1/30 second shutter velocity whereas panning with the movement of my topic, giving a way of velocity and motion to the photograph. That is straightforward to perform with Handbook Mode + Auto ISO. Nevertheless, observe that you just’ll threat overexposure until you cease down your aperture like I did right here:
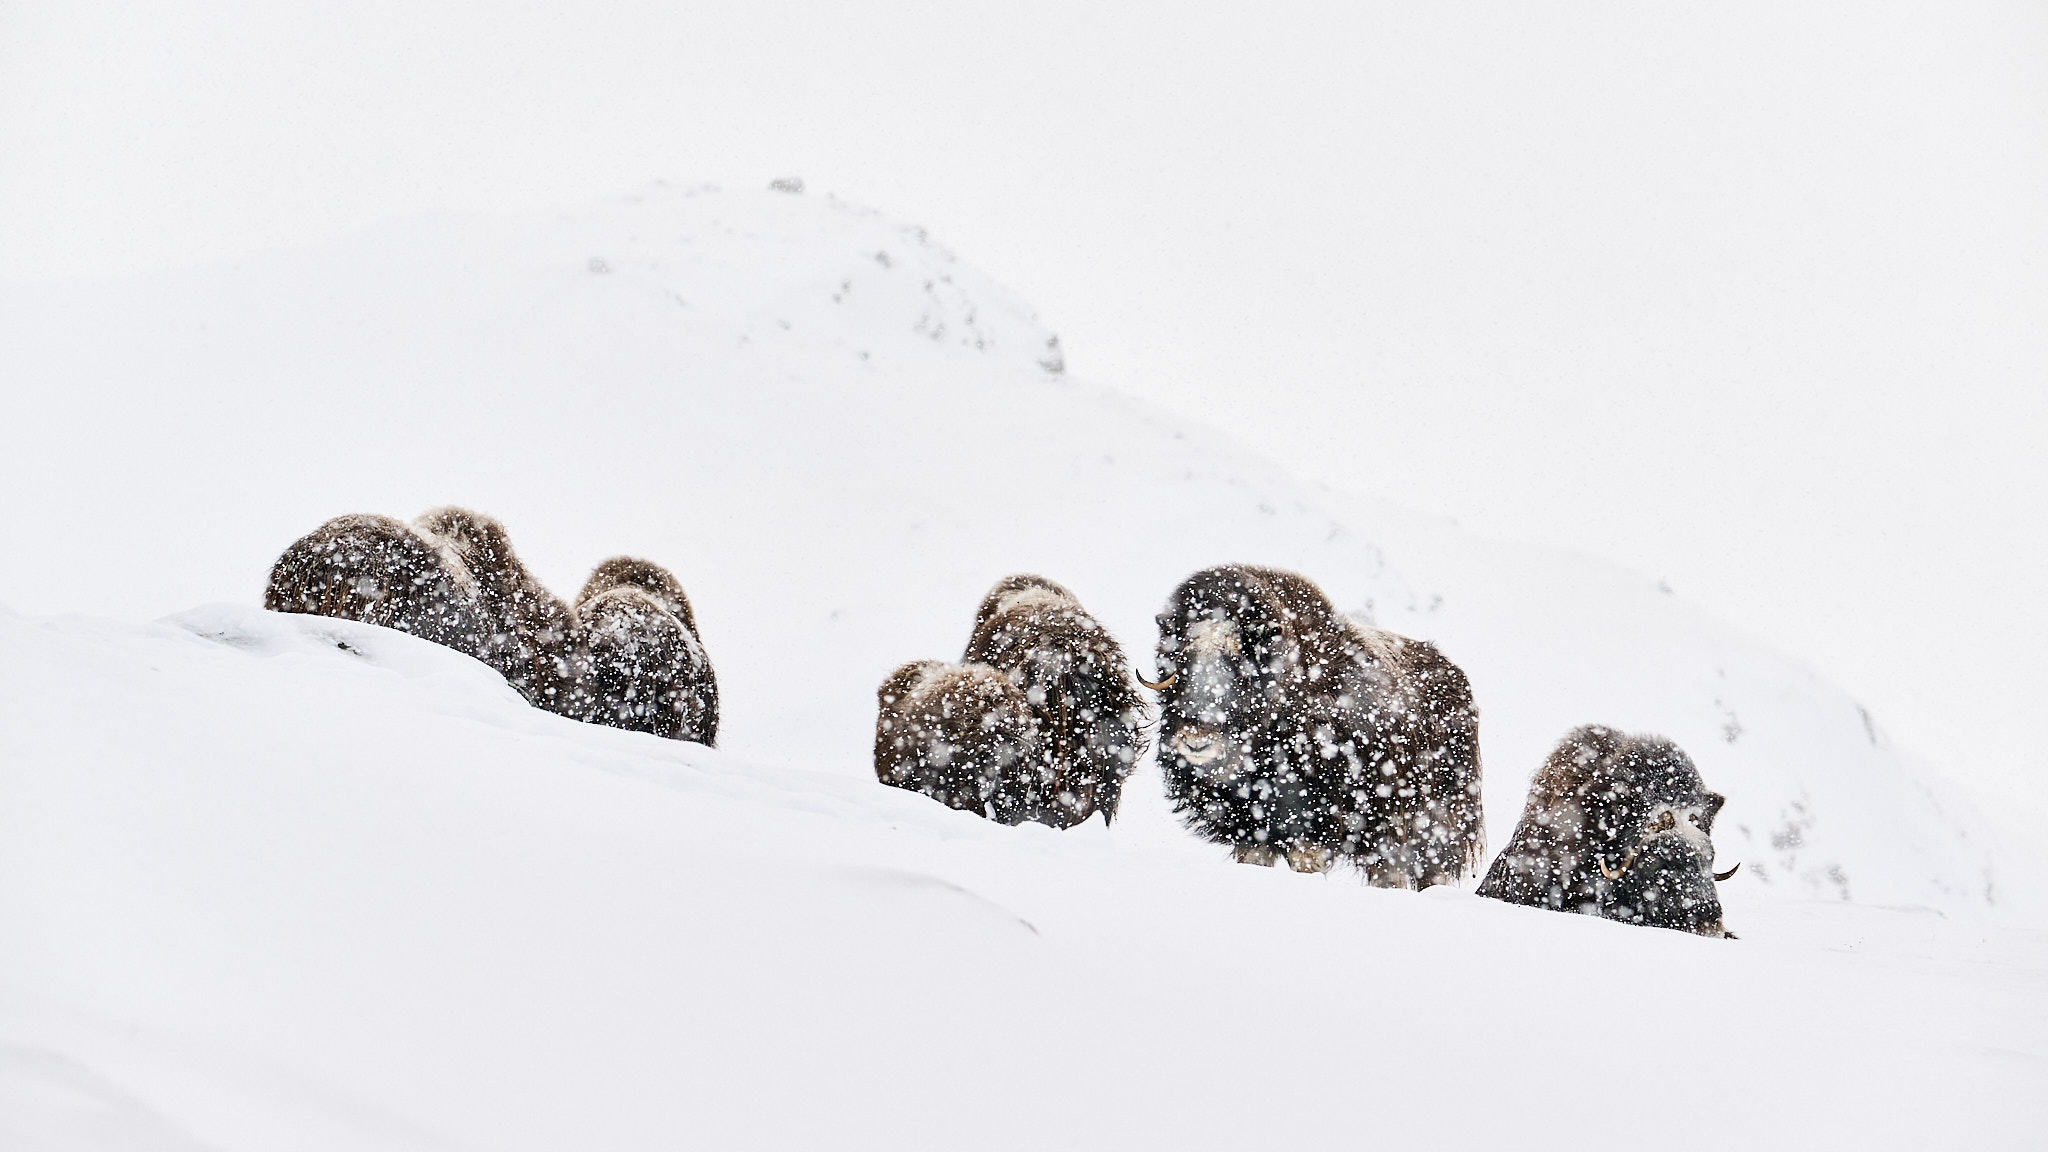
If there are circumstances once you need extra depth of subject, Handbook Mode + Auto ISO additionally permits you that flexibility. Right here, for instance, I observed that I wasn’t getting each muskox within the photograph to be sharp until I finished down a little bit bit, particularly to f/8. It was a fast adjustment, and the digicam compensated for it by boosting the ISO barely.
Please consider the next info: Auto ISO can not go decrease than the bottom ISO. In consequence, you should be cautious to forestall overexposure when utilizing a mixture of a protracted shutter velocity and broad aperture. You particularly must be cautious in very vibrant mild.
In these circumstances, I’ll generally swap to Aperture Precedence mode + base ISO as an alternative, or I’ll choose a quicker shutter velocity (or narrower aperture) in order that overexposure now not happens. Nonetheless, I would really like digicam makers to finally add a parameter to handle this example and mechanically enhance the shutter velocity. I might title this implementation “Good Auto ISO.” (I’d like to notice which you could already accomplish one thing just like this in Aperture Precedence mode + Auto ISO + a customized minimal shutter velocity. However sadly, there is no such thing as a fast solution to change the minimal shutter velocity on this mode on any digicam that I do know of.)
In the end, utilizing Handbook Mode with Auto ISO is without doubt one of the finest methods to realize a excessive stage of management over your wildlife photographs with out worrying about overexposure or underexposure. Most of all, it’s very quick.
Moreover, utilizing Handbook Mode normally might help photographers enhance their abilities with the three predominant variables of images – shutter velocity, aperture, and ISO. This could result in higher long-term outcomes as you higher perceive what you’re doing as a photographer. And all of this with out slowing down the method or supplying you with inaccurate outcomes.
I take pleasure in utilizing Handbook Mode a lot that I even use it when taking panorama photos. It helps me to decelerate and get in the correct mind set for a panorama. As well as, in troublesome circumstances like photographing the Milky Manner at night time or getting the proper texture in shifting water, Handbook Mode is crucial.
I’ve a remaining tip for you. Once you’re placing the digicam in your bag on the finish of the day, or shifting to a unique scene or topic, take the time to pick settings for fast-moving topics. For instance, I normally flip off any publicity compensation, set the shutter velocity to 1/1,000 of a second, and set the utmost aperture of the lens. This offers me with a great start line if I’m in a rush the subsequent time I pull it out of my bag.
In fact, any of the photographs and conditions I used as examples might have been captured utilizing different strategies, and most skilled photographers might have developed a unique approach of working which they’re used to. Nevertheless, I’m fairly assured within the velocity and accuracy of Handbook Mode with Auto ISO. It permits for on-the-fly adjustments extra shortly than the options, and it nonetheless provides practically full management over how the photograph will prove. All of that pays dividends over time!
I hope you loved this text on utilizing Handbook Mode with Auto ISO for wildlife images. In case you have any questions or suggestions, please be happy to let me know within the feedback part beneath.