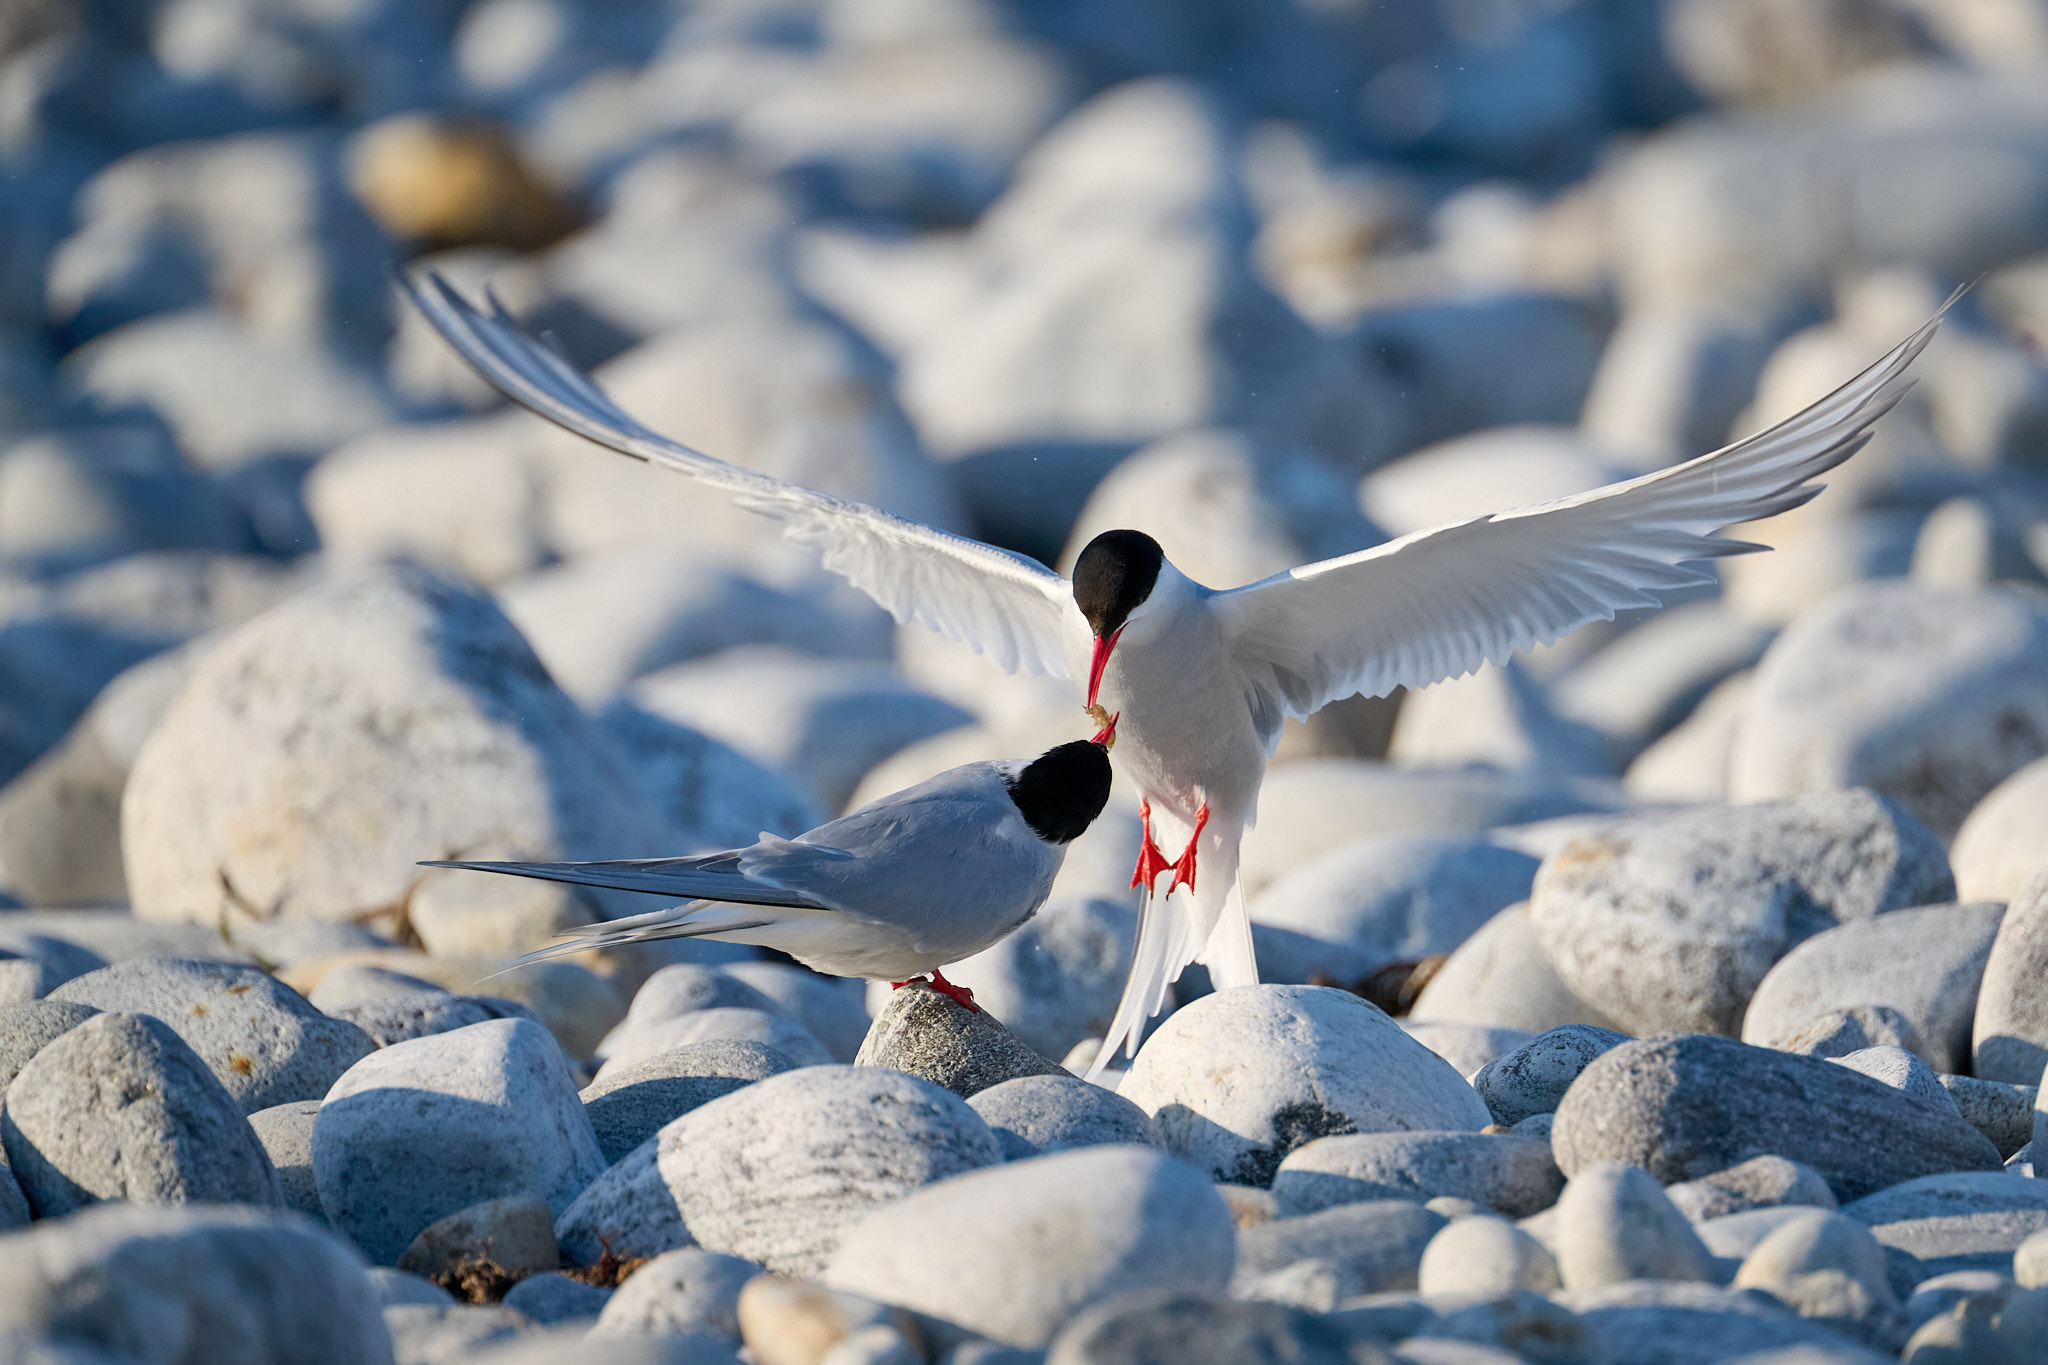
As with every thing in pictures, how one can set your digicam as a wildlife photographer will be subjective. However only a few issues are extra vital – digicam settings and might have an effect on wildlife photographs in a uniquely highly effective approach. This text goals to make clear the most typical settings a newbie wildlife photographer ought to grasp and how one can set them correctly!
Shoot RAW and Keep away from In-Digital camera JPEGs
JPEG is a compressed format, which implies that knowledge is squeezed to scale back the file measurement and it solely captures 8 bits of shade. Moreover, the digicam applies noise discount and sharpening to the file utilizing its inside algorithms, which don’t match the capabilities of contemporary software program. Additionally, JPEG limitations make the impact of your white stability settings and shade house decisions irreversible.
This doesn’t imply that it’s inconceivable to take good photographs utilizing JPEG, or that you’ll by no means want to make use of them. Skilled sports activities photographers who want to supply the editorial workforce with their pictures in a short time certainly profit from this file format. And a few cameras have options that solely apply to JPEGs, like a pre-release seize mode. Nonetheless, I take into account capturing in JPEG to require far more work and experience than capturing RAW in case you are to get good outcomes. Instantly that you must take into consideration many extra settings than normal when capturing JPEG, since so many issues are now not reversible in post-processing.
I’m not a fan of heavy post-production and I don’t even have Photoshop or some other pixel-level editor put in on my Mac. Nonetheless, I imagine it’s essential to have the ability to optimize my recordsdata and work with them to attain the most effective outcomes. And, on the finish of the day, an out-of-camera JPEG simply limits this flexibility an excessive amount of as a consequence of compression and irreversible settings utilized to the recordsdata.
Frankly talking, I believe even sports activities photographers who must ship fast JPEGs on a deadline are largely capturing RAW+JPEG lately.
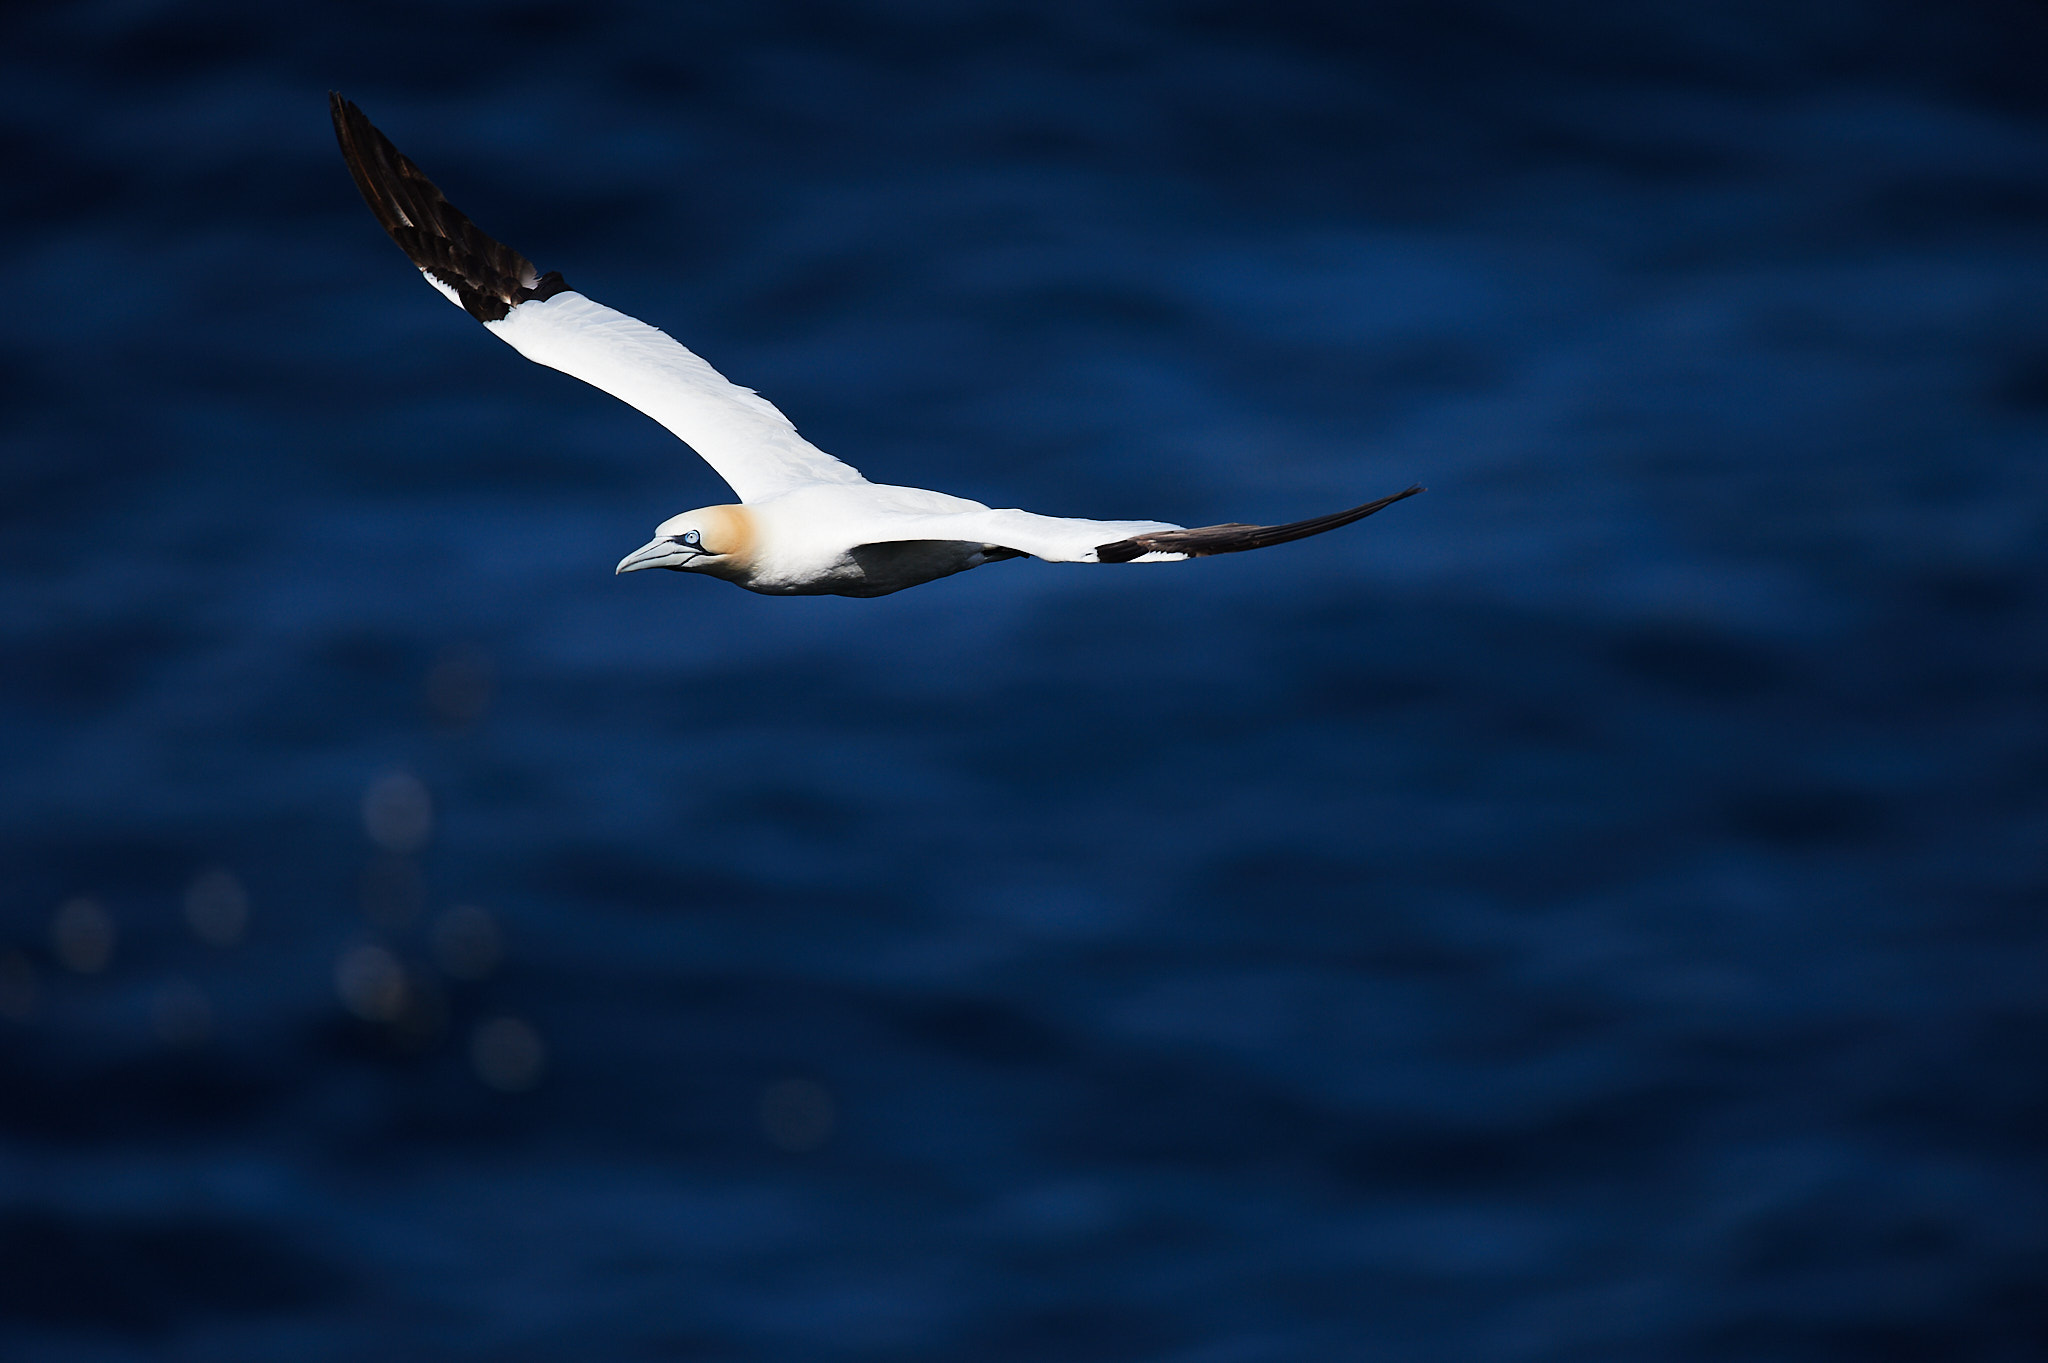
I’ve one small be aware. Cameras lately won’t present you (in dwell view or when reviewing a picture) the direct RAW knowledge you might be capturing. They’ll as a substitute present you a preview, and a histogram, based mostly upon your JPEG settings. So, it’s best to nonetheless decide all the assorted JPEG settings – issues like vignetting correction, image model, white stability, and many others. – rigorously, so that you’re seeing a helpful preview of your pictures. (For instance, I wish to set my Image Management to Impartial in order that I’m precisely seeing how a lot spotlight element I’m capturing, and whether or not I blew out any of the highlights in a photograph. Particularly in instances just like the picture of the gannet under, the place spotlight element is vital however troublesome to seize.)
Stability the “Publicity Triangle” Correctly
As with each style of pictures, it’s essential to set the right shutter pace, aperture, and ISO when photographing wildlife. These are also known as the publicity triangle though ISO will not be, by the standard definition, a part of publicity.
These linked articles clarify the ideas of publicity in additional element than I can do right here. I counsel that you simply learn them in case you are not already very aware of any of these ideas.
However how must you set them for wildlife pictures? It may be a problem. Photographing wildlife typically includes capturing the behaviors and quick motion of topics, which requires the usage of quick shutter speeds and infrequently larger ISOs. However generally, animals keep completely nonetheless or transfer slowly, permitting you to make use of a slower shutter pace and a decrease ISO.
To be ready for each of those conditions, I counsel utilizing guide mode with Auto ISO. This manner, you’ll be able to regulate the shutter pace and aperture, and the digicam will choose the mandatory ISO.
Additionally, you will take management over publicity compensation to make sure that you don’t blow out any delicate particulars in your topic, like shiny feathers. It’s vital to do not forget that the digicam’s instructed publicity is predicated on particular algorithms and will not at all times replicate your creative or technical objective.
Know (and Pre-Set) Your Digital camera
Understanding your digicam totally – and with the ability to shortly regulate its settings with out losing time – is essential when capturing a particular second in wildlife pictures. This may imply the distinction between getting the right shot and lacking it fully.
In case your digicam permits, it’s best to take into account saving a preset for sure conditions that you’re more likely to seize. For instance, you could possibly save a preset to be for birds in flight and one other for stationary animals.
How to do that? On some cameras, you’ll be able to straight save U1/U2/U3 or C1/C2/C3 settings to the mode dial itself, whereas on different cameras it should be carried out through menu banks. It’s additionally vital to recollect what every of those settings is linked to!
Moreover, for these utilizing lengthy telephoto lenses, it’s helpful to apply framing pictures on the transfer. This includes shortly elevating the digicam, pointing it in direction of the topic, and centering it inside the viewfinder as quick as you’ll be able to. Apply at varied focal lengths so that you simply get a superb psychological image of how far “zoomed in” every focal size is, saving you time when swapping lenses or zooming. Apply and mastering your coordination can considerably scale back the time required to seize a shot, rising the chance of success!
Additionally belonging to this matter is knowing how your digicam handles excessive ISOs, when to favor utilizing the digital or mechanic shutter, how one can program customized settings to make your work simpler and sooner, and so forth.
Grasp Autofocus
At this time’s cameras have extraordinarily high-performance autofocus, however it may be troublesome to navigate the completely different choices.
The primary is selecting between single-servo autofocus (AF-S in Nikon slang) or continuous-servo autofocus (AF-C for Nikon).
My recommendation is at all times to set the digicam for steady autofocus. Some topics will nonetheless profit from a single second of autofocus moderately than focusing repeatedly (like a chicken sitting stationary on a department). That’s why I strongly advocate switching to back-button autofocus, and disabling autofocus from the shutter button itself. As a substitute, you’ll use a distinct finger – usually the thumb – to function a distinct button in your digicam, which can say one thing like AF-On. This is a vital setting as a result of it permits you to select when to focus and, if desired, recompose after focusing as in the event you had been utilizing single-action autofocus. However on the identical time, it permits you to use steady focus and comply with the topic when that you must.
Subsequent, that you must select which autofocus areas to make use of. This may be completely different in case you are working with a DSLR or a mirrorless digicam, because the latest mirrorless cameras usually tend to have topic recognition autofocus, whereas DSLRs have a tendency to trace with extra conventional algorithms. I’ve used mirrorless for a very long time and benefit from the topic recognition options, however DSLRs haven’t stopped working and I’ve taken tens of 1000’s of photographs I get pleasure from with them!
In case your digicam has trendy topic recognition autofocus, my recommendation is to make use of a large space – even one protecting the whole body – together with topic recognition. In case your digicam doesn’t, use a small focus level as a substitute and manually place it over the topic’s head. Then permit a conventional algorithm like 3D monitoring to comply with it throughout the body.
In fact, these are simply the start line, and there are different methods to assist your digicam achieve quick, correct focus if these approaches fail. Nonetheless, they’re in depth and can should be addressed in a separate article. (Libor has already mentioned some approaches for Nikon Z customers right here.)
Set the White Stability Correctly in Put up-Processing
When working in RAW, the parameter of white stability will not be as essential to set correctly in your digicam. It nonetheless impacts the histogram and the preview of the picture in your digicam display screen, however it may be adjusted later in post-processing in the event you set the unsuitable white stability, with no loss in picture high quality. This is the reason I depart it on auto.
Nonetheless, it’s nonetheless some of the vital settings to work on. Many of the work is simply carried out again at your pc as a substitute.
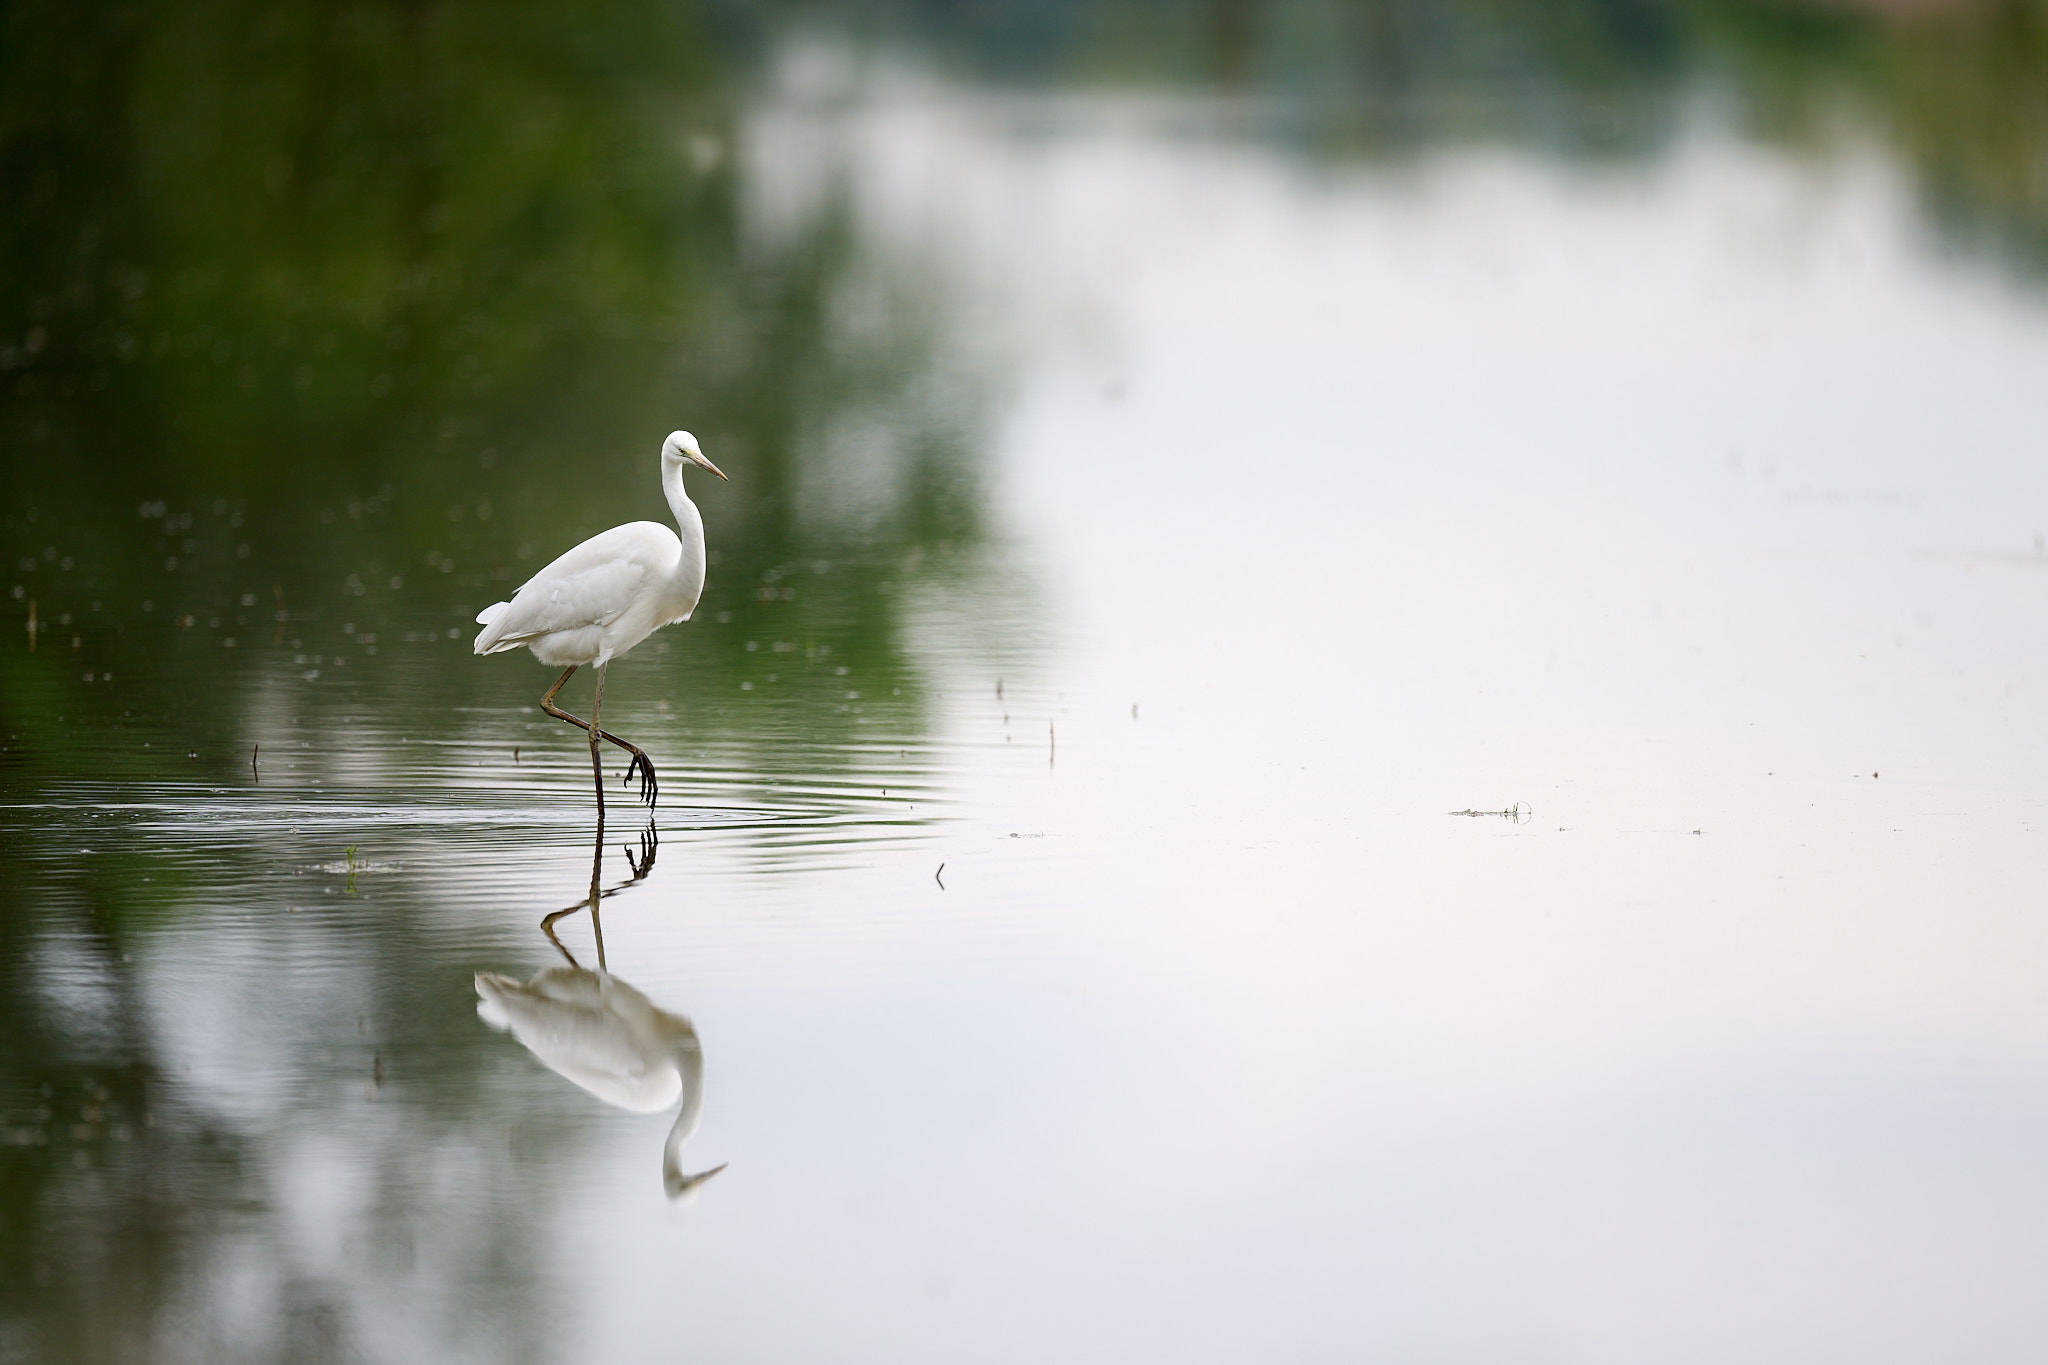
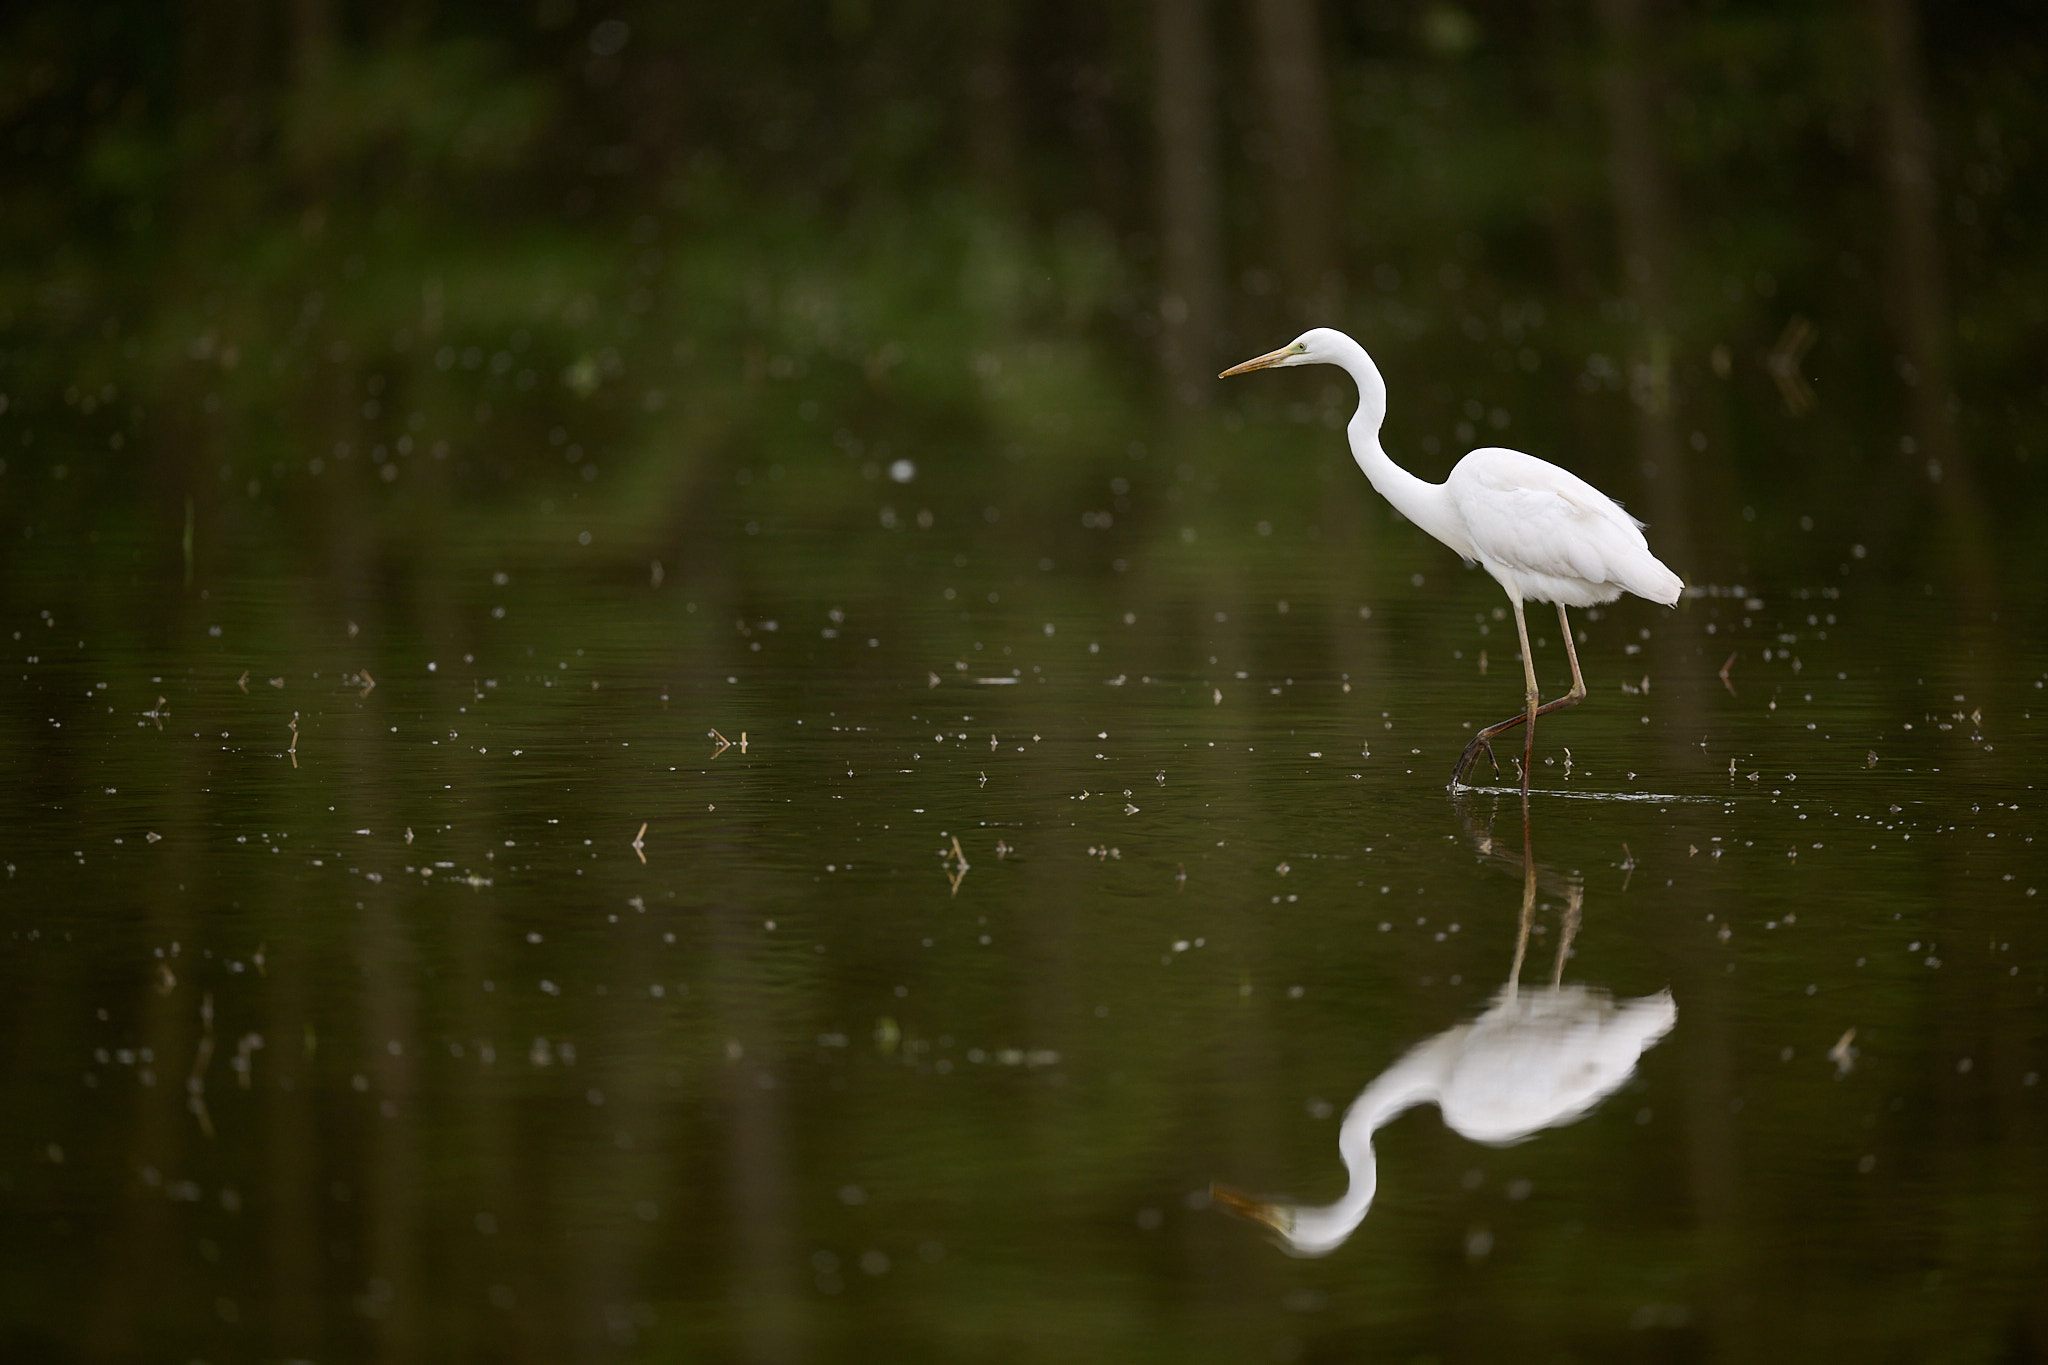
To pick out the best white stability when post-processing your photographs, I like to recommend utilizing a calibrated monitor, ideally of excellent high quality. Additionally, I like to recommend rising the saturation within the software program prior to creating your white stability changes. This lets you intensify any shade shifts and make your changes extra evident. Then, return to an ordinary worth of saturation when carried out. By this strategy, I restored completely white feathers within the White Heron image I took in open shadow.
Capturing correct colours is a high quality objective, however there’s a additional, far more vital motive to set the white stability correctly. It’s the creative alternative of the photographer. Does the picture symbolize a state of affairs of blue mild after sundown? Or is it a fiery sundown? Or backlight with a low-rising solar? In these instances, the temper of the picture could also be extra vital than “correct” colours. Decreasing the white stability values makes a cool temper cooler; elevating it makes every thing hotter.
Briefly, the white stability, along with the publicity, calls for creative choices by the photographer as a result of helps outline the temper of the picture. It isn’t straightforward to make so many troublesome decisions, however apply helps lots.
I exploit the next photos to additional illustrate this idea. It was a chilly morning early in January, a bit after the dawn with some fog remaining decrease to the river water.
The primary file is with a “sunny” white stability setting, the second with “shade” white stability. I don’t like both of them.
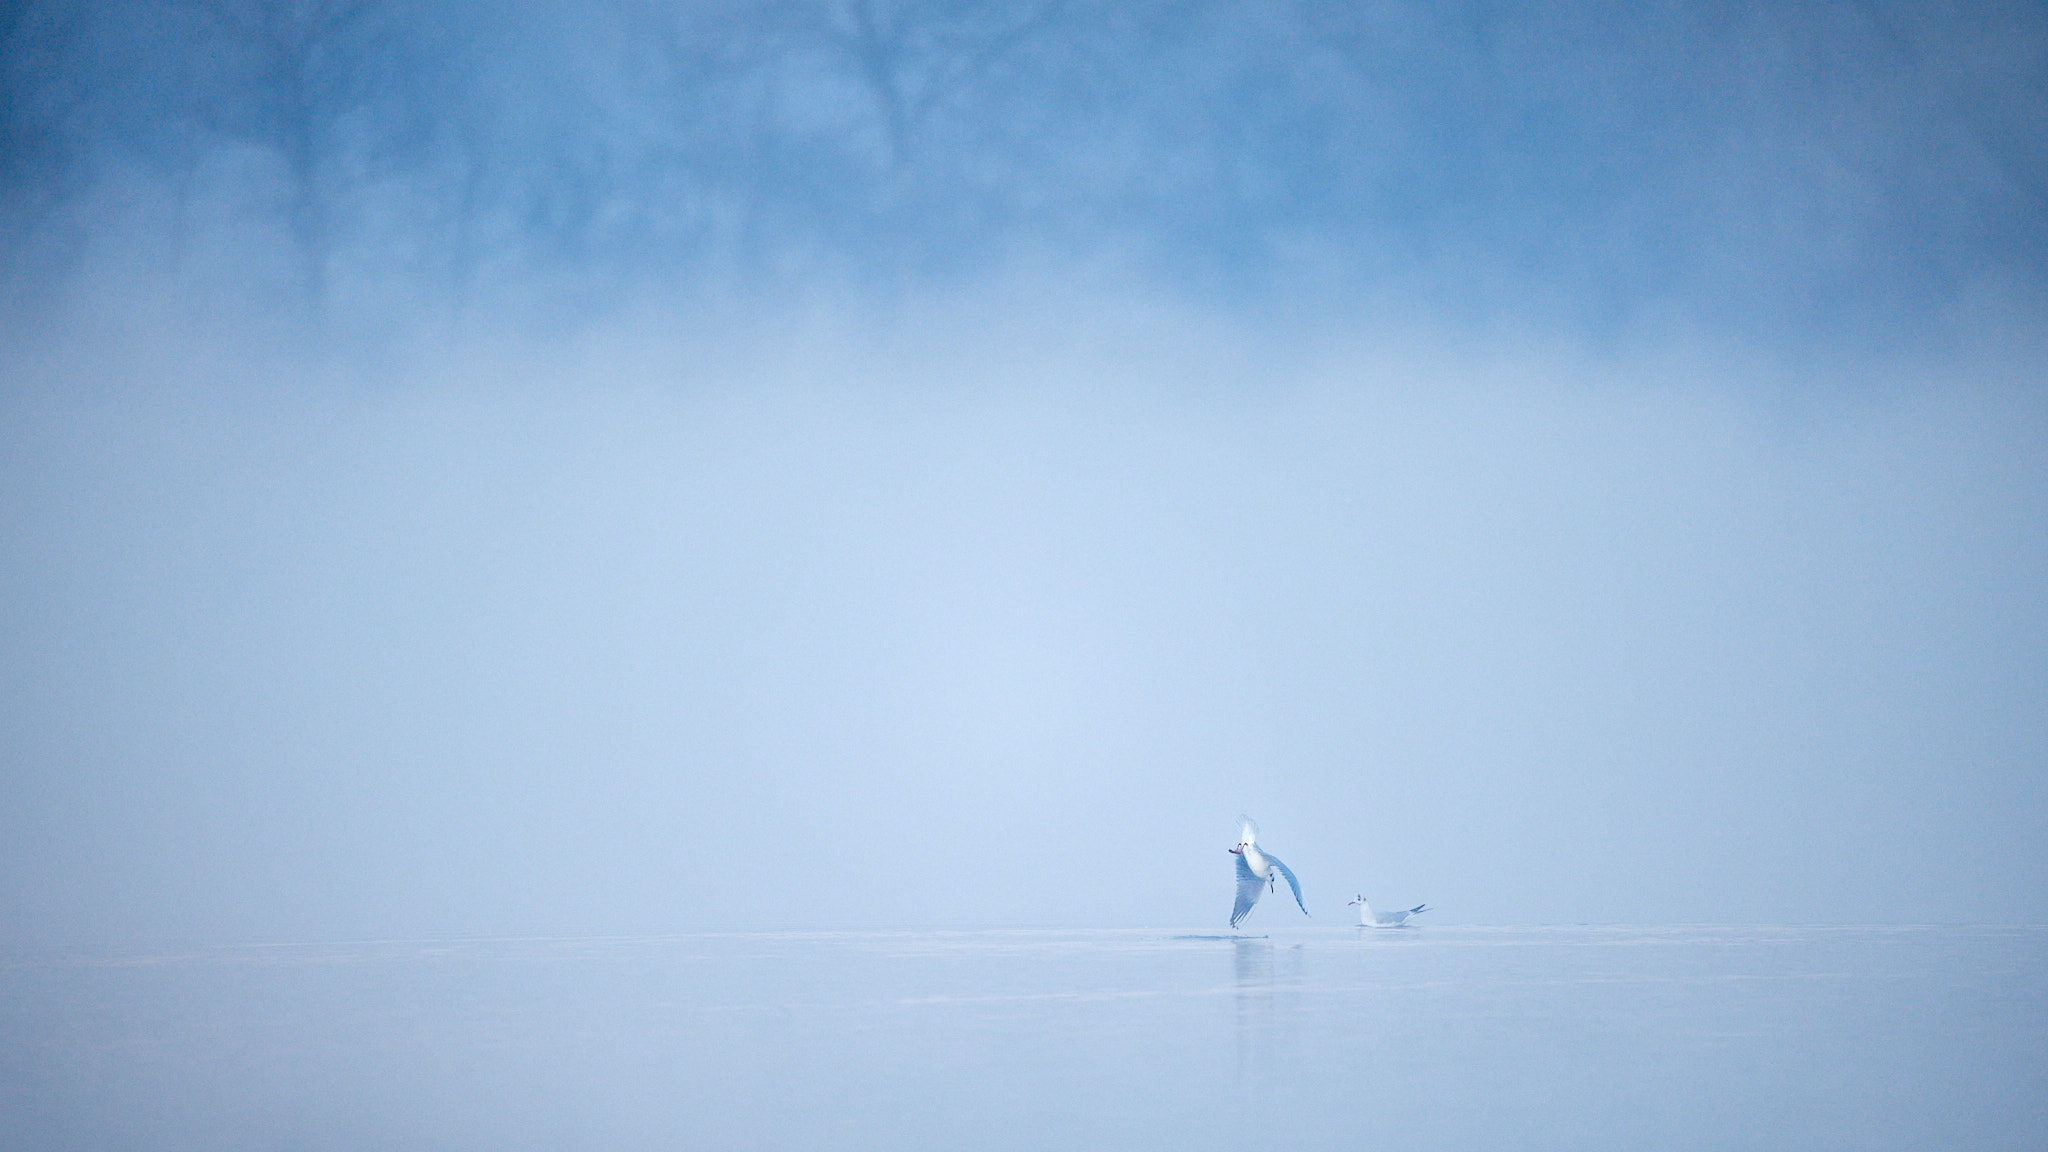
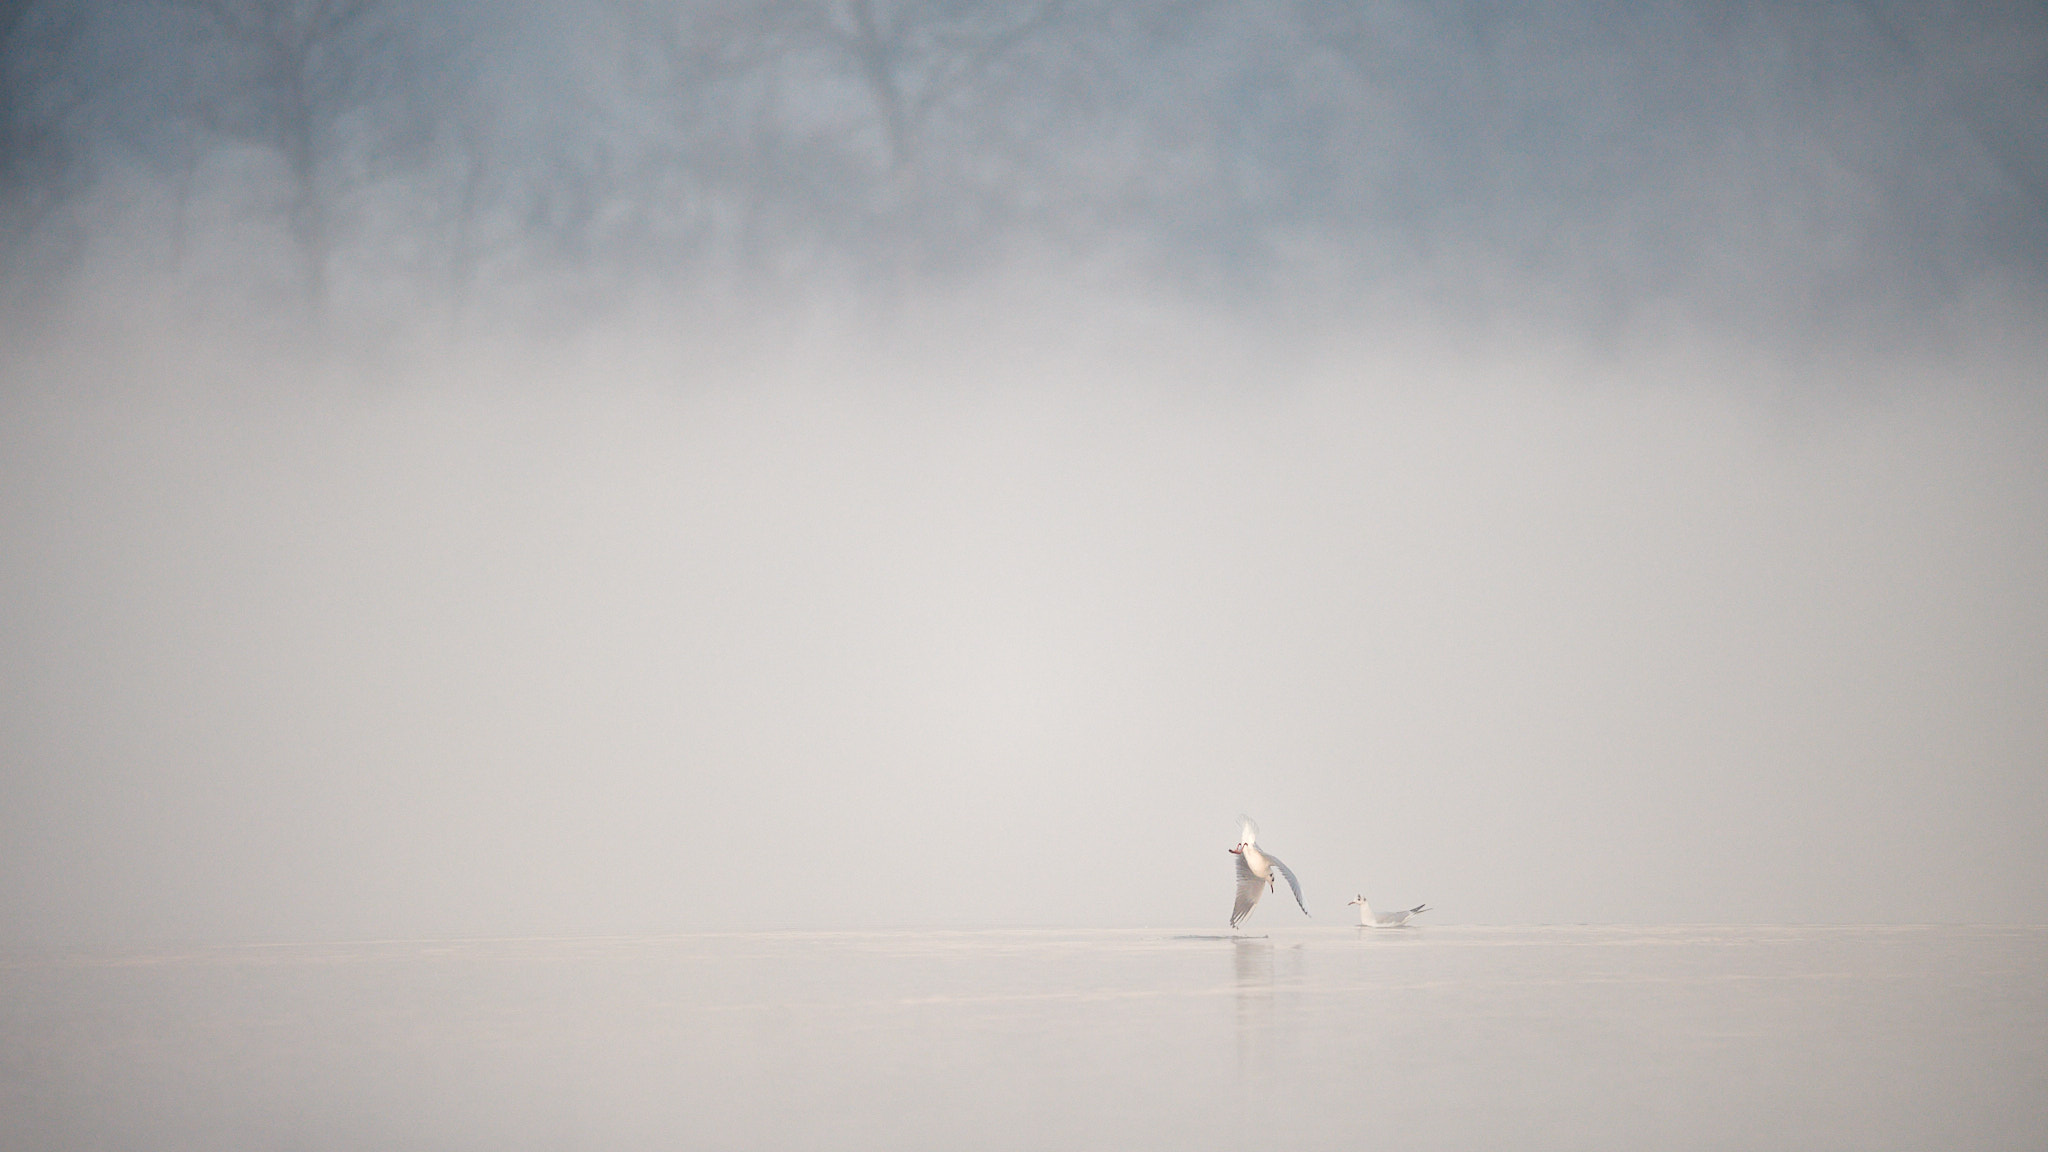
My private alternative, based mostly on my style, is kind of in between “sunny” and “shade”. It’s the following:

As a result of white stability is an inventive alternative, the picture you favor could also be completely different. However that solely additional illustrates how vital white stability is. Even if you shoot RAW and regulate white stability again at your pc, it’s nonetheless some of the vital “digicam settings” to me.
Conclusion
Wildlife pictures is a difficult style of pictures that always calls for mastery of varied ideas and data. In consequence, your preliminary makes an attempt could also be disappointing, however new wildlife photographers shouldn’t be discouraged by this. Ultimately, there are just a few digicam settings to study. Apply will do the remainder to enhance your abilities.
I hope you loved this text on the important digicam settings any newbie wildlife photographer ought to apply, and a few primary beginning factors for these settings. When you have any questions or suggestions, please be at liberty to let me know within the feedback part under.