On the subject of digital camera settings, shutter velocity is crucial variable for fowl pictures. That’s as a result of it’s the setting that it is advisable management essentially the most. Optimizing your shutter velocity is actually the one technique to maximize the quantity of sunshine you’re getting, whereas additionally freezing the fowl’s movement.
Why Shutter Pace?
In some genres of pictures, aperture is crucial digital camera setting by far. For instance, in portrait pictures, a large open aperture can provide you a dreamy look whereas a slender aperture could also be extra acceptable for an environmental portrait with front-to-back focus. Panorama photographers additionally want to pick out their aperture rigorously to attain the best depth of discipline.
Chook pictures is totally different. Though there are some notable exceptions, you’ll often be on the lens’s widest aperture more often than not. To not point out that wildlife lenses are often on the sluggish aspect within the first place, with most apertures of round f/4 to f/5.6 (except you’re very fortunate and have an f/2.8 lens). Even with an f/2.8 lens, you’ll usually keep within the f/2.8 to f/5.6 vary for many birds.
It’s not that depth of discipline is unimportant in fowl pictures. Nevertheless it’s often acceptable and even desired to have a part of the scene out of focus when photographing birds. And there may be often so little gentle that stopping down would require too excessive of an ISO. Particularly for birds in flight, you’ll almost all the time be on the widest aperture, and most of your consideration will must be in your selection of shutter velocity.
Thus, other than ISO, which doesn’t have an effect on the quantity of sunshine getting into your digital camera, shutter velocity is the largest variable you can management in fowl pictures. You should use it to freeze movement or depart some movement blur in intentionally, and you may try to make use of longer shutter speeds to realize that further little bit of sunshine.
Since a fowl might be wherever from nonetheless to flying at over 300 kilometers an hour, it is advisable choose your shutter velocity appropriately. Now, I already talked about shutter velocity slightly in my article on the most effective settings for fowl pictures, and Libor talked about it in his settings for birds in flight pictures article. However I’m going to go in slightly extra depth in the present day and focus simply on shutter velocity.
Normal Values
There are some commonplace values for shutter velocity that will provide you with reliably sharp images in quite a lot of situations. They’re the “set it and (principally) neglect it” settings for shutter velocity. Here’s a tough information:
| Scenario | Secure Advice | Typical Vary |
|---|---|---|
| Perched, nonetheless birds | 1/400 | 1/40 – 1/640 |
| Strolling or slowly shifting birds | 1/800 | 1/500-1/1500 |
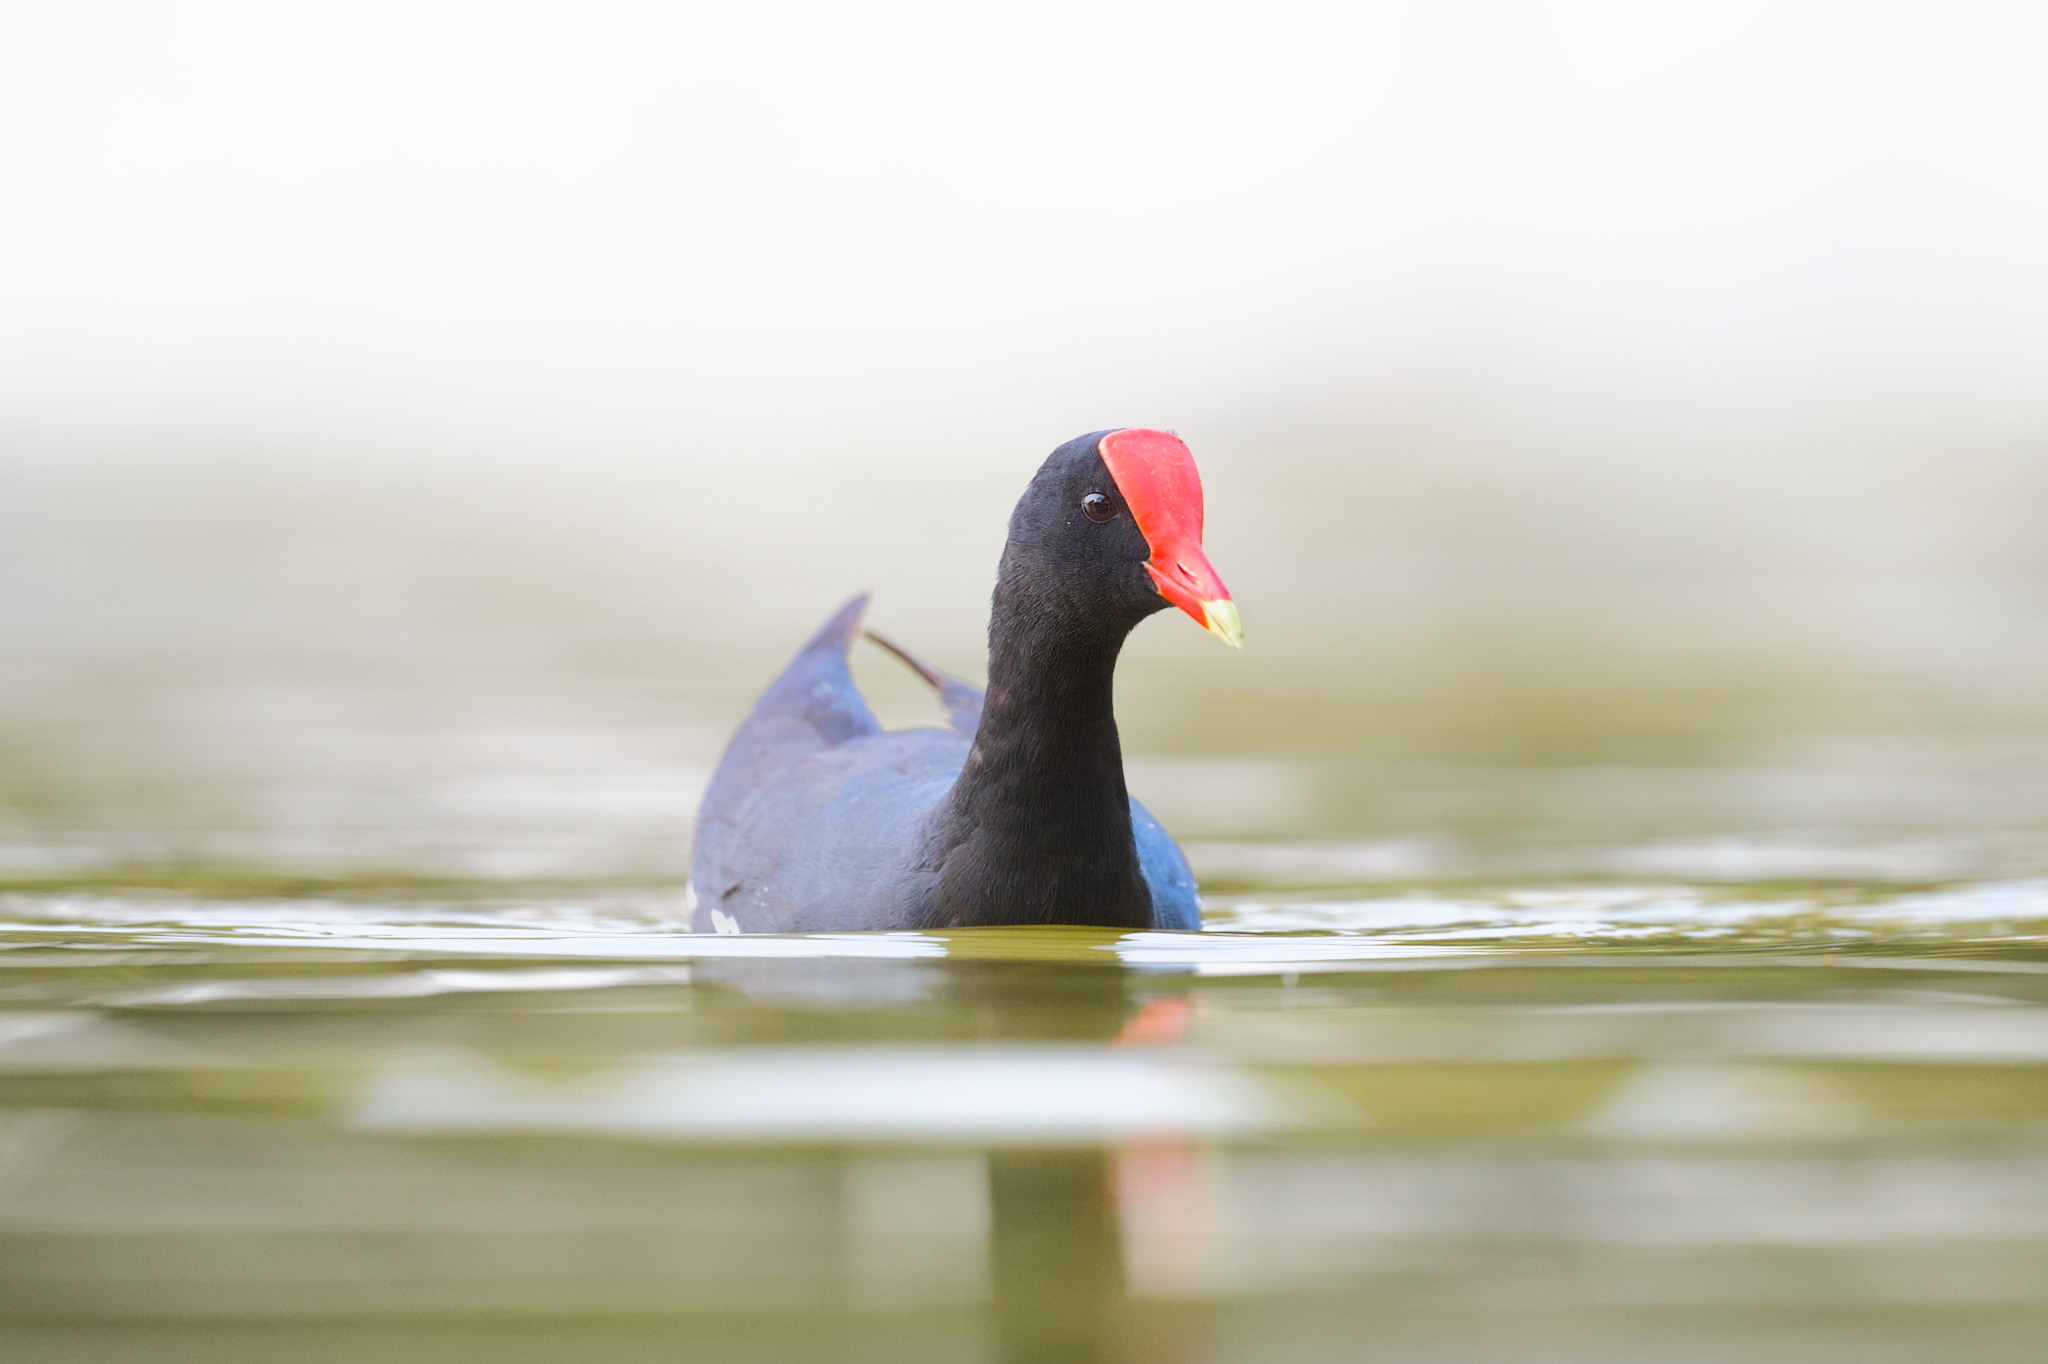
| Operating or swimming birds | 1/1200 | 1/800-1/1500 |
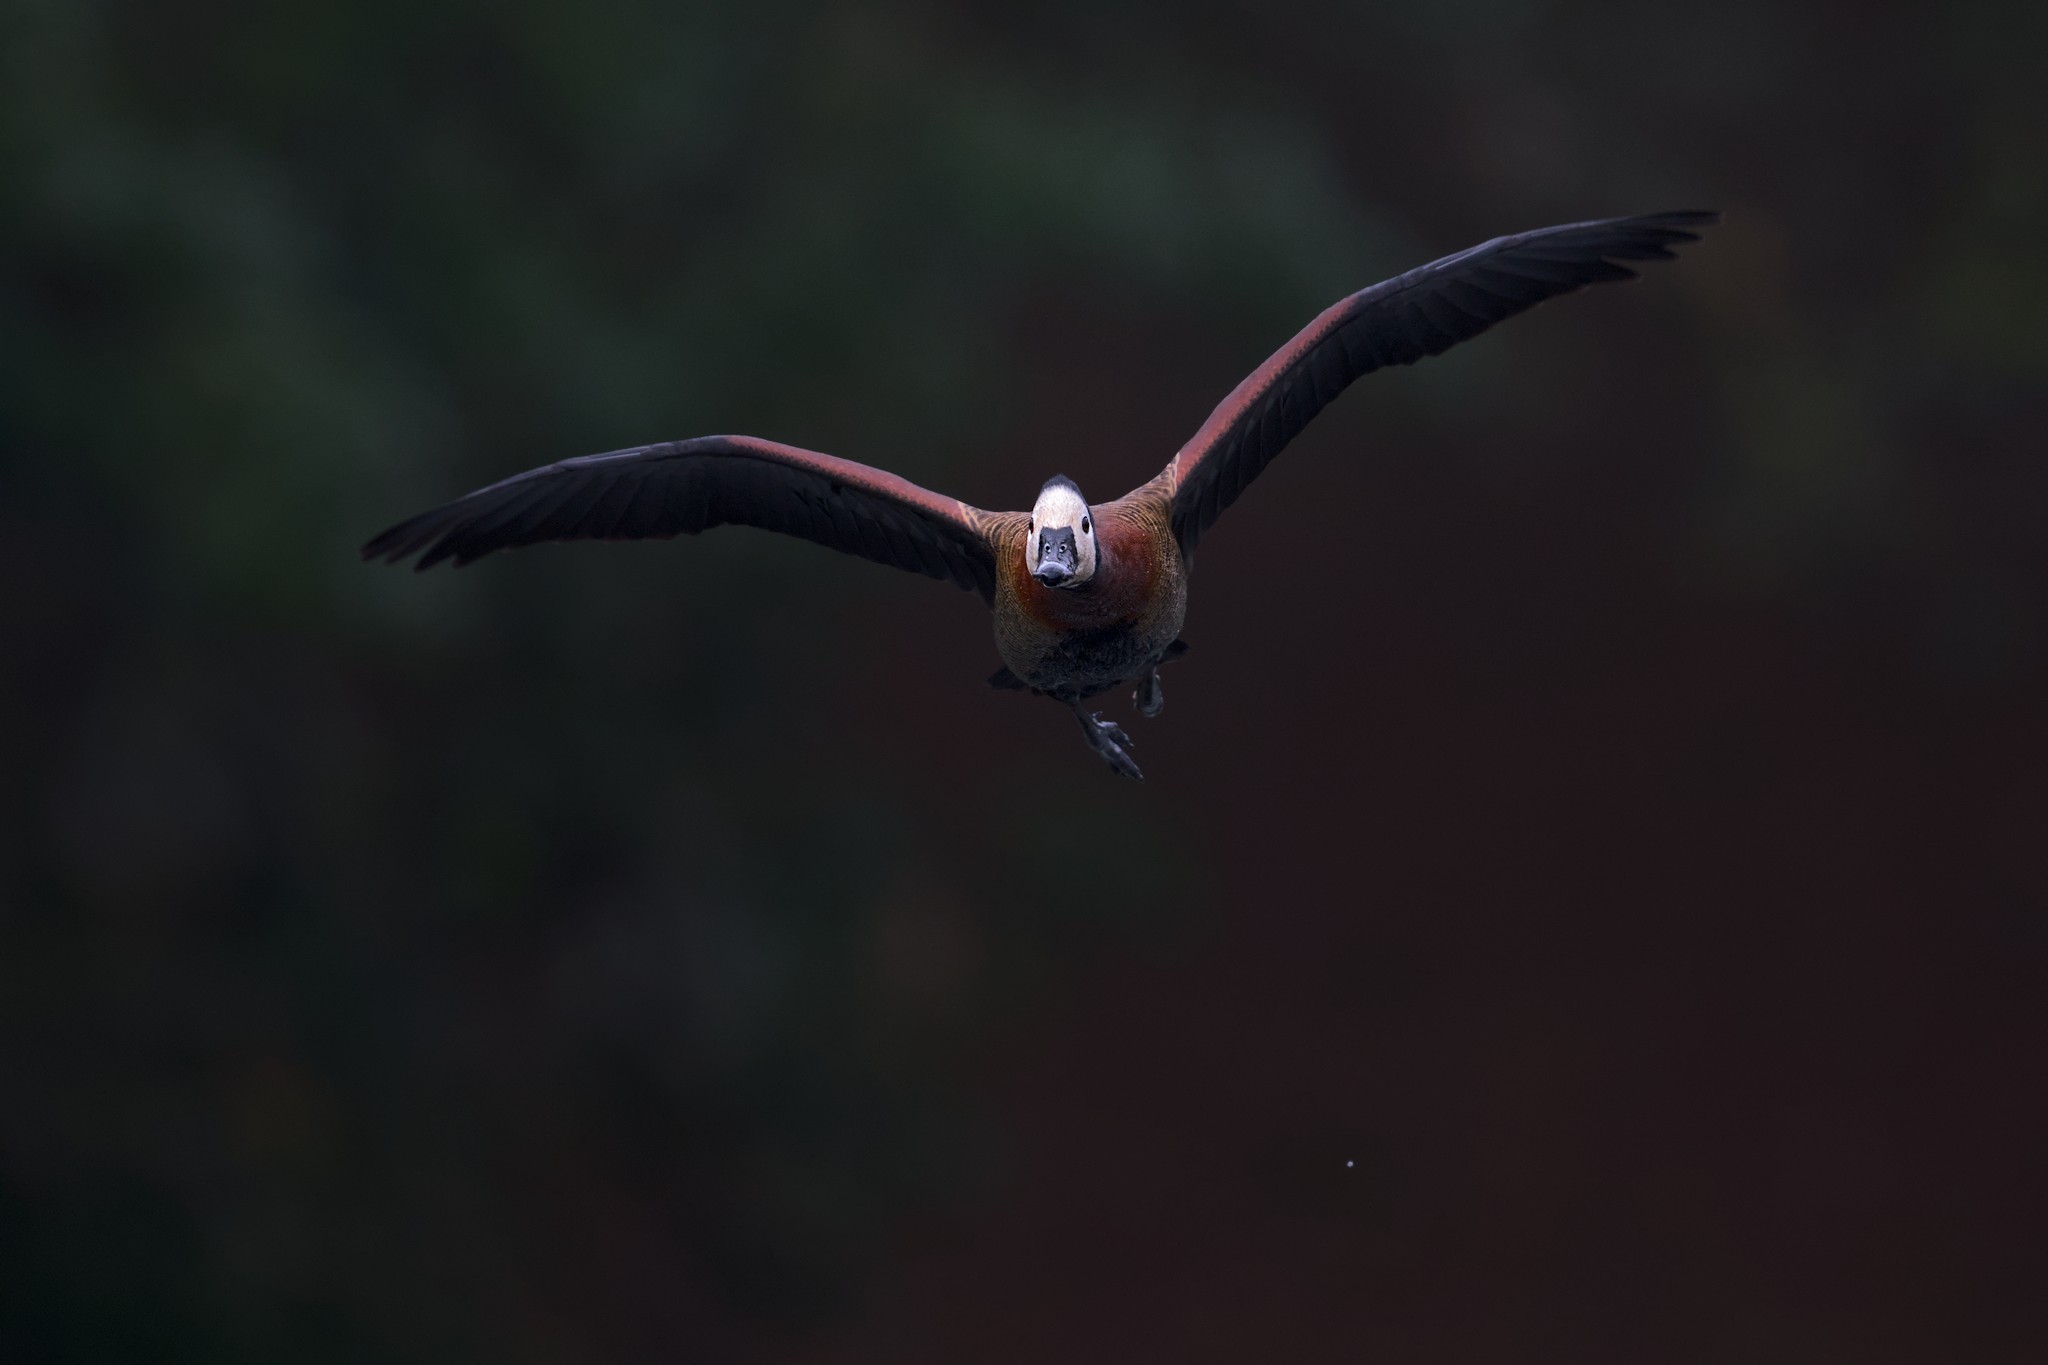
| Birds in flight, sluggish | 1/2500 | 1/1600-1/3200 |
| Birds in flight, quick | 1/3200 | 1/2500-1/8000 |
You may set these shutter speeds in a couple of other ways, however I like to recommend utilizing handbook mode with Auto ISO. Then you possibly can set the aperture (usually the widest accessible one) and punctiliously choose your shutter velocity, whereas the digital camera floats the ISO to provide the correct publicity. After all, if the sunshine could be very sturdy and the digital camera is overexposing even at base ISO, then it’s a good suggestion to shortly change to aperture precedence as an alternative and let the digital camera select a sooner shutter velocity robotically. However handbook + Auto ISO mode works for me 99% of the time.
Going Past the Secure Shutter Pace
Within the uncommon instances for when there’s really an abundance of sunshine for fowl pictures, you might find yourself utilizing a sooner shutter velocity than the “secure suggestions” that I listed above. Like when photographing straight towards daylight mirrored on the water, you might be at 1/4000 and even 1/8000 second simply to tame the sunshine. However are there instances the place it’s best to go longer than the secure shutter velocity?
Completely. The primary case is if you need a little bit of movement blur. Sometimes, if a fowl is shifting and also you need a extra summary look, you possibly can blur some half (often the wings) or the entire fowl to inject a little bit of impressionism in your fowl pictures.
However there’s another excuse to go longer than the secure shutter velocity: when it is advisable seize extra gentle. Sure, there’s a excessive likelihood of movement blur (both out of your digital camera shake or from topic motion). Nevertheless it’s nonetheless worthwhile to attempt typically.
The method is straightforward. When you have a sitting or perched fowl, and they’re very nonetheless, it may be potential to make use of shutter speeds for much longer than you’ll anticipate. I’ve seen sharp images all the way down to 1/100, 1/50, and even 1/20 second typically. It helps to have a tripod, though it’s even potential to shoot handheld in case your digital camera or lens has good vibration discount.
First, begin with a shutter velocity that’s secure for you – most likely round 1/320-1/400, relying in your topic and whether or not you’re handholding the digital camera or utilizing a tripod. After that, progressively use an extended shutter velocity in a sequence: 1/250, 1/200, 1/125, 1/80, and so on. and take 4-5 pictures with every, rigorously supporting your digital camera and lens. It really works even higher when you’re resting on the bottom, and naturally it really works greatest with a tripod. Even and not using a tripod, although, I’ve efficiently gone into the 1/50-1/80 vary earlier than.
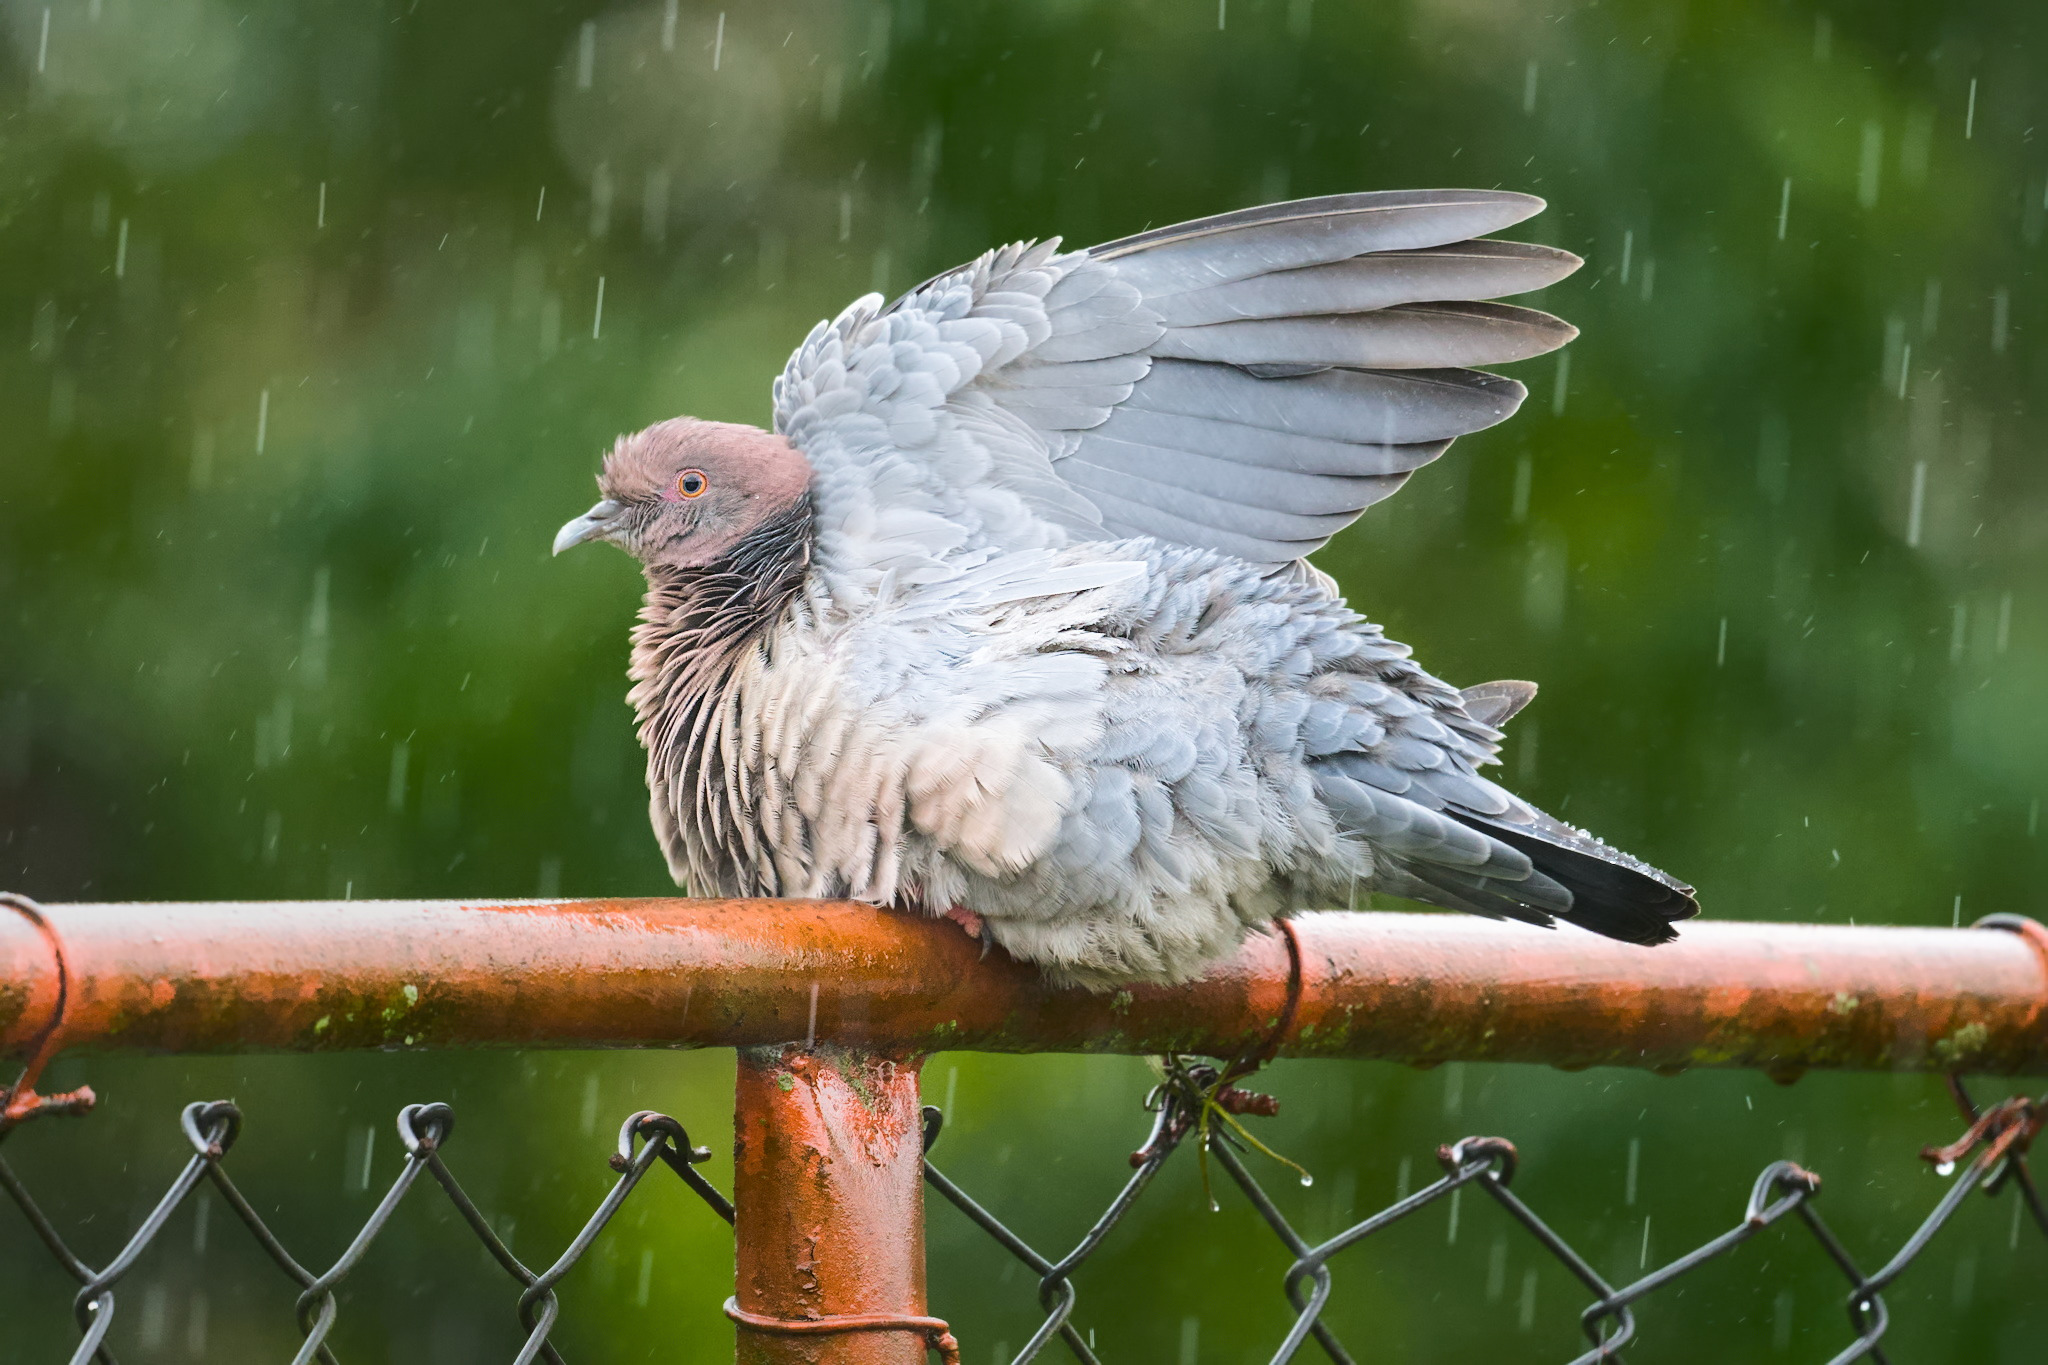
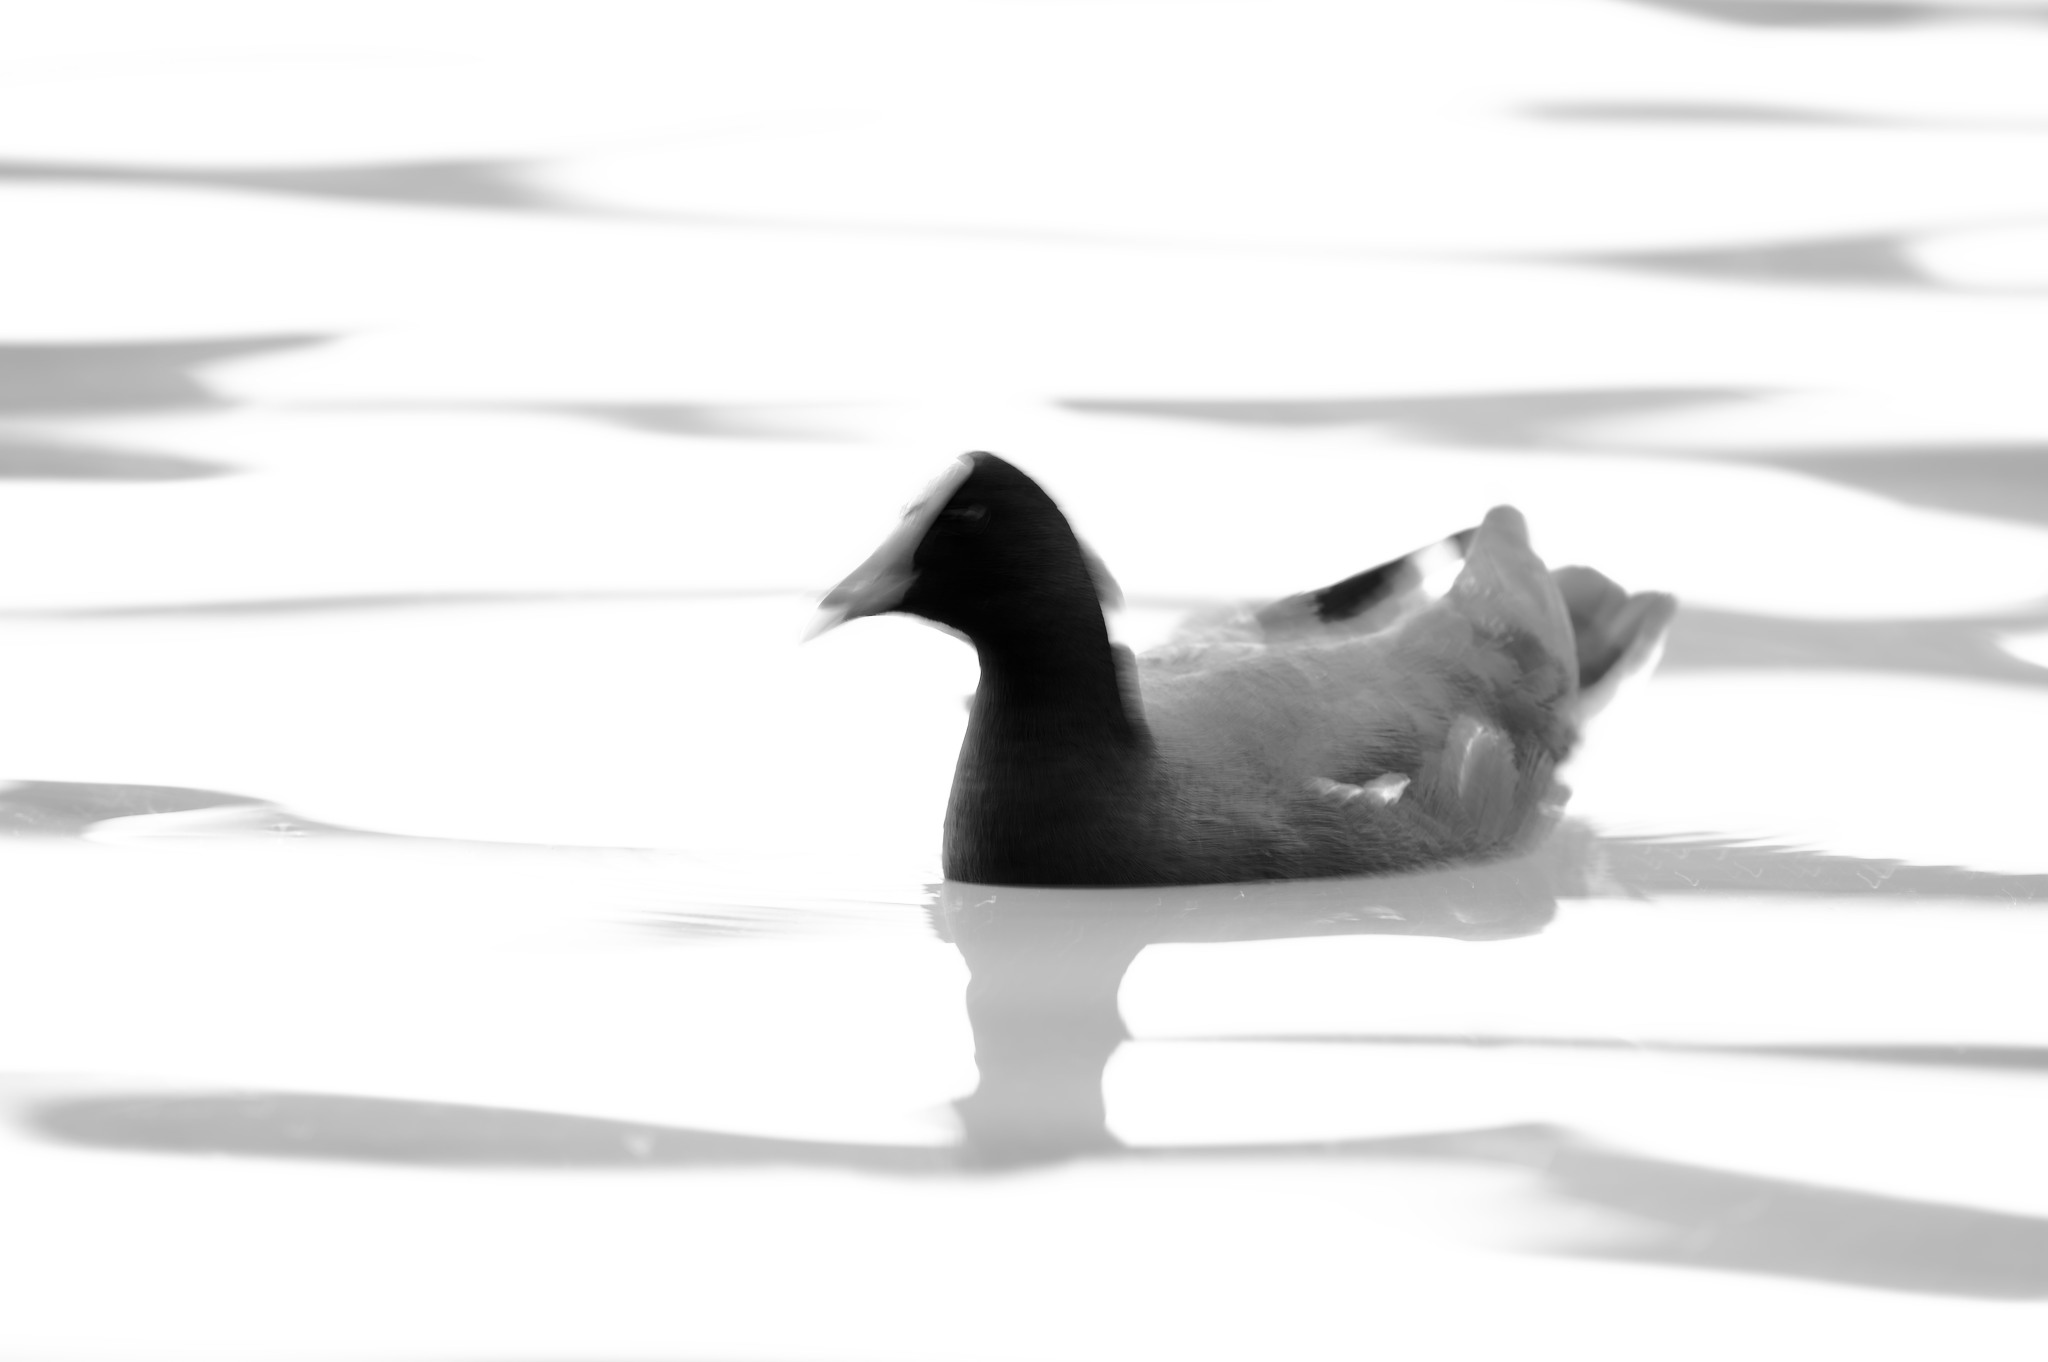
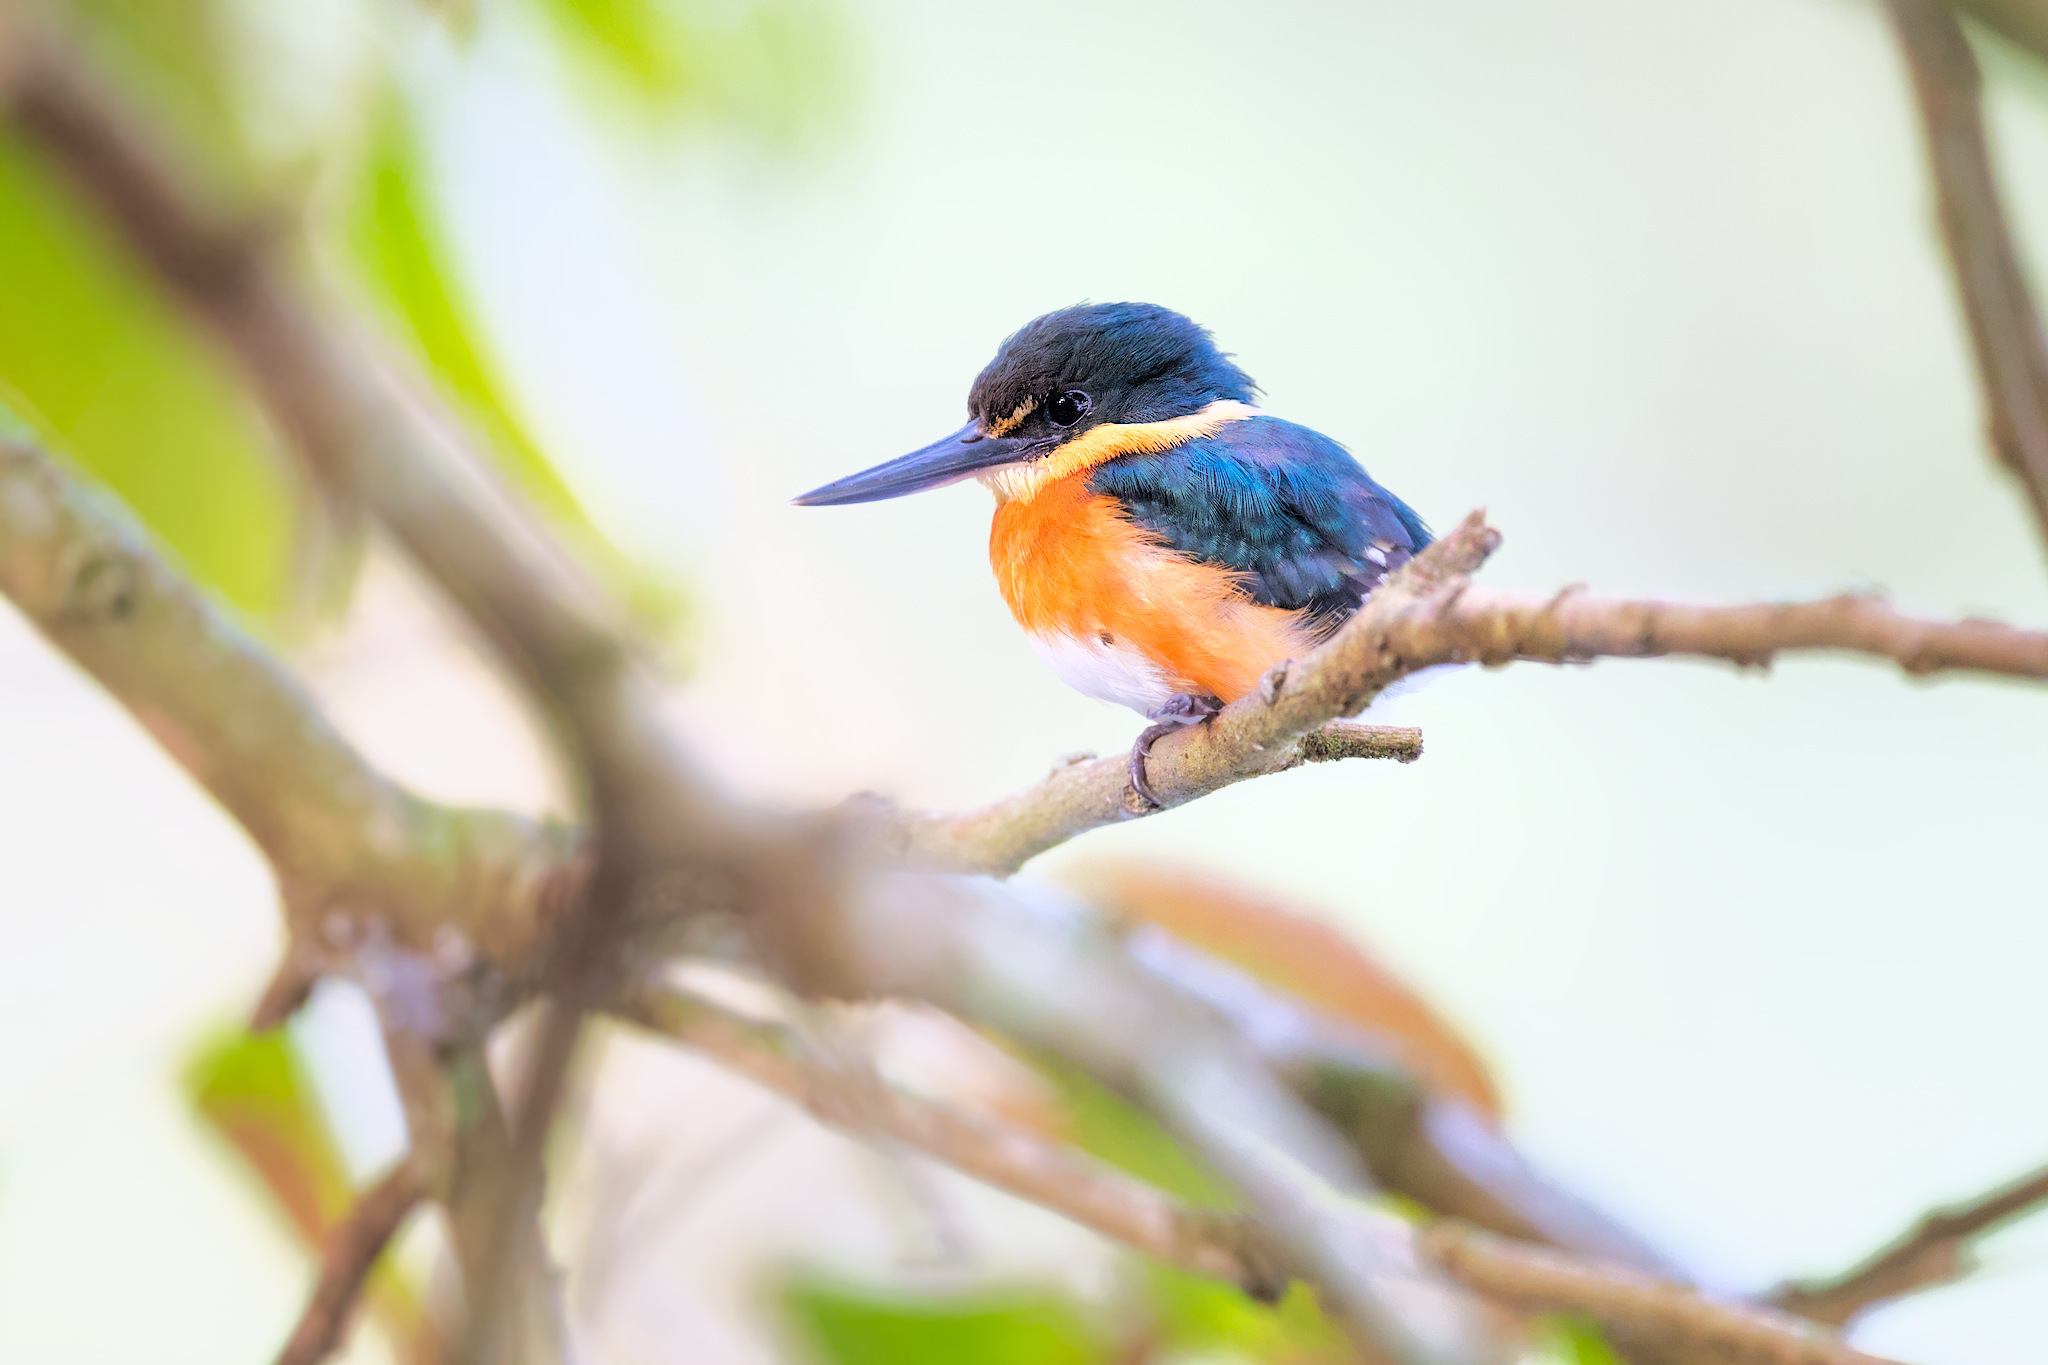
Right here is an instance of a photograph taken with this system. I shot this picture handheld at 1/80 second. At that shutter velocity, solely about one in ten pictures was sharp. However that was sufficient, and capturing at 1/80 second allowed me to make use of a extra cheap ISO of 2800, in comparison with one thing like ISO 10,000 that may have been essential at 1/250 second.
Here’s a 200% crop to indicate the extent of element nonetheless potential at 1/80:
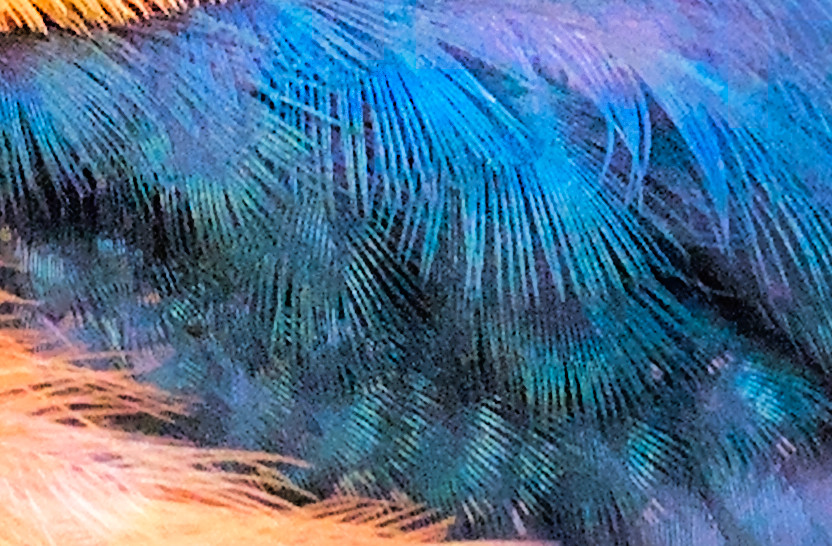
How far you possibly can push the shutter velocity relies upon upon how nonetheless the fowl actually is, and if there’s any wind shifting the feathers barely. Bear in mind, feathers have an unlimited quantity of wonderful element, so any motion in them will present up immediatley within the shot. After all, if one or two feathers present movement blur, that’s not an issue if the remaining are sharp, and particularly if the attention remains to be sharp. However simply because you may get to 1/80 or 1/50 in a best-case state of affairs doesn’t imply you possibly can all the time obtain it.
When it’s best to use this system? Solely when you understand you’ll get various probabilities with a fowl. If it’s a uncommon fowl, I’d advocate taking part in it slightly safer, particularly when you would possibly solely have one or two pictures earlier than it flies away. However for extra frequent birds or if you completely know you’ve already received a secure picture, it could actually usually make your ultimate picture cleaner and crisper, with a decrease ISO and fewer noise.
After all, there’s solely some extent in utilizing this system if you don’t have a lot gentle. Should you’re at 1/four-hundredth of a second and also you want ISO 400 to get a well-exposed shot, I don’t suppose there’s a lot level in attempting to get all the way down to ISO 100 on the danger of some movement blur. The time might most likely be spent discovering a greater angle earlier than the fowl flies away.
Conclusion
The primary digital camera setting I take into consideration in fowl pictures is shutter velocity. I’m always altering my shutter velocity to accommodate not simply the assorted ranges of movement in birds, but additionally to get as a lot gentle as potential. It’s the variable fowl photographers must be on high of with a view to actually optimize their pictures whereas nonetheless preserving all that lovely feather element. I hope this text gave you some helpful ideas for optimizing shutter velocity in your individual fowl pictures!